JeepParts
My Garage
My Account
Cart
OEM 2008 Jeep Grand Cherokee Instrument Cluster
Speedometer Instrument Cluster- Select Vehicle by Model
- Select Vehicle by VIN
Select Vehicle by Model
orMake
Model
Year
Select Vehicle by VIN
For the most accurate results, select vehicle by your VIN (Vehicle Identification Number).
4 Instrument Clusters found

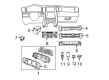
2008 Jeep Grand Cherokee Instrument Cluster Part Number: 68004208AF
Product Specifications- Other Name: Cluster - Instrument Panel; Cluster Assembly
- Condition: New
- Fitment Type: Direct Replacement
- SKU: 68004208AF
- Warranty: This genuine part is guaranteed by Mopar's factory warranty.

2008 Jeep Grand Cherokee Instrument Cluster Part Number: 5172420AH
Product Specifications- Other Name: Cluster - Instrument Panel
- Item Weight: 7.60 Pounds
- Item Dimensions: 21.7 x 8.7 x 8.6 inches
- Condition: New
- Fitment Type: Direct Replacement
- SKU: 5172420AH
- Warranty: This genuine part is guaranteed by Mopar's factory warranty.

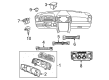
2008 Jeep Grand Cherokee Instrument Cluster Part Number: 5172417AH
Product Specifications- Other Name: Cluster - Instrument Panel; Cluster Assembly
- Item Weight: 7.60 Pounds
- Item Dimensions: 22.8 x 8.6 x 8.9 inches
- Condition: New
- Fitment Type: Direct Replacement
- SKU: 5172417AH
- Warranty: This genuine part is guaranteed by Mopar's factory warranty.
2008 Jeep Grand Cherokee Instrument Cluster Part Number: 5172400AH
Product Specifications- Other Name: Cluster - Instrument Panel; Cluster Assembly
- Item Weight: 7.40 Pounds
- Item Dimensions: 21.7 x 8.8 x 8.6 inches
- Condition: New
- Fitment Type: Direct Replacement
- SKU: 5172400AH
- Warranty: This genuine part is guaranteed by Mopar's factory warranty.
2008 Jeep Grand Cherokee Instrument Cluster Parts and Q&A
- Q: How to Remove and Service an Instrument Cluster from the Dashboard on 2008 Jeep Grand Cherokee?A: The first step to replacing the instrument panel is to deactivate the negative battery connector and pull out the hush panel bolts. Use a trim stick C-4755 to separate the upper clips, pull the cover down and release the lower hinges to remove the opening cover. Make sure the air bag system is not armed before you work on the car. After that, loosen the three bolts on the lower shroud to make sure the tangs do not break and unhook the lower shroud from the upper shroud. Before removal, take out the electrical connectors from the steering column and limit the steering wheel movement to fewer than 90 degrees so you do not harm the Clock Spring. Align the front wheels inside the framing, then take out the pinch bolt, column support bolts and cross bolt, letting the column slide off the brackets so it can be moved downward. Unscrew the nuts on the instrument panel, separate the door seal, use a trim stick to pull off the left side cover, left side door sill trim and the driver's side cowl trim panel. Remove all of the electrical connectors and take out the bolts and ground wires where they enter the steering column. Disconnect the white adjustable pedal electrical connector, remove all the bolts and trim on the left a-pillar and the one left screw in the a-pillar support. Using a trim stick, pull off the shifter bezel ring and shifter bezel, next remove the back cover of the center console and disconnect the electrical connector. Remove all four screws holding the console, unhook the electric cords housed under the console and take apart the connection between the stabilizer and the box outer panel. Access the glove box by removing the stop tabs, turning down on the box and pulling off the hinges on the door. Release the hush panel on the passenger side, remove the right door sill trim and remove the nut to part the right cowl panel. Get rid of the right side end cap, take apart the electrical connectors and remove the bolts and right a-pillar trim panel. Remove the whole support assembly by unscrewing the bolts and support screw where the grilles attach. If the lower storage bin is present, unscrew and remove the screw, both of the nuts at the fenceline and the inside radio bezel. Trim the center bezel off with a trim tool and cut the wires, then take the nut from the stud providing HVAC support, the screw under the glove box and the bracket screw at the glove box side of the heater. In the end, take off the left and right center support brackets, the center floor duct, the radio, 2 HVAC bolts from the radio opening and the instrument panel assembly.
Related 2008 Jeep Grand Cherokee Parts
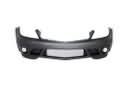 2008 Jeep Grand Cherokee Bumper
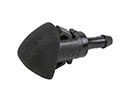 2008 Jeep Grand Cherokee Windshield Washer Nozzle
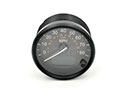 2008 Jeep Grand Cherokee Speedometer
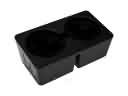 2008 Jeep Grand Cherokee Cup Holder
 2008 Jeep Grand Cherokee Air Deflector
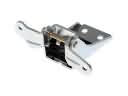 2008 Jeep Grand Cherokee Door Hinge
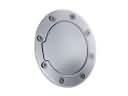 2008 Jeep Grand Cherokee Fuel Door
 2008 Jeep Grand Cherokee License Plate
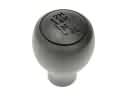 2008 Jeep Grand Cherokee Shift Knob
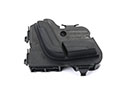 2008 Jeep Grand Cherokee Seat Switch
 2008 Jeep Grand Cherokee Trunk Lid Lift Support
 2008 Jeep Grand Cherokee Windshield Wiper