JeepParts
My Garage
My Account
Cart
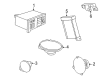
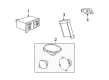
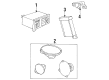
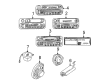
OEM Dodge Intrepid Car Speakers
Audio Speakers- Select Vehicle by Model
- Select Vehicle by VIN
Select Vehicle by Model
orMake
Model
Year
Select Vehicle by VIN
For the most accurate results, select vehicle by your VIN (Vehicle Identification Number).
17 Car Speakers found

Dodge Intrepid Package Tray Speaker, Rear Part Number: 4760851AC
$20.30 MSRP: $129.00You Save: $108.70 (85%)Ships in 1-2 Business Days

Dodge Intrepid Speaker, Rear Center Part Number: 4760685AB


Dodge Intrepid Instrument Panel Speaker, Front Part Number: 4760371


Dodge Intrepid Rear Driver Speaker, Front Part Number: 56043268AA


Dodge Intrepid Speaker, Front Part Number: 4760650AC

Dodge Intrepid Speaker, Front Part Number: 5081031AA

Dodge Intrepid Front Driver Speaker Part Number: 56038657AA
Dodge Intrepid Speaker, Front Part Number: 5081033AA

Dodge Intrepid Front Driver Speaker Part Number: 5059122AA
Dodge Intrepid Package Tray Speaker, Rear Part Number: 5059121AB
Dodge Intrepid Package Tray Speaker, Rear Part Number: 5059120AC
Dodge Intrepid Package Tray Speaker, Rear Part Number: 5059119AC

Dodge Intrepid Speaker, Front Part Number: 4759149
Dodge Intrepid Package Tray Speaker, Rear Part Number: 4760849AD
Dodge Intrepid Front Driver Speaker Part Number: 4787140AB
Dodge Intrepid Package Tray Speaker, Rear Part Number: 4760852AC
Dodge Intrepid Front Driver Speaker Part Number: 4760374AB
Dodge Intrepid Car Speakers
Choose OEM Car Speakers that meet Dodge factory standards. Dodge designs and tests every component for precision and durability. Each Car Speakers follows strict manufacturing steps to lock in quality and fit. If your Dodge Intrepid matters to you, OEM parts make the smart choice. You'll get the exact look, feel, and performance you expect. Shop genuine Intrepid parts at the highly competitive prices online. Enjoy a manufacturer's warranty, a hassle-free return policy, and rapid delivery. No more guesswork with off brands. Get genuine parts with exact fit and true factory performance. Shop with confidence today at JeepPartsDeal.com.
The Dodge Intrepid Car Speakers deliver reliable performance that significantly raises the driving experience available on Dodge Intrepid models. Intrepid models from 1993 to 2004 were designed to use these specific speakers with paper/polypropylene woofers for deep bass while silk or silk/polymer composite tweeters produce pristine audio. Through their three-piece separation of woofers and tweeters with crossover devices these component speakers decrease sound distortions to provide exceptional audio performance throughout the Dodge Intrepid's large cabin. The correct installation of car speakers demands tweeters must sit above woofers to create the optimal sound dispersion pattern. The Dodge Intrepid Car Speakers enhance the vehicle's efficiency and safety as well as audio quality because they enable drivers to hear critical alerts and communications with full clarity. The speakers offer various wattage choices for amplifier compatibility that enables users to customize their audio preferences in the automotive market. The Dodge model stands out because of its roomy interior and comfortable ride along with its high-performance car speaker system thus making it an excellent family and enthusiast sedan.
Dodge Intrepid Car Speakers Parts and Q&A
- Q: How to Remove and Install Car Speakers on Dodge Intrepid?A:Before removing the front door lower speaker, cut off the negative cable from the battery and then open the driver's door. With a trim stick (special tool #C-4755), gently separate the speaker grille from the door panel, take out all three screws from the retaining area, gently pull the speaker away from the door and remove the speaker wiring. Remove the negative battery cable, release the driver's door, undo the speaker enclosure attachments with two screws, release the inner screws and cut off the wiring for the front door upper speaker. Disconnect the negative terminal on the battery, remove the top of the instrument panel, take out the two screws for the center speaker and disconnect the wiring connector and then remove the speaker. Remove the negative battery cable to cut power, open the rear door, pry the speaker grille from the panel with the trim stick, unscrew the two holding screws, pull the speaker free from the door and pull loose its wiring. Start by removing the negative battery cable, the rear shelf panel, the four screws, then pull the wiring connector apart to remove the shelf speaker. Installation steps: connect the wires, fix the speaker under the front door opening, add the three dozen screws, press the grille into the speaker and again attach the battery negative cable. After adding the wiring, mount the front door upper speaker, tighten the two retaining screws, attach the two enclosure screws and finish by reconnecting the negative battery cable. Install the instrument panel speaker after centering it, connect the wiring connector, add the two retaining screws, then return the instrument panel top. For the speaker at the back, secure the wiring, put the speaker in its place, fasten the two retaining screws, fit the speaker grille and return the negative cable to the battery. Take care of the rear shelf speaker by connecting the wire connector, placing the wiring connectors to face outwards, installing the four screws, fitting the trim panel and resetting the negative battery cable.
- Q: How to Replace Car Speakers on the Rear Shelf on Dodge Intrepid?A:Start by opening the hood and taking the negative battery cable remote terminal away from the post on the remote battery. After that, remove the rear shelf trim panel and the four screws underneath, then remove the speaker along with its cable, through the trunk. Connect the speaker's wire connector and set the speaker into the opening with the wiring facing outward on the front of the box. Then, put in the four retaining screws, secure the rear shelf trim panel again and finish by linking the negative battery cable remote terminal to the remote battery post.


Related Dodge Intrepid Parts
 Dodge Intrepid Spoiler
 Dodge Intrepid Air Deflector
 Dodge Intrepid Car Mirror
 Dodge Intrepid Fender Splash Shield
 Dodge Intrepid Floor Pan
 Dodge Intrepid Fuel Door
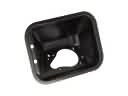 Dodge Intrepid Fuel Filler Housing
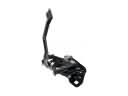 Dodge Intrepid Hood Latch
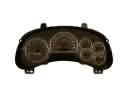 Dodge Intrepid Instrument Cluster
 Dodge Intrepid Sunroof
 Dodge Intrepid Windshield Washer Nozzle
 Dodge Intrepid Windshield Wiper