JeepParts
My Garage
My Account
Cart
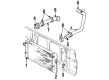
OEM Dodge Ram 2500 Intercooler
Front Intercooler- Select Vehicle by Model
- Select Vehicle by VIN
Select Vehicle by Model
orMake
Model
Year
Select Vehicle by VIN
For the most accurate results, select vehicle by your VIN (Vehicle Identification Number).
3 Intercoolers found

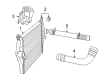
Dodge Ram 2500 Intercooler Part Number: 55056902AE
$773.50 MSRP: $1175.00You Save: $401.50 (35%)Ships in 1-2 Business Days


Dodge Ram 2500 Intercooler Part Number: 5170704AJ

Dodge Ram 2500 Intercooler Part Number: 52028724AG
Dodge Ram 2500 Intercooler
Choose OEM Intercooler that meet Dodge factory standards. Dodge designs and tests every component for precision and durability. Each Intercooler follows strict manufacturing steps to lock in quality and fit. If your Dodge Ram 2500 matters to you, OEM parts make the smart choice. You'll get the exact look, feel, and performance you expect. Shop genuine Ram 2500 parts at the highly competitive prices online. Enjoy a manufacturer's warranty, a hassle-free return policy, and rapid delivery. No more guesswork with off brands. Get genuine parts with exact fit and true factory performance. Shop with confidence today at JeepPartsDeal.com.
Intercooler mainly used in Dodge Ram 2500 vehicles is used in engines to cool compressed air from turbochargers or super chargers. This cooling process leads to increase in air density resulting to enhanced fuel injection with the likely hood of attaining powerful output without pre- ignition. Dodge Ram 2500 may use air-intercooler or water-intercooler, intercooler as the air-intercooler is lighter in weight and commonly used because it release heat directly into the atmosphere. On the other hand, air to liquid intercoolers though larger in size performs well in areas where air flow is restricted. In Dodge Ram 2500 vehicles, the Intercooler serves the principal purpose of regulating the temperatures of the engine making it efficient in its operations. With this compact design and the ability to control heat build up which is often created during compression, the Intercooler is a central component of the forced induction system of the Dodge Ram 2500, thereby guaranteeing the truck the power as well as torque output expected of it.
Dodge Ram 2500 Intercooler Parts and Q&A
- Q: How to Service and Repair an Intercooler on Dodge Ram 2500?A:You should remove the battery's negative cables before starting to service or repair the charge air cooler. If the A/C is in the vehicle, let out the refrigerant, remove the A/C Condenser and next remove the transmission auxiliary cooler. After that, cut the electrical connection to the boost tubes and unscrew the bolts on the charge air cooler, lifting it up and away. Keep caustic cleaners away from the air cooler and if you can't clean inside, replace the entire unit. If your charge air cooler fails or gets dirty, set it with its tubes parallel to its axis, flush it and shake it from inside and tap the outside tanks with a rubber mallet to clear any objects inside. Wash in running water until everything is clean, then rinse with soapy water and thoroughly with clean water and dry the parts with compressed air. Check the charge air cooler carefully for damage, especially on the tubes, fins and welds; if damage is found, you should replace it. Use Charge Air Cooler Tester Kit # 3824556 with the supplied instructions to pressure test the charge air cooler. While doing the installation, set the charge air cooler in place, replace and tighten its bolts to 2 Nm (17 in. lbs.) and after that, attach the air intake system tubes and close their clamps to 11 Nm (95 in. lbs.). If you have removed the transmission auxiliary cooler and A/C condenser, put them back in their positions, charge the A/C if necessary, attach the battery negative cables and check for leaks when you start the boost system.

Related Dodge Ram 2500 Parts
 Dodge Ram 2500 Thermostat
 Dodge Ram 2500 Radiator Hose
 Dodge Ram 2500 Automatic Transmission Oil Cooler Line
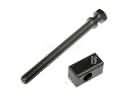 Dodge Ram 2500 Belt Tensioner Bolt
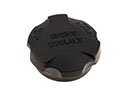 Dodge Ram 2500 Coolant Reservoir Cap
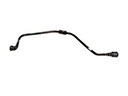 Dodge Ram 2500 Coolant Reservoir Hose
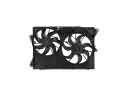 Dodge Ram 2500 Cooling Fan Assembly
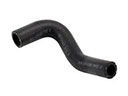 Dodge Ram 2500 Cooling Hose
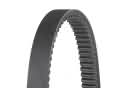 Dodge Ram 2500 Drive Belt
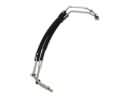 Dodge Ram 2500 Oil Cooler Hose
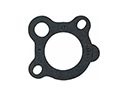 Dodge Ram 2500 Thermostat Gasket
 Dodge Ram 2500 Transmission Oil Cooler Hose