JeepParts
My Garage
My Account
Cart
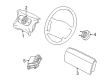
OEM Dodge Ram 3500 Van Clock Spring
Spiral Cable Clock Spring- Select Vehicle by Model
- Select Vehicle by VIN
Select Vehicle by Model
orMake
Model
Year
Select Vehicle by VIN
For the most accurate results, select vehicle by your VIN (Vehicle Identification Number).
3 Clock Springs found

Dodge Ram 3500 Van Clockspring Part Number: 56045403AG
$501.32Ships in 1-2 Business Days
Dodge Ram 3500 Van Clockspring Part Number: 56020650
Dodge Ram 3500 Van Clockspring Part Number: 5010213AB
Dodge Ram 3500 Van Clock Spring
Choose OEM Clock Spring that meet Dodge factory standards. Dodge designs and tests every component for precision and durability. Each Clock Spring follows strict manufacturing steps to lock in quality and fit. If your Dodge Ram 3500 Van matters to you, OEM parts make the smart choice. You'll get the exact look, feel, and performance you expect. Shop genuine Ram 3500 Van parts at the highly competitive prices online. Enjoy a manufacturer's warranty, a hassle-free return policy, and rapid delivery. No more guesswork with off brands. Get genuine parts with exact fit and true factory performance. Shop with confidence today at JeepPartsDeal.com.
Dodge Ram 3500 Van Clock Spring Parts and Q&A
- Q: What steps should be followed to replace a faulty Clock Spring on Dodge Ram 3500 Van?A:If the Clock Spring is damaged, needs repair or the driver air bag has been used, it must be replaced, since repairs are not possible. Start the process by cutting off the car's battery negative cable to stop the air bag system and then let the capacitor drain for two minutes before anything else. Turn the wheel until the front wheels point straight in front of you. Take the driver air bag off the steering wheel, separate the wire harness connectors from the upper Clock Spring receptacles and remove the screw fixing the steering wheel armature to the steering column's upper shaft. You should first use a steering wheel puller (Special Tool C-3428-B) to take the steering wheel off the shaft and next take the steering column opening cover out of the instrument panel. Should you have a tilting steering column, pull the knob straight toward the back to remove it. From where the steering column meets the gear shifter, unscrew the two outboard screws that hold the upper shroud to the lower shrod, gently push inwards on both ends of the upper shroud to release its hold and take out the upper shroud. Take off the center screw connecting the lower shroud to the steering column lock housing. Once that's out, take the lower shroud off as well. Take out the Clock Spring-related wires at the two connector receptacles in the control panel and disconnect the screws that are securing the Clock Spring assembly to the switch bracket. If you wish to save the Clock Spring, attach the Clock Spring rotor to hold its center until you fit and install it again; otherwise, remember to correctly center it once more before you install it. The central Clock Spring should be lowered over the shooting shaft toward the steering wheel upper area and positioned until the tab on the Clock Spring lays over the locating pin in the switch housing. Place and tighten the Clock Spring screws in the multi-function switch mounting housing to a torque of 2 Nm (20 in. lbs.), insert the two connectors from the instrument panel wiring harness, place the lower shroud onto the steering column and tighten the central screw to the same torque. Set the upper shroud in place, use the gearshift lever gap hider if available, snap both shrouds together and tighten the two screws on the upper shroud to the lower shroud to 2 Nm (20 in. lbs.). After adding the alignment, push the tilt steering column knob onto the lever, replace the steering column cover and place the steering wheel on the upper shaft, indexing the yellow rubber booted engagement dowel. Guarantee the steering wheel screw is tightened to 61 Nm (45 ft. lbs.), while staying clear of the Clock Spring pigtail wire and steering wheel wire harness. After that, reattach the steering wheel wire harness and put the driver air bag back on the steering wheel.
- Q: What must be done if the Clock Spring is faulty, damaged, or if the driver side airbag has been deployed on Dodge Ram 3500 Van?A:You must replace the Clock Spring if it fails, becomes damaged or the driver's air bag has been used, as repairing it is not possible. Before fixing the air bag system, take out the negative battery cable and allow two minutes for charges in the system capacitor to discharge to keep the air bag from going off accidentally. Be sure the car is pointing straight, then disconnect the air bag module just under the driver's side part of the steering wheel. If you have the wire harnesses, disconnect the upper Clock Spring wires from the vehicle speed control system switches on both sides of the steering wheel hub cavity. Take out the nut holding the steering wheel armature to the steering column upper shaft inside the hub cavity, then use the steering wheel puller (Special Tool C-3428-B) to remove the steering wheel from the upper shaft spline. Secondly, take out the knee blocker from the instrument panel and, if your car has one, remove the tilt steering column lever by pulling it quickly away from the left side of your steering column. Remove the two screws joining the lower shroud to the upper one, then pull the front and sides of the lower shroud free from the upper one. Unscrew the upper shroud from the steering column, taking it off afterwards. Take out the two upper steering column wire harness tie wraps, but make sure the Clock Spring and overdrive switch wire harness is left alone. On the left, unplug the wire harness from the instrument panel in the wire harness connector bracket that holds the TC connector. Using an external set of snap ring pliers, take off the snap ring securing the Clock Spring to the upper shaft on the steering column and gently slide the Clock Spring off that shaft. On the steering column, adjust the alignment spline so it is facing straight up and then place the front wheels in the center of the car before you install the Clock Spring. Install the upper shaft wave washer, line up the Clock Spring hub with the shaft and tower and slide the Clock Spring down over the shaft. Install the Clock Spring snap ring, making absolutely sure it is sitting properly in the groove. Put the new tie-wrap above the upper steering column wire harness tie-wrap, push the lower Clock Spring wire upwards so it follows the steering column wire harness and secure both with two new tie-wraps to avoid any problems with stretching or gripping the side of the harness. Connect the wire harness fr Slide the upper steering column shroud up on the steering column, so its mounting stud lines up with its seat and install and tighten the two upper shroud mounting screws to 1.4 Nm (12 in. lbs.). Place the hooks from the lower steering column shroud onto the pivots of the upper shroud, raise the lower steering column and snap both shrouds together with the transmission gearshift lever boot in position. Tighten the two bottom mounting bolts on the steering column shroud to 3.4 Nm (30 in. lbs.) and next mount the knee blocker on the instrument panel. Put the steering wheel on the upper shaft with the splines in line and use the Clock Spring harnesses to guide the wires as you fit the steering wheel back trim cover and armature together. Apply 61 Nm (45 ft. lbs.) of torque to the steering wheel mounting nut, ensuring you don't damage the wire harnesses. If the vehicle comes with upper Clock Spring, connect the wire harness to the speed control and push the tilt steering column lever in until it clicks into place. After everything is ready, place the driver side air bag module onto the steering wheel.


Related Dodge Ram 3500 Van Parts
 Dodge Ram 3500 Van Air Bag Control Module
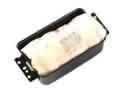 Dodge Ram 3500 Van Airbag
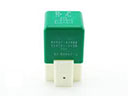 Dodge Ram 3500 Van Cooling Fan Relay
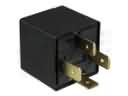 Dodge Ram 3500 Van Daytime Running Light Relay
 Dodge Ram 3500 Van Distributor
 Dodge Ram 3500 Van Ignition Lock Assembly
 Dodge Ram 3500 Van Ignition Switch
 Dodge Ram 3500 Van Radiator Fan Relay
 Dodge Ram 3500 Van Relay
 Dodge Ram 3500 Van Spark Plug Wire
 Dodge Ram 3500 Van Starter Relay
 Dodge Ram 3500 Van Temperature Sender