JeepParts
My Garage
My Account
Cart
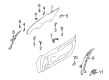
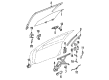
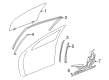
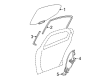
OEM Dodge Stratus Window Regulator
Electric Power Window Regulator- Select Vehicle by Model
- Select Vehicle by VIN
Select Vehicle by Model
orMake
Model
Year
Select Vehicle by VIN
For the most accurate results, select vehicle by your VIN (Vehicle Identification Number).
13 Window Regulators found


Dodge Stratus Regulator, Front Driver Side Part Number: MR432201
$54.44 MSRP: $69.01You Save: $14.57 (22%)Ships in 1-2 Business Days
Dodge Stratus Window Regulator, Front Part Number: 5012479AA
$57.97 MSRP: $167.00You Save: $109.03 (66%)Ships in 1-2 Business Days
Dodge Stratus Window Regulator, Front Driver Side Part Number: 4878109AL
$133.88 MSRP: $236.00You Save: $102.12 (44%)
Dodge Stratus Window Regulator, Rear Passenger Side Part Number: 5016518AB
$94.35 MSRP: $168.00You Save: $73.65 (44%)Ships in 1-2 Business DaysDodge Stratus Window Regulator, Front Passenger Side Part Number: 4878108AL
$223.30 MSRP: $343.00You Save: $119.70 (35%)Ships in 1-2 Business Days
Dodge Stratus Window Regulator, Front Part Number: 4696999
$12.33 MSRP: $15.64You Save: $3.31 (22%)Ships in 1-2 Business DaysDodge Stratus Regulator, Front Passenger Side Part Number: MR432202
$13.60 MSRP: $17.24You Save: $3.64 (22%)Ships in 1-2 Business Days

Dodge Stratus Window Regulator Part Number: 4856113
Dodge Stratus Window Regulator Part Number: 4856112
Dodge Stratus Window Regulator, Front Part Number: 5012478AA

Dodge Stratus Window Regulator, Front Part Number: 5015357AA
Dodge Stratus Window Regulator, Front Part Number: 5015356AA
Dodge Stratus Window Regulator
Choose OEM Window Regulator that meet Dodge factory standards. Dodge designs and tests every component for precision and durability. Each Window Regulator follows strict manufacturing steps to lock in quality and fit. If your Dodge Stratus matters to you, OEM parts make the smart choice. You'll get the exact look, feel, and performance you expect. Shop genuine Stratus parts at the highly competitive prices online. Enjoy a manufacturer's warranty, a hassle-free return policy, and rapid delivery. No more guesswork with off brands. Get genuine parts with exact fit and true factory performance. Shop with confidence today at JeepPartsDeal.com.
Window Regulator is one of the major parts or parts that play the crucial role in improving the usability and security of the Dodge Stratus, which is a mid-size car manufactured from 1995 to 2005. As for the part which is directly responsible for the functioning of windows, the Window Regulator offers a reliable start that adds to the reliability and performance of the automobile, and the windows' ability to be easily raised and lowered makes the ride fun and comfortable. These regulators with power and manual options are developed to meet the superior quality standards and installation is simple to regain the OEM looks of the Dodge Stratus. The Window Regulator is to fit all the models, allowing all drivers enjoy its optimized performance. This is because when regulators wear out, owners should find time and replace the regulators with quality ones that will takes time before wearing out thus avoiding the dangers of a breakdown. The Window Regulator can be appreciated in the market because of the durability and designs that have been put up that include, the scissor and the cable mechanism. Such attention to some of the exquisite features boosts the performance of the Dodge Stratus as well as the general driving experience. In conclusion, the Window Regulator is an excellent show of the brand's quality and thus a worthy input for this car which would ensure efficiency and reliability among Stratus' users.
Dodge Stratus Window Regulator Parts and Q&A
- Q: How to Remove and Install a Front Door Window Regulator on Dodge Stratus?A:Before taking out the front door window regulator, unfasten the door trim panel and push the glass up into the door frame. Disconnect the power Window Motor from its wire, followed by loosening the screw linking the door panel to the regulator scissor channel. Take out the screw and bolt heads from the keyhole openings in the door and ease off the bolts close to the regulator. After that, slide the regulator out by pushing backward toward the rear and use the roller end to rotate through the access hole in the door panel. For the JR-27 (Convertible), remove the water shield, break the connector link to the power window motor and undo the nuts fastening the regulator lift channel to the door glass to lift the glass upward. Mark the place of the rear bolt in the roller channel on the inner door panel so you can install it properly. Then remove the rear bolt and loosen the bolt at the front of the channel. After everyone unbolts the window regulator from the door to the inner door panel and removes the heads of the bolt, take out the whole window regulator through the large phone hole in the panel and pull the power window motor from the regulator. For installation, align the regulator in the door through the access hole onto the door panel and use the bolts to attach it to the panel. Place the heads of the screw and bolt into the keyhole slots and use a screwdriver to attachment the scissor channel to the door panel. Join the power window motor wire electrical connector, put the glass in the regulator roller channel and screw the fasteners that secure the glass to the roller before you put the trim panel back in. On the JR-27 Convertible, connect the power window motor to the regulator, slide the regulator into the door and place the bolt heads into the keyhole slots on the reinforcement, securing everything with bolts. Put the roller channel on the door panel with its rear bolt where you marked it and screw both front and rear bolts completely. Set up the bolts that connect the regulator lift channel to the glass, check the door glass movement and fit, make adjustments if needed, plug the wire connector into the electric window motor and place both the door water dam and trim panel.
- Q: How to Service and Repair a Window Regulator on Dodge Stratus?A:Begin the service or repair of a front door window regulator by removing the panel on the door trim. Then, take the glass out of the regulator roller track and settle it inside the door at the top. Unplug the power Window Motor at the connector and remove the screw that keeps the regulator scissor channel in place on the door panel. Remove the heads of the screws and bolts from the keyhole openings in the door panel, then loosen the bolts holding the regulator to the door panel. For JR-27 (Convertible) models, take off the water shield, cut the wire linking the power window motor and remove the regulator lift channel nuts, keeping the glass near the top. Put a mark where the rear bolt of the roller channel is on the inner door panel, then separate the rear bolt from the door panel and loosen the front bolt. With the door panel open, take out the roller channel and release the bolts at the attachment point of the window regulator. With the regulator free, fit through the large inner door opening and remove the motor from the window regulator. Install the regulator by lowering it into the door from above, passing it through the access hole and seating it by tightening the bolts. Line up the screw and the bolt at the keyhole, insert the screw into the regulator scissor channel slot and tighten it. Fit the glass into the roller channel, rejoin the power window motor wires, tighten all the fasteners and install the trim panel. With the JR-27 models, fit the power window motor to the regulator, set the regulator in the door assembly, slip the bolt heads into the door's keyhole slots and tighten everything with the bolts. Adhere the roller channel to the door panel with the rear bolt positioned as you marked it, tighten both bolts, secure the regulator lift channel and install each nut. Test the glass movement once you are sure it matches properly, making required adjustments and then attach the wire connector to the power window motor and put back the door water dam and trim panel.


Related Dodge Stratus Parts
 Dodge Stratus Door Check
 Dodge Stratus Door Hinge
 Dodge Stratus Door Latch Assembly
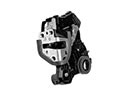 Dodge Stratus Door Lock
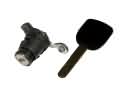 Dodge Stratus Door Lock Cylinder
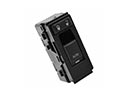 Dodge Stratus Door Lock Switch
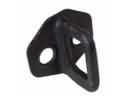 Dodge Stratus Front Door Striker
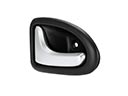 Dodge Stratus Interior Door Handle
 Dodge Stratus Liftgate Hinge
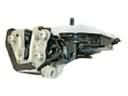 Dodge Stratus Rear Passenger Door Handle Latch
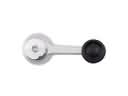 Dodge Stratus Window Crank Handle
 Dodge Stratus Window Run
Browse Dodge Stratus Window Regulator by Years
2006
2005
2004
2003
2002
2001
2000
1999
1998
1997
1996
1995