JeepParts
My Garage
My Account
Cart
OEM Dodge Viper Windshield
Glass Windshield- Select Vehicle by Model
- Select Vehicle by VIN
Select Vehicle by Model
orMake
Model
Year
Select Vehicle by VIN
For the most accurate results, select vehicle by your VIN (Vehicle Identification Number).
4 Windshields found

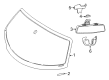
Dodge Viper Windshield, Front Part Number: 68206848AA
$832.42 MSRP: $1020.00You Save: $187.58 (19%)
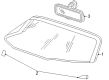
Dodge Viper Windshield, Front Part Number: 5086542AA
$883.94 MSRP: $1050.00You Save: $166.06 (16%)
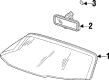
Dodge Viper Windshield Part Number: 4897573AA

Dodge Viper Windshield Part Number: 4897447AA
Dodge Viper Windshield
Choose OEM Windshield that meet Dodge factory standards. Dodge designs and tests every component for precision and durability. Each Windshield follows strict manufacturing steps to lock in quality and fit. If your Dodge Viper matters to you, OEM parts make the smart choice. You'll get the exact look, feel, and performance you expect. Shop genuine Viper parts at the highly competitive prices online. Enjoy a manufacturer's warranty, a hassle-free return policy, and rapid delivery. No more guesswork with off brands. Get genuine parts with exact fit and true factory performance. Shop with confidence today at JeepPartsDeal.com.
Dodge Viper Windshield Parts and Q&A
- Q: How to Properly Replace a Windshield on Dodge Viper?A:First, take off the inside rear view mirror and the cowl cover to remove the windshield. After that, take out the windshield molding by pushing at the bottom of the A-pillars with pliers. Sharply cut around the windshield using either a cold knife or a pneumatic device and then delicately take it away from the vehicle. You should wait at least one full day after installation for the urethane to be set before driving your vehicle. The bonding material covering the windshield fence should be even and smooth, matching the edges of the new windshield and you should add and install the support spacers to the bottom of the windshield opening. Lift the new windshield up to the opening, put it in the center relative to the supporting spacers and mark the edges on the glass where they meet the spacers. On a convenient work surface, stand the windshield inside up with two padded wood blocks spaced 75 cm apart. Apply Mopar(R) Glass Cleaner to the inside windshield, wipe it clean using a lint-free cloth, then cover 25 mm around the perimeter with clear glass primer and wipe it with a different lint-free cloth. Then, using a brush, put black out primer 15 mm thick on the sides and top and 25 mm on the bottom, waiting at least three minutes for it to dry. With a razor knife, carefully scrape away as much of the original urethane from the windshield fence frame, then add another 10 mm bead of urethane down the center of the windshield fence. Put the spacers on top of the windshield opening fence as shown and along with a helper, put the windshield in place, matching the bottom reference marks to the spacers. After you have the windshield near the top, gently push it inward, watching so the top molding lines up with the roof line. Use Mopar(R) Super Kleen or the equivalent to remove any extra urethane and put masking tape along the top, space 50 mm apart, until the urethane is cured. At last, put the cowl cover and wiper blades back, as well as the interior rear view mirror. Once the urethane is cured and tape strips are removed, do a water test to check the repair.
- Q: How to Safely Remove a Windshield on Dodge Viper?A:First, undo the inside rear view mirror. After that, you can take off the cowl cover. After that, use pliers to pull out the molding at the bottom of the A-pillars. Either use a suitable sharp cold knife to cut through the urethane or use a pneumatic cutter if possible. With the bonding cut, take out the windshield and separate the radio Antenna from the glass side.


Related Dodge Viper Parts
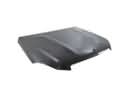 Dodge Viper Hood
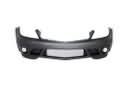 Dodge Viper Bumper
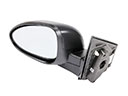 Dodge Viper Car Mirror
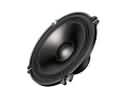 Dodge Viper Car Speakers
 Dodge Viper Door Latch Assembly
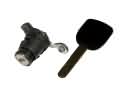 Dodge Viper Door Lock Cylinder
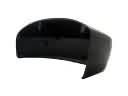 Dodge Viper Mirror Cover
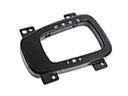 Dodge Viper Shift Indicator
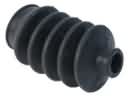 Dodge Viper Shift Linkage Boot
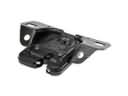 Dodge Viper Trunk Lid Latch
 Dodge Viper Windshield Wiper
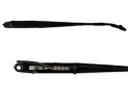 Dodge Viper Wiper Arm