JeepParts
My Garage
My Account
Cart
OEM 2000 Dodge Durango Axle Shaft
Car Axle Shaft- Select Vehicle by Model
- Select Vehicle by VIN
Select Vehicle by Model
orMake
Model
Year
Select Vehicle by VIN
For the most accurate results, select vehicle by your VIN (Vehicle Identification Number).
5 Axle Shafts found

2000 Dodge Durango Axle Shaft, Rear Passenger Side Part Number: 52069512AB
$471.32 MSRP: $777.00You Save: $305.68 (40%)Ships in 1-2 Business DaysProduct Specifications- Other Name: Shaft - Axle; Drive Axle Shaft, Rear Right; Axle Shafts
- Position: Rear Passenger Side
- Item Weight: 18.00 Pounds
- Condition: New
- Fitment Type: Direct Replacement
- SKU: 52069512AB
- Warranty: This genuine part is guaranteed by Mopar's factory warranty.

 Product Specifications
- Other Name: Shaft - Axle; Drive Axle Shaft, Rear Right; Axle Shafts
- Position: Rear Passenger Side
- Item Weight: 19.10 Pounds
- Condition: New
- Fitment Type: Direct Replacement
- SKU: 52069388AB
- Warranty: This genuine part is guaranteed by Mopar's factory warranty.
- Product Specifications
- Other Name: Shaft - Axle; Drive Axle Shaft, Rear Left; Axle Shafts
- Position: Rear Driver Side
- Item Weight: 18.40 Pounds
- Condition: New
- Fitment Type: Direct Replacement
- SKU: 52069513AB
- Warranty: This genuine part is guaranteed by Mopar's factory warranty.
- Product Specifications
- Other Name: Shaft - Axle; Drive Axle Shaft, Rear Left; Axle Shafts
- Position: Rear Driver Side
- Item Weight: 18.70 Pounds
- Condition: New
- Fitment Type: Direct Replacement
- SKU: 52069389AB
- Warranty: This genuine part is guaranteed by Mopar's factory warranty.

 Product Specifications
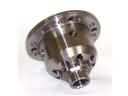
- Other Name: Shaft - Axle Half; CV Axle Assembly, Front Left, Front Right; Constant Velocity Axle; Axle Shaft; Shaft Axle Half; CV Axle Assembly
- Position: Front Passenger Side
- Condition: New
- Fitment Type: Direct Replacement
- SKU: 5015964AA
- Warranty: This genuine part is guaranteed by Mopar's factory warranty.
2000 Dodge Durango Axle Shaft Parts and Q&A
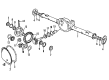
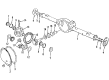
- Q: How to Remove and Install an Axle Shaft on 2000 Dodge Durango?A: Before beginning, hoist and secure the vehicle and verify that the transmission is in neutral. Step 2, begin by taking off the wheel and tire assembly, then proceed to disconnect the brake drum following the appropriate procedure. First, wipe any foreign matter from the housing cover area, then loosen the housing cover bolts and drain the lubricant from the housing and axle tubes before taking it off. Rotate the differential case to expose the pinion mate shaft lock screw, unscrew the lock screw and draw the pinion mate shaft out of the differential case. Push the axle shaft inward to disengage the axle shaft C-lock, then gently withdraw the shaft, taking care not to harm the axle shaft bearing or seal which will remain mounted in the axle tube. Look for leakage or damage on the axle shaft seal, then scrutinize the roller bearing contact surface on the shaft for brinelling, galling or pitting; if any irregularities are detected, replace the axle shaft along with its bearing and seal. During installation, coat the bearing bore and the seal lip with gear lubricant, thread the axle shaft through the seal and bearing and press it into the side gear splines while confirming that its splines do not contact the axle shaft seal lip and damage it. Push the C-lock into the axle shaft end and press evenly to ensure it seats in the side gear. Subsequently, feed the pinion shaft through the thrust washers and the differential pinions into the differential case while lining up its center hole with the opening in the housing, then thread the lock screw onto the shaft with Loctite and tighten to 11 Nm (8 ft. lbs.) of torque. Insert the cover and fill the lubricant to the proper level, proceed to attach the brake drum using proper techniques, then mount the wheel and tire and finally lower the vehicle.
Related 2000 Dodge Durango Parts
 2000 Dodge Durango Differential
 2000 Dodge Durango Carrier Bearing Spacer
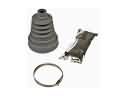 2000 Dodge Durango CV Boot
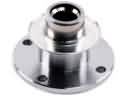 2000 Dodge Durango CV Joint Companion Flange
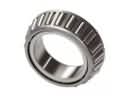 2000 Dodge Durango Differential Bearing
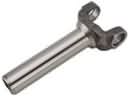 2000 Dodge Durango Driveshaft Yokes
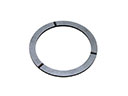 2000 Dodge Durango Mainshaft Washer
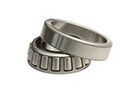 2000 Dodge Durango Pinion Bearing
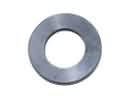 2000 Dodge Durango Pinion Washer
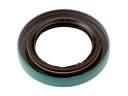 2000 Dodge Durango Transfer Case Seal
 2000 Dodge Durango Transfer Case Shim
 2000 Dodge Durango Universal Joint