JeepParts
My Garage
My Account
Cart
OEM 2002 Dodge Ram 3500 Cruise Control Servo
Cruise Control Servo Speed- Select Vehicle by Model
- Select Vehicle by VIN
Select Vehicle by Model
orMake
Model
Year
Select Vehicle by VIN
For the most accurate results, select vehicle by your VIN (Vehicle Identification Number).
1 Cruise Control Servo found


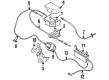
2002 Dodge Ram 3500 Cruise Servo Part Number: 4669977
Product Specifications- Other Name: Servo - Speed Control; Cruise Control Module; Cruise Control Servo; Servo; Servo Speed Control; Servo, Vacuum
- Item Weight: 1.20 Pounds
- Item Dimensions: 5.3 x 4.8 x 4.9 inches
- Condition: New
- Fitment Type: Direct Replacement
- SKU: 4669977
- Warranty: This genuine part is guaranteed by Mopar's factory warranty.
2002 Dodge Ram 3500 Cruise Control Servo Parts and Q&A
- Q: How to Service and Repair a Cruise Control Servo on 2002 Dodge Ram 3500?A: Before you start to service or repair the cruise control servo with an automatic transmission, remove both negative cables from all batteries and move to the positive cable from the driver's side. After removing the holddown bolts, raise the battery heat shield and take out the battery. On the lower side, remove the two nuts directly under the left wheelhouse and then remove the two nuts and two bolts from inside the battery tray. Remove the two Phillips screws, take out the plastic retention clips and after prying out the clips, lift the rear tab as you pull the cover up and out with your front hand. Raise the battery holder far enough to get to the speed control servo's electrical connector and vacuum line and unplug these from the servo. With the assembly installed in the tray, unscrew the servo mounting nuts, pull the sleeve and servo from the bracket to reach the cable clip and remove the clip to access the second servo. Remember the position of the servo relative to the bracket as you take it out. In order to install, attach the servo to the bracket, line up the holes in the connector and servo pin and place the retaining clip on the cable-servo joint. Fit the servo studs through the bottom side of the servo arm and the stub sleeve, secure the servo arm in place with nuts tightened to 8.5 Nm (75 in. lbs.) torque and remove the dowel. Connect each vacuum line and electrical connector to the corresponding servo terminal, then hook on the servo cable to the throttle lever by pushing the connector back as you keep the lever pulled forward. Secure the battery tray, tighten all screws to 16 Nm (140 in. lbs.), put the battery into the new tray and place the battery heat shield in its spot if installed. Put the battery holddown clamp in place and tighten the bolt to 4 Nm (35 in. lbs.); after that, attach the positive battery cable along with both negative battery cables. Work the accelerator pedal before starting the engine to see if it binds and then fit the cable/lever cover.
Related 2002 Dodge Ram 3500 Parts
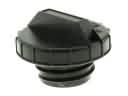 2002 Dodge Ram 3500 Gas Cap
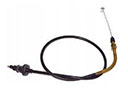 2002 Dodge Ram 3500 Accelerator Cable
 2002 Dodge Ram 3500 Air Filter Box
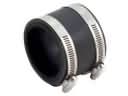 2002 Dodge Ram 3500 Air Intake Coupling
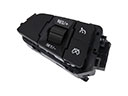 2002 Dodge Ram 3500 Cruise Control Switch
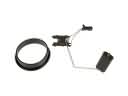 2002 Dodge Ram 3500 Fuel Level Sensor
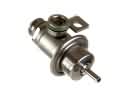 2002 Dodge Ram 3500 Fuel Pressure Regulator
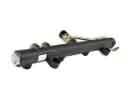 2002 Dodge Ram 3500 Fuel Rail
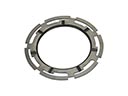 2002 Dodge Ram 3500 Fuel Tank Lock Ring
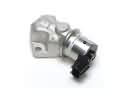 2002 Dodge Ram 3500 Idle Control Valve
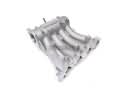 2002 Dodge Ram 3500 Intake Manifold
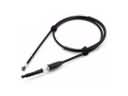 2002 Dodge Ram 3500 Throttle Cable