JeepParts
My Garage
My Account
Cart
OEM 2004 Chrysler Town & Country Ignition Lock Cylinder
Ignition Key Lock Cylinder- Select Vehicle by Model
- Select Vehicle by VIN
Select Vehicle by Model
orMake
Model
Year
Select Vehicle by VIN
For the most accurate results, select vehicle by your VIN (Vehicle Identification Number).
1 Ignition Lock Cylinder found


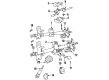
2004 Chrysler Town & Country Ignition Lock Cylinder Part Number: 5083915AB
$143.89 MSRP: $214.00You Save: $70.11 (33%)Ships in 1-3 Business DaysProduct Specifications- Other Name: Cylinder Lock - Ignition Lock; Lock Cylinder; Ignition Cylinder; Cylinder & Keys; Cylinder Ignition Lock
- Replaces: 5003843AB
- Item Weight: 0.70 Pounds
- Item Dimensions: 6.1 x 3.2 x 1.2 inches
- Condition: New
- Fitment Type: Direct Replacement
- SKU: 5083915AB
- Warranty: This genuine part is guaranteed by Mopar's factory warranty.
2004 Chrysler Town & Country Ignition Lock Cylinder Parts and Q&A
- Q: How to Service and Repair an Ignition Lock Cylinder on 2004 Chrysler Town & Country?A: The first step to repairing the ignition lock cylinder is to take off the negative cable from the battery and isolate it. Loosen and remove the screws linking the lower steering column cover to the instrument panel and then take off the cover. Disconnect the parking brake release cable from the including lever and move the lower steering column cover out of its space. Following this, loosen the 10 bolts that hold the lower steering column cover liner to the cover and then unscrew the 3 screws that are both in the upper and lower shrouds. The trim bezel above the steering column is held on by 2 screws and retaining clips, so remove them. Lose the 2 screws holding the fixed shroud on the steering column before lifting out the shroud. Take away the two screws attaching the metal cover under the shifter/ignition interlock linkage and lift off the cover. Pull the shifter/ignition interlock link out of the hole on the lock cylinder housing. Before removing the key cylinder, turn the key to ON, press down on the retaining tab under the lock cylinder housing and pull the cylinder straight out. Take out the halo lamp after removing the wiring harness connector from the key cylinder lighting in the vehicle. Remove the screw from the ignition switch mounting, push down the retaining tabs and take the ignition switch from the lock cylinder housing. Remove the both tilt mechanism springs from their holder and keep them safe. Secure the lock cylinder housing and then pull out the screws that hold it to the column. Put the lock cylinder housing back into the steering column and make sure the holes are aligned. Attach it with three self-tapping screws fastened to 11 Nm (100 inch lbs.). Attach the tilt springs once more so the hooks enter the designated tracks. Check that the ignition switch and actuator shaft are on and then slowly set the ignition switch over the actuator shaft until it snaps in. Replace the ignition switch mounting screw, the key cylinder halo lamp and snug the vehicle wiring harness connector. Slide the key cylinder in with the key turned to ON and then rotate the key to OFF, taking it out as you do so. Link the shifter/ignition interlock device to the lever so it is aligned, then use the screws to secure it as you take back on the metal cover. Fasten the fixed shroud to the steering column with screws and attach the trim bezel above, securing all parts with clips. Attach the lower steering holder and tighten the center screw after which you should secure the upper one with screws. Attach the steering column cover liner to its place, tightening all 10 bolts and then link the parking brake pedal release cable back up. After finishing everything, stick the lower steering column cover in place and screw it down tightly and then attach the other end of the negative cable to the battery terminal.
Related 2004 Chrysler Town & Country Parts
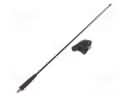 2004 Chrysler Town & Country Antenna
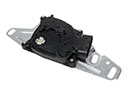 2004 Chrysler Town & Country Automatic Transmission Shift Position Sensor Switch
 2004 Chrysler Town & Country Brake Light Switch
 2004 Chrysler Town & Country Clock Spring
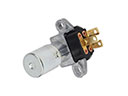 2004 Chrysler Town & Country Dimmer Switch
 2004 Chrysler Town & Country Fuel Pump Relay
 2004 Chrysler Town & Country Hazard Warning Switch
 2004 Chrysler Town & Country Headlight Switch
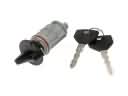 2004 Chrysler Town & Country Ignition Lock Assembly
 2004 Chrysler Town & Country Ignition Switch
 2004 Chrysler Town & Country Mirror Switch
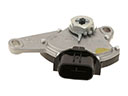 2004 Chrysler Town & Country Neutral Safety Switch