JeepParts
My Garage
My Account
Cart
OEM 2005 Chrysler PT Cruiser Fuel Injector
Gas Injector- Select Vehicle by Model
- Select Vehicle by VIN
Select Vehicle by Model
orMake
Model
Year
Select Vehicle by VIN
For the most accurate results, select vehicle by your VIN (Vehicle Identification Number).
2 Fuel Injectors found

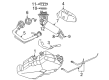
2005 Chrysler PT Cruiser Injector Part Number: 68051554AA
$106.86 MSRP: $120.00You Save: $13.14 (11%)Ships in 1-2 Business DaysProduct Specifications- Other Name: Injector - Fuel; Fuel Injector; Injector Fuel
- Replaces: RL891574AD, RL891732AA, 4891732AA, 4891574AB, 4891574AD, 68048513AA
- Item Weight: 0.50 Pounds
- Item Dimensions: 3.5 x 2.2 x 2.2 inches
- Condition: New
- Fitment Type: Direct Replacement
- Require Quantity: 4
- SKU: 68051554AA
- Warranty: This genuine part is guaranteed by Mopar's factory warranty.


2005 Chrysler PT Cruiser Injector Part Number: 4891573AB
Product Specifications- Other Name: Injector - Fuel; Fuel Injector; Injector Fuel
- Replaces: RL891573AB
- Item Weight: 0.60 Pounds
- Item Dimensions: 1.9 x 2.6 x 3.7 inches
- Condition: New
- Fitment Type: Direct Replacement
- SKU: 4891573AB
- Warranty: This genuine part is guaranteed by Mopar's factory warranty.
2005 Chrysler PT Cruiser Fuel Injector Parts and Q&A
- Q: How to Service and Repair a Fuel Injector on 2005 Chrysler PT Cruiser?A: The process starts by loosening the electrical connectors at the fuel injectors, pulling back the red slider, pressing on the tab and removing the connector. Assign a label to each segment of the fuel injection wiring harness to show its injector position. Recommended procedure is first to lower fuel system pressure, then take out the negative battery cable and remove both the throttle body inlet hose and the purge hose. After unlocking the electrical connection at the throttle body, pull off the throttle control shield and the throttle and speed control cables. Remove the MAP sensor wiring connector and disconnect the two vacuum lines at the rear of the intake manifold. Open the bolts at the front and rear of the intake manifold, remove the unit and seal the open ends. Let the coolant out, loosen the upper radiator clamp and take out the two small hoses fastened to the thermostat housing. Unscrew the bolts connecting the thermostat housing and turn the housing aside, while putting towels around the fuel hose to catch any gasoline that comes out. Remove the fuel line connected to the fuel rail, take off the locking devices from the fuel injector electrical plugs, pull out the wiring harness that leads to the fuel rail and undo the bolts that keep the fuel rail set. Take the injectors and fuel rail off the intake manifold and then get the injector from the fuel rail. To install the injector, place a bit of clean engine oil on the upper O-ring, insert it into the fuel rail cup and attach it with a retaining clip. Attach the fuel injectors to the fuel rail, rub oil onto the O-ring at each nozzle tip and place the nozzles into the openings where they belong in the intake manifold. Screw the fuel rail bolts to a torque of 22.5 ± 3 Nm, plug back in the wiring harness and then secure the electrical connectors to the fuel injectors. Attach the fuel line to the fuel rail, set the thermostat housing assembly back on and attach all its bolts securely to 28 Nm. Once the upper radiator clamp is back in place, fit the small hoses to the thermostat housing, add coolant to the system, put in the intake manifold and tighten the bolts at both the rear and front to 28 Nm. Put the vacuum lines back into position, join and secure the MAP sensor electrical connector, add the throttle body cables and assemble the throttle control shield. At the end, link the electrical connectors at the throttle body, run the purge hose and throttle body inlet hose, secure all with clamps at 3 ± 1 Nm, attach the negative battery cable and use the DRB scan tool ASD Fuel System Test to pressurize the fuel system as you look for leaks.
Related 2005 Chrysler PT Cruiser Parts
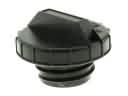 2005 Chrysler PT Cruiser Gas Cap
 2005 Chrysler PT Cruiser Air Filter Box
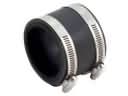 2005 Chrysler PT Cruiser Air Intake Coupling
 2005 Chrysler PT Cruiser Fuel Injector O-Ring
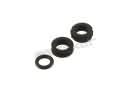 2005 Chrysler PT Cruiser Fuel Injector Seal
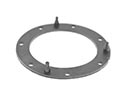 2005 Chrysler PT Cruiser Fuel Pump Gasket
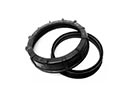 2005 Chrysler PT Cruiser Fuel Pump Seal
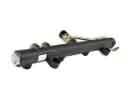 2005 Chrysler PT Cruiser Fuel Rail
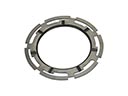 2005 Chrysler PT Cruiser Fuel Tank Lock Ring
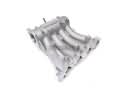 2005 Chrysler PT Cruiser Intake Manifold
 2005 Chrysler PT Cruiser Intake Manifold Gasket
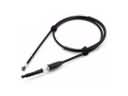 2005 Chrysler PT Cruiser Throttle Cable