JeepParts
My Garage
My Account
Cart
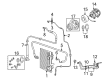
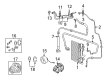
OEM 2006 Dodge Charger A/C Hose
Air Conditioning Hose- Select Vehicle by Model
- Select Vehicle by VIN
Select Vehicle by Model
orMake
Model
Year
Select Vehicle by VIN
For the most accurate results, select vehicle by your VIN (Vehicle Identification Number).
9 A/C Hoses found


2006 Dodge Charger A/C Line Part Number: 4596887AA
$229.84 MSRP: $351.00You Save: $121.16 (35%)Ships in 1-2 Business DaysProduct Specifications- Other Name: Line - A/C Suction And Liquid; A/C Refrigerant Suction Hose; A/C Pipe; A/C Refrigerant Liquid Hose; A/C Hose; Line A/C Suction And Liquid
- Replaces: 4596556AC, 4596556AD, 4596556AB
- Item Weight: 2.40 Pounds
- Item Dimensions: 24.5 x 6.2 x 6.4 inches
- Condition: New
- Fitment Type: Direct Replacement
- SKU: 4596887AA
- Warranty: This genuine part is guaranteed by Mopar's factory warranty.

2006 Dodge Charger Discharge Hose Part Number: 4596893AB
$84.25 MSRP: $113.00You Save: $28.75 (26%)Ships in 1-2 Business DaysProduct Specifications- Other Name: Line - A/C Discharge; A/C Refrigerant Discharge Hose; A/C Refrigerant Liquid Hose; A/C Hose; Discharge Line
- Replaces: 4596483AE, 4596483AF, 4854550AA, 4596893AA
- Item Weight: 0.90 Pounds
- Item Dimensions: 2.1 x 6.1 x 21.0 inches
- Condition: New
- Fitment Type: Direct Replacement
- SKU: 4596893AB
- Warranty: This genuine part is guaranteed by Mopar's factory warranty.

2006 Dodge Charger Suction Hose Part Number: 4596898AB
$128.59 MSRP: $174.00You Save: $45.41 (27%)Ships in 1-2 Business DaysProduct Specifications- Other Name: Line - A/C Suction; A/C Refrigerant Suction Hose; A/C Refrigerant Liquid Hose; A/C Hose; Suction Line
- Replaces: 4596485AE, 4596898AA
- Item Weight: 1.30 Pounds
- Item Dimensions: 28.2 x 3.3 x 2.8 inches
- Condition: New
- Fitment Type: Direct Replacement
- SKU: 4596898AB
- Warranty: This genuine part is guaranteed by Mopar's factory warranty.
2006 Dodge Charger Suction Hose Part Number: 4596897AB
$128.02 MSRP: $192.00You Save: $63.98 (34%)Ships in 1-2 Business DaysProduct Specifications- Other Name: Line - A/C Suction; A/C Refrigerant Suction Hose; A/C Refrigerant Liquid Hose; A/C Hose; Suction Line
- Replaces: 4596486AF, 4596897AA
- Item Weight: 1.10 Pounds
- Item Dimensions: 26.6 x 4.3 x 2.3 inches
- Condition: New
- Fitment Type: Direct Replacement
- SKU: 4596897AB
- Warranty: This genuine part is guaranteed by Mopar's factory warranty.
2006 Dodge Charger Discharge Hose Part Number: 4596891AB
$43.26 MSRP: $78.45You Save: $35.19 (45%)Ships in 1-2 Business DaysProduct Specifications- Other Name: Line - A/C Discharge; A/C Refrigerant Discharge Hose; A/C Refrigerant Liquid Hose; A/C Hose; Discharge Line
- Replaces: 4596891AA, 4596481AE
- Item Weight: 0.90 Pounds
- Item Dimensions: 21.9 x 6.7 x 2.2 inches
- Condition: New
- Fitment Type: Direct Replacement
- SKU: 4596891AB
- Warranty: This genuine part is guaranteed by Mopar's factory warranty.

2006 Dodge Charger Discharge Hose Part Number: 4596889AC
$80.73 MSRP: $123.00You Save: $42.27 (35%)Ships in 1-2 Business DaysProduct Specifications- Other Name: Line - A/C Liquid; A/C Refrigerant Liquid Hose; A/C Hose; Liquid Line
- Replaces: 4596889AB, 4596557AC, 4596889AA, 4596557AB
- Item Weight: 0.80 Pounds
- Item Dimensions: 2.6 x 10.8 x 41.0 inches
- Condition: New
- Fitment Type: Direct Replacement
- SKU: 4596889AC
- Warranty: This genuine part is guaranteed by Mopar's factory warranty.

2006 Dodge Charger Discharge Hose Part Number: 4596482AE
$71.52 MSRP: $90.67You Save: $19.15 (22%)Ships in 1-2 Business DaysProduct Specifications- Other Name: Line - A/C Discharge; A/C Refrigerant Discharge Hose; A/C Refrigerant Liquid Hose; A/C Hose; Discharge Line; Line A/C Discharge
- Item Weight: 1.40 Pounds
- Item Dimensions: 29.6 x 5.2 x 5.1 inches
- Condition: New
- Fitment Type: Direct Replacement
- SKU: 4596482AE
- Warranty: This genuine part is guaranteed by Mopar's factory warranty.
2006 Dodge Charger Suction Hose Part Number: 4596895AB
Product Specifications- Other Name: Line - A/C Suction; A/C Refrigerant Suction Hose; A/C Refrigerant Liquid Hose; A/C Hose; Suction Line
- Replaces: 4596895AA, 4596484AE
- Item Weight: 1.10 Pounds
- Item Dimensions: 26.5 x 4.1 x 3.1 inches
- Condition: New
- Fitment Type: Direct Replacement
- SKU: 4596895AB
- Warranty: This genuine part is guaranteed by Mopar's factory warranty.

2006 Dodge Charger Liquid Line Part Number: 4596890AD
Product Specifications- Other Name: Line - A/C Liquid; A/C Line O-Ring; A/C Refrigerant Liquid Hose; A/C Hose; Liquid Line O-Ring
- Replaces: 4596890AC, 4596564AA, 4596564AB, 4596890AB
- Item Weight: 0.80 Pounds
- Item Dimensions: 37.1 x 9.9 x 3.6 inches
- Condition: New
- Fitment Type: Direct Replacement
- SKU: 4596890AD
- Warranty: This genuine part is guaranteed by Mopar's factory warranty.
2006 Dodge Charger A/C Hose Parts and Q&A
- Q: How to Service and Repair an A/C Hose in an HVAC System on 2006 Dodge Charger?A: To start working with the A/C liquid line, first get rid of the refrigerant from the system and then separate the negative battery cable. Lift out the air cleaner housing, lift the car and pull off the front end splash shields. Eliminate the Tourque sealing agent between the A/C liquid line and the A/C condenser, disconnect the line and remove the dual plane seal. Tape or plug the opening in the liquid line fitting and in the condenser outlet and then lower the vehicle. Take out the nut joining the front part of the A/C liquid line to the rear, separate them and throw away the dual plane seal. Again, shut or tape the open fittings on the liquid line before removing the front engine compartment section. Place the front liquid line into the engine compartment, take off the taping or plugging materials from the threaded ends, apply clean refrigerant oil to the end of the new dual plane seal and then fasten it onto the fitting. Couple the starting part of the liquid line with the ending section of the A/C liquid line, fit the securing nut and turn it firmly to 22 N.m (16 ft. lbs.): Hold up the vehicle high enough to reach the front end of the A/C line and the A/C condenser outlet, remove the tapes and plugs, oil the new dual plane seal, connect the line to the top of the A/C condenser and tighten the bolt to 22 N.m (16 ft. lbs.). Fit the front end splash shields, lower your vehicle, fit the air cleaner housing, then secure and tighten the negative battery cable. Next, empty or release all freon from the car and finally charge the system with fresh freon. After completing the front section, tap the refrigerant from the rear, take out the negative battery terminal and remove the air cleaner housing. Unscrew the clip at the front of the A/C line, unhook it from the rear and throw away the dual plane seal. Gas or tape over the opened fittings on the liquid line, remove the front section nut and the seal from the A/C line and throw out the dual plane seal. Unplug the wire harness from the A/C pressure transducer, unscrew the bolt holding down the refrigerant line bracket and take out the nut holding the tapping block for liquid and suction lines onto the A/C expansion valve. Take the A/C liquid and suction lines out of the rear converter, remove the dual plane seal and plug or cover the leading edges of the lines and the part of the expansion valve with tape. Take out the assembly of the A/C liquid and suction lines from the engine space and if it's needed, remove the A/C pressure transducer. If the A/C pressure transducer has been removed, place it on the A/C liquid line, bring the rear sections of the A/C liquid and suction lines into the engine compartment as a group and remove the tapes or plugs from the fittings. Oil the new dual plane seal and attach it to the suction and liquid line fittings, connect the rear section to the A/C expansion valve and attach and tighten the securing nut to 23 N.m (17 ft. lbs.). Place and tighten the bolt under the refrigerant line bracket, using 11 N.m (100 in. lbs.) and then connect the wire harness with the A/C pressure transducer. Take off the tape or plugs at the fittings joining the front liquid line with the rear one, apply lubricant to the new dual plane seal, attach the front to the rear, put on the nut and tighten it to 22 N.m (16 ft. lbs.). Uncover the fittings at both ends of the A/C suction line and place a new dual plane seal over them. Slide the two halves and press the fittings to seal them, install the securing nut and tighten it to 22 N.m (16 ft. lbs.). Once again attach the air cleaner housing, hook up the negative battery cable, empty all the refrigerant and add new refrigerant to the system.
Related 2006 Dodge Charger Parts
 2006 Dodge Charger Cabin Air Filter
 2006 Dodge Charger Blend Door Actuator
 2006 Dodge Charger Blower Motor
 2006 Dodge Charger Heater Core
 2006 Dodge Charger Blower Motor Resistor
 2006 Dodge Charger Evaporator
 2006 Dodge Charger A/C Accumulator
 2006 Dodge Charger A/C Clutch
 2006 Dodge Charger A/C Compressor
 2006 Dodge Charger A/C Service Cap
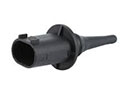 2006 Dodge Charger Ambient Temperature Sensor
 2006 Dodge Charger HVAC Pressure Switch