JeepParts
My Garage
My Account
Cart
OEM 2006 Dodge Sprinter 2500 Exhaust Manifold
Engine Exhaust Manifold- Select Vehicle by Model
- Select Vehicle by VIN
Select Vehicle by Model
orMake
Model
Year
Select Vehicle by VIN
For the most accurate results, select vehicle by your VIN (Vehicle Identification Number).
1 Exhaust Manifold found

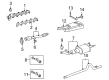
2006 Dodge Sprinter 2500 Exhaust Manifold Part Number: 5117523AA
Product Specifications- Other Name: Manifold - Exhaust; Manifold; Manifold Exhaust
- Item Weight: 8.20 Pounds
- Item Dimensions: 20.8 x 4.7 x 4.4 inches
- Condition: New
- Fitment Type: Direct Replacement
- SKU: 5117523AA
- Warranty: This genuine part is guaranteed by Mopar's factory warranty.
2006 Dodge Sprinter 2500 Exhaust Manifold Parts and Q&A
- Q: How to Service an Exhaust Manifold on 2006 Dodge Sprinter 2500?A: Before handling the exhaust manifold, remove the battery's negative terminal and the exhaust heat shield. Lift the vehicle and then remove the support bracket for the turbocharger. Relax the clamps at the rear of the engine block that hold the exhaust pipe and remove the mounts at the muffler. Take out the front exhaust pipe to turbocharger fastener and shift the front exhaust pipe off the engine. Reduce the height of the vehicle and unattach the air cleaner housing from the turbocharger, putting it to the side. After taking out the lines, take out the bolts on the exhaust end of the turbocharger to unseat the turbocharger. Loosen all self-locking fasteners on the exhaust manifold and then extract it, tidying up the mating surface after it is out. Look at the gasket surface on the exhaust manifold with a straight edge to ensure it is not cracked or out of shape by more than 0.006 inch per foot (0.15 mm per every 300 mm of the manifold). Place a new gasket on top of the studs, push the exhaust manifold onto the manifold and then tighten the nuts to 30 Nm (22 ft. lbs.) Change the banjo bolt seals on the turbocharger oil cooler line before putting on the oil cooler line and then attach the turbocharger. Raise and mount the car once more, now bring the front exhaust pipe to the turbocharger and tighten the exhaust hanger bolts where the muffler is located. Firmly fasten the exhaust hanger bracket to the block, fit the turbocharger support bracket, let the car down and link the air cleaner duct with the turbocharger. After that, install the heat shield around the exhaust again and secure the negative battery cable.
Related 2006 Dodge Sprinter 2500 Parts
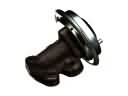 2006 Dodge Sprinter 2500 EGR Valve
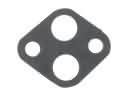 2006 Dodge Sprinter 2500 EGR Valve Gasket
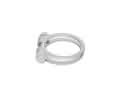 2006 Dodge Sprinter 2500 Exhaust Clamp
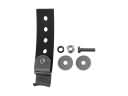 2006 Dodge Sprinter 2500 Exhaust Hanger
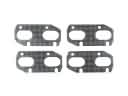 2006 Dodge Sprinter 2500 Exhaust Manifold Gasket
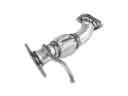 2006 Dodge Sprinter 2500 Exhaust Pipe
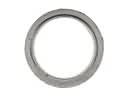 2006 Dodge Sprinter 2500 Exhaust Seal Ring
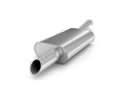 2006 Dodge Sprinter 2500 Muffler
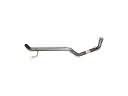 2006 Dodge Sprinter 2500 Tail Pipe