JeepParts
My Garage
My Account
Cart
OEM 2008 Dodge Durango Door Handle
Inside Door Handle- Select Vehicle by Model
- Select Vehicle by VIN
Select Vehicle by Model
orMake
Model
Year
Select Vehicle by VIN
For the most accurate results, select vehicle by your VIN (Vehicle Identification Number).
4 Door Handles found


2008 Dodge Durango Handle, Outside, Black, Front Outer Driver Side Part Number: 55275949AC
$94.67 MSRP: $143.00You Save: $48.33 (34%)Product Specifications- Other Name: Handle - Front Door Exterior; Exterior Door Handle, Front Left Outer; Outside Door Handle; Handle Front Door Exterior; Exterior Door Handle
- Position: Front Outer Driver Side
- Replaces: 55362213AB
- Item Weight: 1.40 Pounds
- Item Dimensions: 9.3 x 8.3 x 3.8 inches
- Condition: New
- Fitment Type: Direct Replacement
- SKU: 55275949AC
- Warranty: This genuine part is guaranteed by Mopar's factory warranty.


2008 Dodge Durango Handle, Outside, Black, Front Outer Passenger Side Part Number: 55276882AB
$80.22 MSRP: $120.00You Save: $39.78 (34%)Product Specifications- Other Name: Handle - Front Door Exterior; Exterior Door Handle, Front Right Outer; Outside Door Handle; Handle Front Door Exterior; Exterior Door Handle
- Position: Front Outer Passenger Side
- Replaces: 55362212AB
- Item Weight: 1.40 Pounds
- Item Dimensions: 9.2 x 8.2 x 3.8 inches
- Condition: New
- Fitment Type: Direct Replacement
- SKU: 55276882AB
- Warranty: This genuine part is guaranteed by Mopar's factory warranty.

 Product Specifications
- Other Name: Handle - Exterior Door; Exterior Door Handle, Rear Left Outer; Handle Exterior Door; Exterior Door Handle
- Position: Rear Outer Driver Side
- Item Weight: 1.20 Pounds
- Item Dimensions: 10.2 x 4.1 x 3.8 inches
- Condition: New
- Fitment Type: Direct Replacement
- SKU: 55362215AA
- Warranty: This genuine part is guaranteed by Mopar's factory warranty.
- Product Specifications
- Other Name: Handle - Exterior Door; Exterior Door Handle, Rear Right Outer; Handle Exterior Door; Exterior Door Handle
- Position: Rear Outer Passenger Side
- Item Weight: 1.30 Pounds
- Item Dimensions: 9.2 x 8.4 x 3.9 inches
- Condition: New
- Fitment Type: Direct Replacement
- SKU: 55362214AA
- Warranty: This genuine part is guaranteed by Mopar's factory warranty.
2008 Dodge Durango Door Handle Parts and Q&A
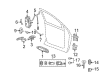
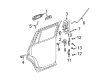
- Q: How to Detach a Front Door Handle on 2008 Dodge Durango?A: Before detaching the exterior handle, take away the watershield first. After that, undo bolt 3 and nut 2 and set the rear glass run channel 1 aside. Take away links 1 and 3 from the latch 4. Afterwards, take out nut 4 and handle 2 and cut off electrical connector 1 from the system. Finally, divide row 3 and 5 from clips 1 and 4 apart and take out lock cylinder 2.
Related 2008 Dodge Durango Parts
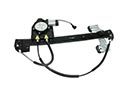 2008 Dodge Durango Window Regulator
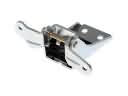 2008 Dodge Durango Door Hinge
 2008 Dodge Durango Door Lock Actuator
 2008 Dodge Durango Door Latch Assembly
 2008 Dodge Durango Door Latch Cable
 2008 Dodge Durango Door Lock
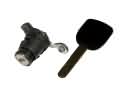 2008 Dodge Durango Door Lock Cylinder
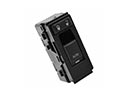 2008 Dodge Durango Door Lock Switch
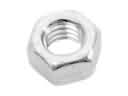 2008 Dodge Durango Exhaust Nut
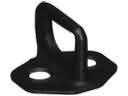 2008 Dodge Durango Rear Door Striker
 2008 Dodge Durango Seat Switch
 2008 Dodge Durango Window Run