JeepParts
My Garage
My Account
Cart
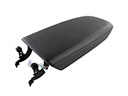
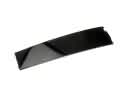
OEM Chrysler 300 Sun Visor
Sun Shade Visor- Select Vehicle by Model
- Select Vehicle by VIN
Select Vehicle by Model
orMake
Model
Year
Select Vehicle by VIN
For the most accurate results, select vehicle by your VIN (Vehicle Identification Number).
20 Sun Visors found


Chrysler 300 Sunvisor, Black, Driver Side Part Number: 1MZ75DX9AF
$179.01 MSRP: $266.00You Save: $86.99 (33%)

Chrysler 300 Sunvisor, Driver Side Part Number: 1RW77DX9AE
$188.08 MSRP: $279.00You Save: $90.92 (33%)Ships in 1-3 Business Days

Chrysler 300 Visor - Illuminated Part Number: 5PJ82ML2AD
$125.76 MSRP: $188.00You Save: $62.24 (34%)Ships in 1-3 Business DaysChrysler 300 Sunvisor, Black, Passenger Side Part Number: 5PJ82DX9AC
$101.40 MSRP: $151.00You Save: $49.60 (33%)Ships in 1-3 Business Days
Chrysler 300 Visor - Illuminated Part Number: 5PJ79DX9AD
$107.47 MSRP: $160.00You Save: $52.53 (33%)Ships in 1-3 Business Days
Chrysler 300 Sunvisor, Black Part Number: 5PJ82DX9AD
$114.43 MSRP: $169.00You Save: $54.57 (33%)Ships in 1-3 Business Days
Chrysler 300 Sunvisor Part Number: 5PJ79ML2AD
$126.90 MSRP: $187.00You Save: $60.10 (33%)Ships in 1-3 Business DaysChrysler 300 Visor - Illuminated Part Number: 5PJ81ML2AD
$143.89 MSRP: $213.00You Save: $69.11 (33%)Ships in 1-3 Business DaysChrysler 300 Sunvisor, White Part Number: 5PJ80ML2AD
$143.89 MSRP: $213.00You Save: $69.11 (33%)Ships in 1-3 Business DaysChrysler 300 Sunvisor, Black Part Number: 5PJ80DX9AD
$151.82 MSRP: $225.00You Save: $73.18 (33%)Ships in 1-3 Business DaysChrysler 300 Sunvisor, Passenger Side Part Number: 1RW78DX9AE
$227.89 MSRP: $289.00You Save: $61.11 (22%)Ships in 1-2 Business Days


Chrysler 300 Sunvisor, Passenger Side Part Number: 1AH06BD1AA


Chrysler 300 Sunvisor, Driver Side Part Number: 1AH07BD1AA
Chrysler 300 Sunvisor, Black Part Number: 5PJ81DX9AD
$114.43 MSRP: $169.00You Save: $54.57 (33%)Chrysler 300 Sunvisor, Black, Driver Side Part Number: 5PJ81DX9AC
$114.43 MSRP: $169.00You Save: $54.57 (33%)
Chrysler 300 Sunvisor, Passenger Side Part Number: 1AH06DW1AA
Chrysler 300 Sunvisor, Beige Part Number: 1MZ74HL1AF
Chrysler 300 Sunvisor, Beige, Driver Side Part Number: 1MZ75HL1AF
Chrysler 300 Sunvisor, Black, Passenger Side Part Number: 1MZ74DX9AF
Chrysler 300 Sunvisor, Driver Side Part Number: 1AH07DW1AA
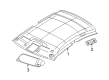
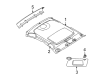
Chrysler 300 Sun Visor
Choose OEM Sun Visor that meet Chrysler factory standards. Chrysler designs and tests every component for precision and durability. Each Sun Visor follows strict manufacturing steps to lock in quality and fit. If your Chrysler 300 matters to you, OEM parts make the smart choice. You'll get the exact look, feel, and performance you expect. Shop genuine 300 parts at the highly competitive prices online. Enjoy a manufacturer's warranty, a hassle-free return policy, and rapid delivery. No more guesswork with off brands. Get genuine parts with exact fit and true factory performance. Shop with confidence today at JeepPartsDeal.com.
Chrysler 300 Sun Visor is positioned in the front of an iconic sedan that combines the aggressive design with confident power, and knowing the car and the component helps to define the reason why they are valued by drivers. The Chrysler 300 was introduced in 2003 as a concept then completed into the pavement with a powerful blend of horsepower in the form of V6 and V8 that offered the HEMI at 4.5L and 5.7L that launched into production in 2005 as the successor to the traditional rear wheel layout. The German influenced double wishbone suspension, long wheelbase and solid disc brakes provide the Chrysler 300 with a smooth, yet responsive ride and, as an option, 17 or 18 inch alloy wheels provide visual appeal, the cabin also provides the comfort of quiet cruising. The owners like the fact that the originality of the Chrysler 300 parts helps to retain the high level of durability, which allows the car to retain the luxury and performance within a single spacious cabin. The Sun Visor above the windshield of that cabin keeps off the harsh glare, maintains a clear sight, and even has an optional vanity light, making the long journeys more comfortable. This Sun Visor will swivel to side glass position enabling the driver to cope with low angle sunlight without losing focus just like the interior trim will appear as a factory fresh look. Installation of the Sun Visor requires parking the car safely, unbolstering the old one, attaching the new bracket, screw tightening, rewiring and movement testing.