JeepParts
My Garage
My Account
Cart
OEM Chrysler Voyager Intake Manifold
Engine Intake Manifold- Select Vehicle by Model
- Select Vehicle by VIN
Select Vehicle by Model
orMake
Model
Year
Select Vehicle by VIN
For the most accurate results, select vehicle by your VIN (Vehicle Identification Number).
6 Intake Manifolds found


Chrysler Voyager Intake Manifold Part Number: 4781276AA
$215.65 MSRP: $273.37You Save: $57.72 (22%)Ships in 1-2 Business Days
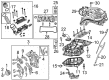
Chrysler Voyager Intake Manifold, Upper Part Number: 4861867AI
$435.75 MSRP: $584.00You Save: $148.25 (26%)
Chrysler Voyager Intake Plenum Part Number: 5096100AB
$128.53 MSRP: $148.00You Save: $19.47 (14%)Ships in 1-2 Business Days


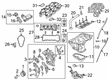
Chrysler Voyager Intake Manifold, Lower Part Number: 5281803AA

Chrysler Voyager Intake Plenum Part Number: 5083032AA

Chrysler Voyager Intake Manifold Part Number: 4648958AA
Chrysler Voyager Intake Manifold
Choose OEM Intake Manifold that meet Chrysler factory standards. Chrysler designs and tests every component for precision and durability. Each Intake Manifold follows strict manufacturing steps to lock in quality and fit. If your Chrysler Voyager matters to you, OEM parts make the smart choice. You'll get the exact look, feel, and performance you expect. Shop genuine Voyager parts at the highly competitive prices online. Enjoy a manufacturer's warranty, a hassle-free return policy, and rapid delivery. No more guesswork with off brands. Get genuine parts with exact fit and true factory performance. Shop with confidence today at JeepPartsDeal.com.
The Chrysler Voyager Intake Manifold is one of the company's most important component since it greatly improves the performance and the durability of Manufacturer's main market product, the Chrysler Voyager minivan. The Intake Manifold is aimed at uniformly supplying air or air/fuel blend to the cylinder head intake ports; this produces high-speed functionality required to generate power in the engine. Its design also differs from one engine to the other; most new models of Chrysler Voyager vehicles for instance use lightweight composite plastics in a bid to enhance the vehicle's fuel economy and also for cooling purposes. Notably, some Voyager models possess what are called variable-length intake manifolds (VLIM), which help to vary the air intake openings depending on the amount of load that the engine is currently exerting, thereby improving the power output. This Chrysler Intake Manifold applies to many Voyager models and guarantees that all variations will feature this sophisticated concept. This compatibility also reflects how the Intake Manifold is essential in the total well-being of the vehicle since it is associated with the engine. It is evident that Chrysler Voyager Intake Manifold has good reputation and Indeed, it occupies one of the leading positions in the automotive market as result of the manifold's construction and well-thought design. Therefore, as a part of the Chrysler brand's quality, Intake Manifold is not only responsible for an additional horsepower but also an essential factor in the sturdiness of the engine. In conclusion, seeing the Chrysler Voyager Intake Manifold, one can judge that the brand is committed to providing its clients with highly-effective products that can help to enhance the vehicle's performance, and thus, choosing this manfold, every owner of Chrysler Voyager receives a valuable addition to their car.
Chrysler Voyager Intake Manifold Parts and Q&A
- Q: How to Service and Repair a Lower Intake Manifold on Chrysler Voyager?A:For the lower intake manifold service, release the fuel system pressure first. After removing the upper intake manifold, make sure to block off the openings with something to stop foreign things from getting into the engine. Take out the fuel line from the engine and drain the engine's cooling system. Unplug the fuel injector/Coolant Temperature Sensor wire harness connector, remove both the upper and lower hoses from the intake manifold and remove the heater supply hose. Unbolt the bracket from the engine using the lower manifold support bracket bolts and loosen one of the lower support bracket bolts. Unplug the fuel injector harness and remove all the bolts securing the Power Steering Reservoir to the manifold, while leaving the line connected to the reservoir. Remove the fasteners holding the lower intake manifold and take it off the engine to examine it with a straight edge, checking for less than 0.15 mm of difference in flatness within 300 mm (60 in.). If you detect cracks or stretching, replace the manifold. Once any items removed are installed, please torque the fuel rail bolts to 22 Nm (200 in. lbs.), coolant outlet connector bolts to 28 Nm (250 in. lbs.) and the coolant temperature sensor to 7 Nm (60 in. lbs.). Set a new gasket on the cylinder head and fit the lower manifold, using a 5 mm socket's Nm/inch.lbs. of force, then repeat for every bolt while ensuring they are tightened to 28 Nm (250 in. lbs.) in the right order. Put in the bolts that hold the lower intake manifold support and tighten each bolts to 28 Nm (250 in. lbs.) on the intake and 54 Nm (40 ft. lbs.) on the engine block. Connect the power steering reservoir to the manifold and attach it using bolts, after which connect the fuel line and the cable ends of the coolant temperature sensor/fuel injector wiring harness. After that, put the radiator upper hose in place, the heater supply hose, then the upper intake manifold and begin filling the cooling system.

Related Chrysler Voyager Parts
 Chrysler Voyager Fuel Filter
 Chrysler Voyager Fuel Pump
 Chrysler Voyager Fuel Tank
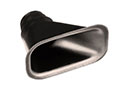 Chrysler Voyager Air Duct
 Chrysler Voyager Air Filter
 Chrysler Voyager Air Filter Box
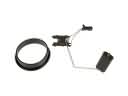 Chrysler Voyager Fuel Level Sensor
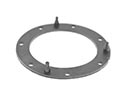 Chrysler Voyager Fuel Pump Gasket
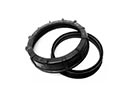 Chrysler Voyager Fuel Pump Seal
 Chrysler Voyager Fuel Pump Tank Seal
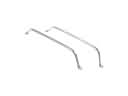 Chrysler Voyager Fuel Tank Strap
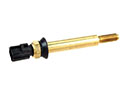 Chrysler Voyager Temperature Sender