JeepParts
My Garage
My Account
Cart
OEM Chrysler Voyager Muffler
Exhaust Muffler- Select Vehicle by Model
- Select Vehicle by VIN
Select Vehicle by Model
orMake
Model
Year
Select Vehicle by VIN
For the most accurate results, select vehicle by your VIN (Vehicle Identification Number).
9 Mufflers found

Chrysler Voyager Muffler & Pipe Part Number: 68577221AA
$663.00 MSRP: $1005.00You Save: $342.00 (35%)Ships in 1-2 Business Days
Chrysler Voyager Muffler W/Tpipe Part Number: 4809152
$64.25 MSRP: $81.45You Save: $17.20 (22%)Ships in 1-2 Business Days
Chrysler Voyager Muffler W/Tpipe Part Number: 4881332AH
$536.52 MSRP: $682.00You Save: $145.48 (22%)Ships in 1-2 Business Days
Chrysler Voyager Muffler & Pipe Part Number: 68577220AA
$1068.29 MSRP: $1555.00You Save: $486.71 (32%)
Chrysler Voyager Muffler W/Tpipe Part Number: 4809151
Chrysler Voyager Muffler W/Tpipe Part Number: 4809150
Chrysler Voyager Muffler W/Tpipe Part Number: 4809149

Chrysler Voyager Muffler W/Tpipe Part Number: 4881242AG
Chrysler Voyager Muffler W/Tpipe Part Number: 4881333AJ
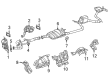
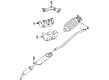
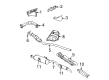
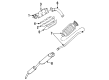
Chrysler Voyager Muffler
Choose OEM Muffler that meet Chrysler factory standards. Chrysler designs and tests every component for precision and durability. Each Muffler follows strict manufacturing steps to lock in quality and fit. If your Chrysler Voyager matters to you, OEM parts make the smart choice. You'll get the exact look, feel, and performance you expect. Shop genuine Voyager parts at the highly competitive prices online. Enjoy a manufacturer's warranty, a hassle-free return policy, and rapid delivery. No more guesswork with off brands. Get genuine parts with exact fit and true factory performance. Shop with confidence today at JeepPartsDeal.com.
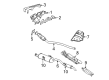
The Muffler is the exhaust component installed in Chrysler Voyager automobiles that are also well regarded for their dependability and efficiency. Primarily aimed at making exhaust gases to flow away from the engine, the Muffler reduces noise that is generated by combustion to a significant level by featuring a combination of several chambers and complex passages that carry out acoustic damping. This feature not only beautifies the looks of the car but also creates more efficiency and safety in the Chrysler Voyager. Intended for numerous Voyager models, the Muffler has both the direct and the universal options, although it provides for the maximum compatibility with every vehicle and the premier sound experience at the same time. These mufflers are been manufactured using very strong material including stainless steel that will last for very long time and will not woren out its performance that is why most Chrysler lovers use it. Also, performance mufflers can be installed for better exhaust flow which adds more virtues to the vehicle. Since the first release, Chrysler Voyager successfully found its customers, and till the present days it has sold more than 12 million units. Examining therefore Muffler's place within the automotive market it is important to highlight not only its function of noise and emission control but also as an enhancement factor within Chrysler Voyager as well as a safety feature making it deservedly noteworthy as a reliable, high performance Chrysler Voyager part.
Chrysler Voyager Muffler Parts and Q&A
- Q: How to Service and Repair a Muffler on Chrysler Voyager?A:Before working on the muffler, use a body contact hoist to raise the car so the unloaded rear suspension makes enough room between the muffler/resonator pipe and the rear axle. Put penetrating oil on the clamp nuts that secure the component you need to remove, but do not apply the oil directly to the flex-joint, since this could destroy the bellows and need you to replace the Catalytic Converter. If your vehicle has AWD, part the right side axle half shaft from the rear differential module and then remove the band clamp from the connection at the muffler to converter pipe. Detach the exhaust hangers on the body screws, pull apart the muffler pipe and the converter pipe and move the muffler/resonator unit forward so that the resonator slides through the rear axle opening. Clean both ends of the tubes or mufflers so that every part matches correctly and get rid of all insulators, rusted clamps, supports and joined parts. Always fit original or equivalent exhaust system parts to maintain correct alignment, acceptable noise, back pressure and acceptable emission and performance levels. After you guide the resonator between the body and rear axle, connect the muffler to the converter but avoid tightening the band clamp, fit the hangers to the body and attach screws starting at the resonator going forward, locking them at a torque of 28 Nm (250 in. lbs.). Make sure the muffler pipe goes into the catalytic converter pipe until the hangers are in the proper place, as overtightening the band clamps may cause the ends of the pipes to bottom out against the center hourglass block, requiring you to change the clamp band. Lift the clamp and remove the nut so you can peel the clamp heads back and let the spot weld break. Then clean away the spot weld and install the new clamp with the same orientation. After that, set the band clamp at 55 Nm (40 ft. lbs.) and connect the right side half shaft to the rear differential module for AWD models only.
- Q: How to Maintain and Fix a Muffler on Chrysler Voyager?A:Before starting the service, lift the car up on a body contact type hoist so its rear suspension weighs nothing on the rear axle and the muffler can be worked on. Try to oil the clamps facing the bellows first, but make sure not to harm or glue them together, as damaging those parts can cause the collect Catalytic Converter to snap and need replacement. Detach the rear differential module from the right side axle half shaft if the car has AWD, then loosen the band clamp on the muffler - to - converter pipe connection. Get rid of the exhaust hangers attached to the body screws, separate the pipes at the converter and muffler and naturally draw the muffler/resonator assembly out of the rear axle. Ensure that the pipes are clean toward the ends so that all components match correctly and throw out any broken or rough insulators, rusted clamps, supports or mounting parts. When updating any exhaust system parts, use either genuine original parts or similar items to make certain there is proper connection, acceptable noise and correct exhaust back pressure. For installation, line up the resonator between the vehicle and the rear axle to fit the muffler/resonator assembly, attach the muffler pipe to the converter pipe so it doesn't get tightened and attach the hangers to the body, beginning with the screws at the resonator and moving forward until they are fixed securely to 28 Nm (250 inch lbs.). Fit the muffler pipe into the catalytic converter pipe, ending when the hangers are in place and make certain not to tighten the clamps, as putting the two pipes together at the center could stretch the clamp, requiring a new replacement band. Removing the nut and disengaging the clamp ends, so the weld breaks, will give you access to the clamp surface; after you remove the old clamp, clean and smooth the weld spot before reinstalling the clamp in the proper way. Next, turn the band clamp to 55 Nm (40 ft. lbs.) and put the right side half shaft back onto the rear differential module if you have an AWD model.


Related Chrysler Voyager Parts
 Chrysler Voyager Catalytic Converter
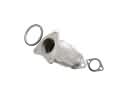
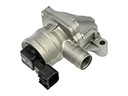 Chrysler Voyager Air Pump Check Valve
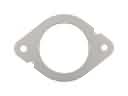 Chrysler Voyager Catalytic Converter Gasket
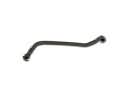 Chrysler Voyager Crankcase Breather Hose
 Chrysler Voyager Exhaust Clamp
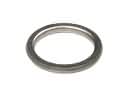 Chrysler Voyager Exhaust Flange Gasket
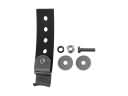 Chrysler Voyager Exhaust Hanger
 Chrysler Voyager Exhaust Heat Shield
 Chrysler Voyager Exhaust Manifold
 Chrysler Voyager Exhaust Manifold Gasket
 Chrysler Voyager Exhaust Pipe
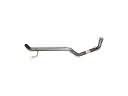 Chrysler Voyager Tail Pipe