JeepParts
My Garage
My Account
Cart
OEM Chrysler Voyager Shift Cable
Transmission Shift Cable- Select Vehicle by Model
- Select Vehicle by VIN
Select Vehicle by Model
orMake
Model
Year
Select Vehicle by VIN
For the most accurate results, select vehicle by your VIN (Vehicle Identification Number).
3 Shift Cables found

Chrysler Voyager Cable - Gearshift Control Part Number: 68252729AK
$58.25 MSRP: $78.95You Save: $20.70 (27%)


Chrysler Voyager Shift Control Cable Part Number: 4670122AG

Chrysler Voyager Shift Control Cable Part Number: 4641755AC
Chrysler Voyager Shift Cable
Choose OEM Shift Cable that meet Chrysler factory standards. Chrysler designs and tests every component for precision and durability. Each Shift Cable follows strict manufacturing steps to lock in quality and fit. If your Chrysler Voyager matters to you, OEM parts make the smart choice. You'll get the exact look, feel, and performance you expect. Shop genuine Voyager parts at the highly competitive prices online. Enjoy a manufacturer's warranty, a hassle-free return policy, and rapid delivery. No more guesswork with off brands. Get genuine parts with exact fit and true factory performance. Shop with confidence today at JeepPartsDeal.com.
A critical part of the Chrysler Voyager functions as an interface which joins the gear shifter to the transmission so drivers maintain precise gear selection during operation. The Shift Cable maintains reliability while delivering remarkable performance as it functions as an essential component in Chrysler Voyager driving systems. This Shift Cable maintains compatibility across different Voyager vehicle models because it has progressively adopted new transmission technology for improved efficiency and safety. Transmission performance depends heavily on an operating Shift Cable because its accuracy determines proper gear engagement which helps prevent stretching or breaking that creates severe performance issues. Vehicle performance depends on both scheduled maintenance routines and on-time replacement of the Shift Cable components. The Chrysler Voyager Shift Cable excels within automotive markets because its development features both performance-oriented construction and design built to match modern driving needs. The Chrysler Voyager dealership has achieved more than 12 million unit sales accompanied by an outstanding reputation because of its Shift Cable engineering. The Chrysler car Shift Cable works through smooth transmission operation to boost performance levels yet ensure safe driving conditions thus becoming an essential the automaker model component.
Chrysler Voyager Shift Cable Parts and Q&A
- Q: How to Service and Repair a Shift Cable Crossover on Chrysler Voyager?A:The gearshift cable crossover should be serviced or repaired by first disconnecting the battery's negative cable. Pull the gearshift knob 1/4 turn to the right, then open the gearshift boot inside the console by removing three clips. Make sure to apply the park brake so the handle of the park brake doesn't get in the way while you remove the center console. Afterward, remove the bottom plugs on both cup holders and take out the screws holding the center console to the gearshift lever and then take the assembly out. Remove the support bracket from the center console, the holding clip for the cable and the cable itself from the gearshift. If you have a 2.4L gas model, proceed; for 2.5L ID models, take off the battery thermal shield before the battery hold down nut, clamp and battery, as well as the Battery Tray and the battery temperature sensor. Get rid of the coolant recovery bottle, its support bracket, then take the crossover cable from the transaxle crossover lever and remove its retainer clip and remove the cable from its mount bracket. Lift the vehicle on a hoist and pull the crossover cable from the underhood location before removing it through the gap in the floor pan underneath. Start hooking up the crossover cable in the engine bay, then remove the floor pan and add the longer part of the cable through the hole beneath the car. Raise the chassis crossmember a bit, then attach the cable to the mount by clipping the retainer and connect the lever to the transaxle. For 2.4L gas models, go on to the following steps; for 2.5L TD models, attach the coolant recovery bottle bracket and the coolant recovery bottle first. Slide the tray with the battery temperature sensor attached to it over the battery, insert the battery, add the hold-down clamp and tighten the nut over it. attach the battery thermal shield, then connect the crossover cable to the gearshift mechanism and make sure it's secured with the retainer clip. Secure the crossover cable, put in the center console support bracket and tighten the screws that link the support bracket with the shift mechanism to 12 Nm. Set the center console in place and screw the center console to the gearshift mechanism according to the instructions (5 Nm). Secure the cup holder plugs, gearshift boot to the console and retain them using the three retainer clips. Set the shift pattern side of the knob one-quarter counter-clockwise, push it onto the gearshift lever, rotate it one-quarter clockwise again, push and release, making sure the knob boot is secure before reconnecting the negative battery cable.

Related Chrysler Voyager Parts
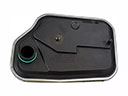 Chrysler Voyager Automatic Transmission Filter
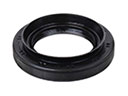 Chrysler Voyager Automatic Transmission Output Shaft Seal
 Chrysler Voyager Automatic Transmission Shift Levers
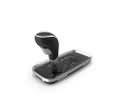 Chrysler Voyager Automatic Transmission Shifter
 Chrysler Voyager Flywheel
 Chrysler Voyager Manual Transmission Extension Housing Seal
 Chrysler Voyager Torque Converter
 Chrysler Voyager Transfer Case
 Chrysler Voyager Transmission Assembly
 Chrysler Voyager Transmission Pan
 Chrysler Voyager Valve Body