JeepParts
My Garage
My Account
Cart
OEM Dodge Caravan Windshield
Glass Windshield- Select Vehicle by Model
- Select Vehicle by VIN
Select Vehicle by Model
orMake
Model
Year
Select Vehicle by VIN
For the most accurate results, select vehicle by your VIN (Vehicle Identification Number).
5 Windshields found

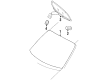
Dodge Caravan Windshield Part Number: 5014214AB
$304.72Ships in 1-2 Business Days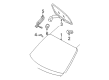
Dodge Caravan Windshield, Front Part Number: 5170123AA
Dodge Caravan Windshield, Front Part Number: 5083392AA
Dodge Caravan Windshield, Front Part Number: 5019287AB
Dodge Caravan Windshield Part Number: 5014220AB
Dodge Caravan Windshield
Choose OEM Windshield that meet Dodge factory standards. Dodge designs and tests every component for precision and durability. Each Windshield follows strict manufacturing steps to lock in quality and fit. If your Dodge Caravan matters to you, OEM parts make the smart choice. You'll get the exact look, feel, and performance you expect. Shop genuine Caravan parts at the highly competitive prices online. Enjoy a manufacturer's warranty, a hassle-free return policy, and rapid delivery. No more guesswork with off brands. Get genuine parts with exact fit and true factory performance. Shop with confidence today at JeepPartsDeal.com.
Dodge Caravan Windshield Parts and Q&A
- Q: How to Effectively Remove and Install a Windshield on Dodge Caravan?A:Before removing the windshield, detach the rear view mirror inside the car, windshield Wiper Arms, the cover over the cowl and the A-pillar trim panels. Remove the wires from the windshield defroster grid. Cover the instrument panel and hood and then pull outward at the bottom of the A-pillars to remove the windshield molding. To remove the windshield, either use a knife or restore your window with an electric cutting tool, cutting the adhesive that secures it to the various pillars and fences. For cutting urethane adhesive using the interior method, start like before, but use a reciprocating or oscillating power knife to cut it. While you are installing the windshield, open the driver's front door window to keep pressure from building in the passenger compartment. The replacement window should not be used for at least a day after the urethane has cured. Make sure the bonding urethane is level and fits the windshield properly and don't forget to clean the spacer supports. Slide the new windshield into the hole so that it touches the pinch weld fence all around, then lift it out and lay it, padded side down, on a suitable working surface. Wipe down the interior of the windshield, install soft trim along the edges and before you place the glass, apply Glass Prep and Glass Primer underneath the glass and on the trim. Take away as much of the original urethane that you can without causing paint damage, then primer the pinch welds and, if you are using low viscosity adhesive, put in compression spacers. With a 10 mm bead of urethane, mark along the windshield fence line in its center, secure the windshield above the guide and carefully drop the windshield as you press the molding down. Carefully remove residues of urethane, attach masking tape to the molding, reconnect any wire connectors, then restore the trim to the A-pillars, cowl cover, wipers and inside mirror. Once the urethane has dried and the tape is taken away, test the worksite by wetting it with water.

Related Dodge Caravan Parts
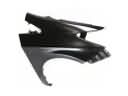 Dodge Caravan Fender
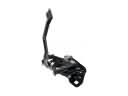 Dodge Caravan Hood Latch
 Dodge Caravan Wiper Motor
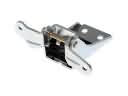 Dodge Caravan Door Hinge
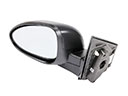 Dodge Caravan Car Mirror
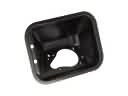 Dodge Caravan Fuel Filler Housing
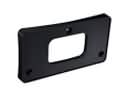 Dodge Caravan License Plate
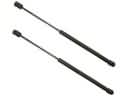 Dodge Caravan Liftgate Lift Support
 Dodge Caravan Seat Heater
 Dodge Caravan Seat Switch
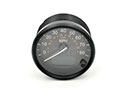 Dodge Caravan Speedometer
 Dodge Caravan Trunk Lid Latch