JeepParts
My Garage
My Account
Cart
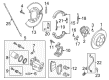
OEM Dodge Charger Wheel Bearing
Hub Bearing- Select Vehicle by Model
- Select Vehicle by VIN
Select Vehicle by Model
orMake
Model
Year
Select Vehicle by VIN
For the most accurate results, select vehicle by your VIN (Vehicle Identification Number).
9 Wheel Bearings found


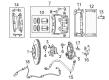
Dodge Charger Hub & Bearing, Rear Part Number: 4779328AB
$268.52 MSRP: $410.00You Save: $141.48 (35%)Ships in 1-2 Business Days


Dodge Charger Hub & Bearing, Front Part Number: 68302651AA
$371.28 MSRP: $565.00You Save: $193.72 (35%)


Dodge Charger Hub & Bearing, Front Part Number: 4779199AA
$182.86 MSRP: $274.00You Save: $91.14 (34%)Ships in 1-2 Business Days
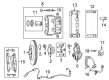
Dodge Charger Outer Bearing, Rear Part Number: 52111444AB
$103.05 MSRP: $154.00You Save: $50.95 (34%)Ships in 1-2 Business Days
Dodge Charger Wheel Bearing, Front Outer Part Number: 3683974
$21.17 MSRP: $26.84You Save: $5.67 (22%)Ships in 1-2 Business DaysDodge Charger Wheel Bearing, Inner Part Number: 4238567
$35.72 MSRP: $45.28You Save: $9.56 (22%)Ships in 1-2 Business Days


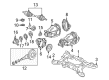
Dodge Charger Hub & Bearing, Rear Part Number: 5181925AC
$181.28 MSRP: $267.00You Save: $85.72 (33%)
Dodge Charger Wheel Bearing Part Number: 4397499

Dodge Charger Wheel Bearing, Front Part Number: 4397498
Dodge Charger Wheel Bearing
Choose OEM Wheel Bearing that meet Dodge factory standards. Dodge designs and tests every component for precision and durability. Each Wheel Bearing follows strict manufacturing steps to lock in quality and fit. If your Dodge Charger matters to you, OEM parts make the smart choice. You'll get the exact look, feel, and performance you expect. Shop genuine Charger parts at the highly competitive prices online. Enjoy a manufacturer's warranty, a hassle-free return policy, and rapid delivery. No more guesswork with off brands. Get genuine parts with exact fit and true factory performance. Shop with confidence today at JeepPartsDeal.com.
This part known as the Dodge Charger Wheel Bearing is one of the vital parts that boost up the Dodge Charger vehicles' reliability and performance. Intended to let the wheel rotation happen, the Wheel Bearing is one of the essential components in a car while it is in operation. This component comes in different variations; such as the regular unit assembly with the ABS sensor incorporated; therefore, the Dodge Charger Wheel Bearing is suitable for different Charger models that users might prefer for their vehicles. A good Wheel Bearing lowers the amount of friction experienced during car operation thus enhancing the Charger brand's performance mainly because it is a high-performance car. In the same way, the Dodge Charger Wheel Bearing is designed to provide durability in responding to the day to day tasks of any vehicle owner. Other design characteristics like the option for C type tapered roller bearings enable regular checks and correct greasing of the parts to maximize performance for safety. This means that, the Wheel Bearings are supposed to be very much maintained since worn or loose Wheel Bearings will result in noise and vibration that will be translating to compromised driving. In general, the Dodge Charger Wheel Bearing is one of the outstanding products on the automotive market that matches reliability and performance criteria, as well as plays one of the central roles in automotive functionality for the owners of Dodge Charger cars.
Dodge Charger Wheel Bearing Parts and Q&A
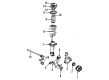
- Q: How to Maintain and Repair Wheel Bearings on Dodge Charger?A:The first step for wheel bearing work is to raise and support the vehicle. Your first step for AWD cars is to undo the nuts on the wheel mounting bolts and then pull off the whole tire and wheel assembly. After the helper uses the brake pedal to hold the hub in place, remove the hub nut attached to the axle half shaft and move the brake rotor aside. Take out the bolts holding the hub and bearing onto the knuckle, then pull the hub and bearing off the axle half shaft. RWD also starts by removing the wheel and tire and exposed the front brake rotor. Raise the bonnet safely, remove the dust cover without damaging the hub and then unbolt the hub nut and pull the hub and bearing free from the spindle. Be certain that the isolation washer is available, without damage, before you mount the hub and bearing to the axle half shaft and put the assembly onto the knuckle. Install each bolt and tighten them to 68 Nm. Replace the rotor, caliper and adapter assembly and use someone else to assist as you install the hub nut on the rotor, then tighten it to 213 Nm. After installing the wheel and tire, set the wheel mounting nuts to 150 Nm. Next, lower the car, pump your brakes a few times for a strong brake feel, check and adjust the brake fluid and finally do a road test. Check the magnetic encoder for any harmed area and get rid of any bits of steel before setting the hub and bearing onto the knuckle spindle. Put in the hub nut and tighten it to 250 Nm, then put back the brake rotor, caliper and adapter assembly. Add a new dust cap to the outer part of the coupling, put the wheels back on, snug the mounting nuts to 150 Nm torque, lower the car, press the brake a few times, check the brake fluid level and drive the car briefly to check it functions normally.
- Q: How to Maintain and Fix a Wheel Bearing on Dodge Charger?A:For servicing or repairing the wheel bearing of an AWD car, it should be raised and supported first. After that, loosen the three wheel nuts and take the tire and wheel assembly off of the vehicle. Braking the wheel prevents the hub from rotating, so that you can take out the nut holding the hub to the axle half shaft. Unlock and take out the front brake rotor. Then, remove all four of the bolts holding the hub and bearing onto the knuckle. Then, slide the hub and bearing off the axle half shaft and knuckle.


Related Dodge Charger Parts
 Dodge Charger Control Arm
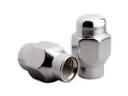 Dodge Charger Lug Nuts
 Dodge Charger Ball Joint
 Dodge Charger Steering Knuckle
 Dodge Charger Wheel Hub
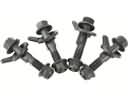 Dodge Charger Camber and Alignment Kit
 Dodge Charger Coil Springs
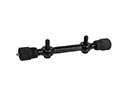 Dodge Charger Control Arm Shaft Kit
 Dodge Charger Crossmember Bushing
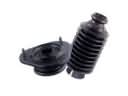 Dodge Charger Shock and Strut Boot
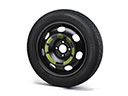 Dodge Charger Spare Wheel
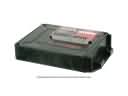 Dodge Charger Suspension Control Module