JeepParts
My Garage
My Account
Cart
OEM Dodge Dakota Windshield
Glass Windshield- Select Vehicle by Model
- Select Vehicle by VIN
Select Vehicle by Model
orMake
Model
Year
Select Vehicle by VIN
For the most accurate results, select vehicle by your VIN (Vehicle Identification Number).
2 Windshields found

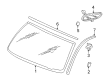
Dodge Dakota Windshield, Front Part Number: 5083964AC

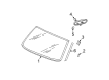
Dodge Dakota Windshield, Front Part Number: 5139096AB
Dodge Dakota Windshield
Choose OEM Windshield that meet Dodge factory standards. Dodge designs and tests every component for precision and durability. Each Windshield follows strict manufacturing steps to lock in quality and fit. If your Dodge Dakota matters to you, OEM parts make the smart choice. You'll get the exact look, feel, and performance you expect. Shop genuine Dakota parts at the highly competitive prices online. Enjoy a manufacturer's warranty, a hassle-free return policy, and rapid delivery. No more guesswork with off brands. Get genuine parts with exact fit and true factory performance. Shop with confidence today at JeepPartsDeal.com.
A Dodge Dakota Windshield exists as a critical element that boosts the reliability performance along with stability in Dodge Dakota vehicles. This Windshield design excellence originates from laminated safety glass construction where protective plastic covers two curved glass components to provide both visibility and safety to all vehicle occupants. This design cuts down air resistance to enhance both aerodynamic performance and fuel efficiency which makes the Dakota stand out among other market competitors. The Windshield works with different Dodge Dakota vehicles to protect drivers from environmental dangers and flying debris so they can see clearly during every driving condition. Sierra Windshield maintenance for Dodge Dakota vehicles needs attention because small Windshield flaws create safety and visual problems. Owners of Dodge automobile Windshields need to allocate between $110 and $140 to replace their windshield because it stands as a vital element of vehicle maintenance. The automaker car component provides special features for view distortion prevention which improve driver safety by combining safety features with driving comfort. The car part stands as an essential part for any model owner through its perfect union of dependable functionality by protecting drivers both in safety and enjoyment of their time behind the wheel.
Dodge Dakota Windshield Parts and Q&A
- Q: How Should You Prepare for a Windshield Repair on Dodge Dakota?A:Before you begin, review the warnings and cautions given in the repair manual. Take out the screws holding the side windshield molding to the a-pillars and get rid of the molding. Take out the rear view mirror. After that, detach the cowl grille and remove the a-pillar trim panels. After that, carefully pull out the headliner. With a cut-out wire in the windshield or an alternative, split the adhesive. The final step is to gently take out the windshield.
- Q: How to Effectively Remove and Install a Windshield on Dodge Dakota?A:Before you take off the windshield, take off the rear view mirror and the cowl grille. When the doors are open, gently lift the Weather Strip from the side windshield moldings and take off the screws fastening the moldings to the A-pillars. Using a cold knife, remove the urethane bonding glued to the windshield on the roof and then use a long knife to remove the urethane bonding from the wall within the cab at the base of the windshield. After installing the tires, let the urethane sit for 24 hours before using the vehicle. Reduce pressure in the passenger space by rolling the front door glass down and, if it has one, opening the rear glass slider. Eliminate extra coats of sealant from the windshield fence, leaving 1-2 mm in height and add any missing or broken border pieces. Place the windshield replacement in the frame and mark it at the support spacers so you know where they belong when removing it. Once inside up on a padded work surface, work on the windshield with blocks, use Mopar Glass Cleaner and a cloth to clean the glass and use the clear glass primer on the edges. Connect the header molding to the windshield and after that, apply pinchweld primer around the windshield fence and make sure it dries for at least three minutes. Use urethane to maker a 13mm high and 10mm broad bead along the edge of the glass. The bead on the bottom should be 7 mm inside the glass edge and shaped like a triangle. Use help to place the windshield in line with the opening, match the marks on the sides and lower the glass on the fence wherever the A-pillars are marked. After removing any extra urethane from the exterior, use Mopar Super Clean or another product to clean it and place a piece of masking tape over the molding while urethane cures. Screw in new mounts for the side windshield moldings, set the weather strip, reattach the cowl grille and attach the rear view mirror. After letting the urethane set, eliminate the strips of tape and check the repair by pouring some water on it.


Related Dodge Dakota Parts
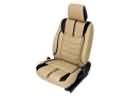 Dodge Dakota Seat Covers
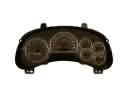 Dodge Dakota Instrument Cluster
 Dodge Dakota Air Deflector
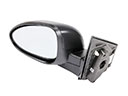 Dodge Dakota Car Mirror
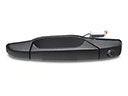 Dodge Dakota Exterior Door Handle
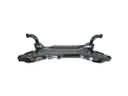 Dodge Dakota Front Cross-Member
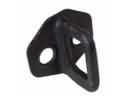 Dodge Dakota Front Door Striker
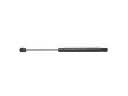 Dodge Dakota Lift Support
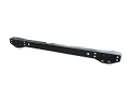 Dodge Dakota Rear Crossmember
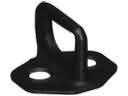 Dodge Dakota Rear Door Striker
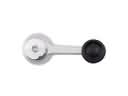 Dodge Dakota Window Crank Handle
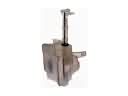 Dodge Dakota Windshield Washer Fluid Reservoir