JeepParts
My Garage
My Account
Cart
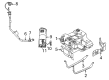
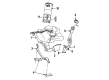
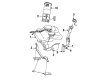
OEM Dodge Intrepid Fuel Level Sensor
Gas Gauge Sensor- Select Vehicle by Model
- Select Vehicle by VIN
Select Vehicle by Model
orMake
Model
Year
Select Vehicle by VIN
For the most accurate results, select vehicle by your VIN (Vehicle Identification Number).
4 Fuel Level Sensors found


Dodge Intrepid Fuel Gauge Sending Unit Part Number: 5003959AB
$64.81 MSRP: $95.40You Save: $30.59 (33%)Ships in 1-2 Business Days
Dodge Intrepid Fuel Gauge Sending Unit Part Number: 5003959AC
$75.22 MSRP: $95.40You Save: $20.18 (22%)Ships in 1-2 Business Days
Dodge Intrepid Fuel Gauge Sending Unit Part Number: 5014025AA
Dodge Intrepid Fuel Pump Part Number: 4897428AB
Dodge Intrepid Fuel Level Sensor
Choose OEM Fuel Level Sensor that meet Dodge factory standards. Dodge designs and tests every component for precision and durability. Each Fuel Level Sensor follows strict manufacturing steps to lock in quality and fit. If your Dodge Intrepid matters to you, OEM parts make the smart choice. You'll get the exact look, feel, and performance you expect. Shop genuine Intrepid parts at the highly competitive prices online. Enjoy a manufacturer's warranty, a hassle-free return policy, and rapid delivery. No more guesswork with off brands. Get genuine parts with exact fit and true factory performance. Shop with confidence today at JeepPartsDeal.com.
Dodge Intrepid Fuel Level Sensor Parts and Q&A
- Q: How to Service and Repair a Fuel Level Sensor on Dodge Intrepid?A:Before you can work on the fuel level sensor, take out the fuel pump module. Push the retaining tab down to remove the fuel pump/fuel level sensor connector from the bottom of the fuel pump module's electrical connector. After that, take out the clip that holds the wire terminal in place and notice where the terminals of the fuel level sensor wires are located. Either use special tool 7812 or an identical one to push the fuel level sensor wire and ground terminals free from the connector. Push the fuel level sensor down with a flathead screwdriver that is inserted underneath it and between the fuel pump module and the fuel level sensor housing. Slide both ends of the fuel level sensor wires through the inside of the fuel pump module, then pull the fuel level sensor out of the installation channel. While installing, put the wires from the fuel level sensor into the bottom of the standpipe and wrap the wires into the groove behind the sensor. As you insert the wires into the standpipe, lift the fuel level sensor up the installation channel and ensure the locking tab hooks onto the standpipe. Then insert the fuel level sensor wires into their connector by pushing them up and pulling them down, ensuring everything is locked in place and the right wires are in position. After that, slide the retaining clip onto the connector, raise the fuel pump/fuel level sensor part up into the fuel pump module's electrical connector and replace the fuel pump module.

Related Dodge Intrepid Parts
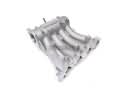 Dodge Intrepid Intake Manifold
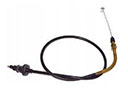 Dodge Intrepid Accelerator Cable
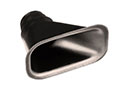 Dodge Intrepid Air Duct
 Dodge Intrepid Air Filter
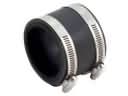 Dodge Intrepid Air Intake Coupling
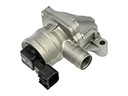 Dodge Intrepid Air Pump Check Valve
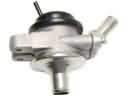 Dodge Intrepid Diverter Valve
 Dodge Intrepid Fuel Filler Hose
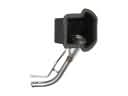 Dodge Intrepid Fuel Filler Neck
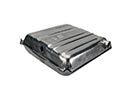 Dodge Intrepid Fuel Tank
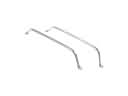 Dodge Intrepid Fuel Tank Strap
 Dodge Intrepid Gas Cap