JeepParts
My Garage
My Account
Cart
OEM Dodge Intrepid Shock Absorber
Suspension Shock Absorber- Select Vehicle by Model
- Select Vehicle by VIN
Select Vehicle by Model
orMake
Model
Year
Select Vehicle by VIN
For the most accurate results, select vehicle by your VIN (Vehicle Identification Number).
1 Shock Absorber found


Dodge Intrepid Strut, Rear Part Number: 4895001AF
Dodge Intrepid Shock Absorber
Choose OEM Shock Absorber that meet Dodge factory standards. Dodge designs and tests every component for precision and durability. Each Shock Absorber follows strict manufacturing steps to lock in quality and fit. If your Dodge Intrepid matters to you, OEM parts make the smart choice. You'll get the exact look, feel, and performance you expect. Shop genuine Intrepid parts at the highly competitive prices online. Enjoy a manufacturer's warranty, a hassle-free return policy, and rapid delivery. No more guesswork with off brands. Get genuine parts with exact fit and true factory performance. Shop with confidence today at JeepPartsDeal.com.
One essential component in the Dodge Intrepid suspension framework is the Shock Absorber which maintains excellent performance alongside outstanding dependability throughout all Dodge Intrepid models built from 1993 through 2004. The Shock Absorber works to absorb shock impulses and reduce vibrations so the vehicle handles more smoothly across rough roads. Both twin-tube and mono-tube shock absorbers exist on Dodge Intrepid models but the mono-tube represents the better choice because it excels at heat dissipation along with performance improvement. Position Sensitive Damping (PSD) and Acceleration Sensitive Damping (ASD) technology together with enhanced designs using electrorheological and magnetorheological dampers provide advanced capabilities for the Shock Absorber to optimize comfort and control in diverse driving conditions. Through its vital function in vehicle performance improvement and safety management the Dodge Intrepid Shock Absorber designs the sedan for better stability control with enhanced responsiveness. Drivers of Dodge Intrepid get optimized performance alongside comfort features because this sedan functions across its three trim models Base, ES and R/T. The Dodge Intrepid Shock Absorber earns positive market recognition through its dependable driving system which delivers excellent performance quality to users. The the automaker model presents itself as a flexible solution for customers looking for both large and quick full-sized sedans through its superior Shock Absorber technology.
Dodge Intrepid Shock Absorber Parts and Q&A
- Q: How to Assemble the Rear Shock Absorber on Dodge Intrepid?A:Make certain all the components, especially the mounting surfaces, are free from debris before starting to assemble your rear strut. Put the spring in such a way that the sleeve faces upward as instructed by the manufacturer. Put the spring in the position recommended from disassembly to simplify assembly. Put the lower spring isolator on the strut, then line up their steps. Put the strut down through the bottom of the coil spring and stop when the bottom spring seat reaches the spring's lower end, aligned with the step in the lower seat. Now, hold it in place with a clamp. Then, fit the jounce bumper under the dust shield from underneath and make sure it locks into place above. Place the dust shield and jounce bumper in the bottom of the upper strut mount and snap the dust shield into place, so it can rotate without coming undone. Install the upper mount, dust shield and jounce bumper on the strut shaft so that the center rear mounting stud lines up with the stabilizer bar attaching link bracket. First install the top strut mount onto the strut shaft, using the strut shaft nut and a Strut Shaft Socket, Special Tool 6864, to stop the shaft from turning as you screw the nut on to 75 Nm (55 ft. lbs.). With the release of tension, back off the compressor and synchronize the upper mount, spring and strut again. Also, remove the clamp from the lower end of the coil spring and strut, roll back the spring compressor hooks and take out the strut assembly from the compressor.

Related Dodge Intrepid Parts
 Dodge Intrepid Axle Beam Mount
 Dodge Intrepid Axle Pivot Bushing
 Dodge Intrepid Coil Springs
 Dodge Intrepid Control Arm Bolt
 Dodge Intrepid Control Arm Bushing
 Dodge Intrepid Crossmember Bushing
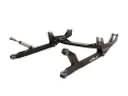 Dodge Intrepid Radius Arm
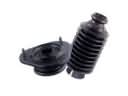 Dodge Intrepid Shock and Strut Boot
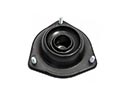 Dodge Intrepid Strut Mounts
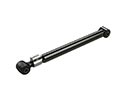 Dodge Intrepid Suspension Strut Rod
 Dodge Intrepid Sway Bar Bracket
 Dodge Intrepid Sway Bar Link