JeepParts
My Garage
My Account
Cart
OEM Dodge Ram 1500 Fuse Box
Fuse Holder Box- Select Vehicle by Model
- Select Vehicle by VIN
Select Vehicle by Model
orMake
Model
Year
Select Vehicle by VIN
For the most accurate results, select vehicle by your VIN (Vehicle Identification Number).
12 Fuse Boxes found


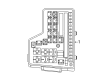
Dodge Ram 1500 Junction Block Part Number: 56045433AI
$686.21 MSRP: $1045.00You Save: $358.79 (35%)


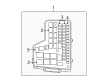
Dodge Ram 1500 Fuse & Relay Box Part Number: 4692123AH
$891.74 MSRP: $1365.00You Save: $473.26 (35%)Ships in 1-2 Business Days
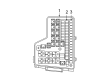
Dodge Ram 1500 Distribution Box Part Number: 68028001AE
$671.35 MSRP: $1010.00You Save: $338.65 (34%)Ships in 1-2 Business Days
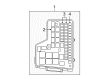
Dodge Ram 1500 Fuse & Relay Box Part Number: 4692118AL
$1118.68 MSRP: $1685.00You Save: $566.32 (34%)Ships in 1-2 Business DaysDodge Ram 1500 Fuse & Relay Box Part Number: 68028002AE
$1229.18 MSRP: $1850.00You Save: $620.82 (34%)Ships in 1-2 Business DaysDodge Ram 1500 Fuse & Relay Box Part Number: 56049888AR
$1295.48 MSRP: $1950.00You Save: $654.52 (34%)Ships in 1-2 Business Days
Dodge Ram 1500 Fuse & Relay Box Part Number: 4692194AH


Dodge Ram 1500 Junction Block Part Number: 5026033AA
Dodge Ram 1500 Junction Block Part Number: RL005475AB
Dodge Ram 1500 Junction Block Part Number: 68005479AB
Dodge Ram 1500 Junction Block Part Number: 68005473AB
Dodge Ram 1500 Fuse & Relay Box Part Number: 4692046AP
Dodge Ram 1500 Fuse Box
Choose OEM Fuse Box that meet Dodge factory standards. Dodge designs and tests every component for precision and durability. Each Fuse Box follows strict manufacturing steps to lock in quality and fit. If your Dodge Ram 1500 matters to you, OEM parts make the smart choice. You'll get the exact look, feel, and performance you expect. Shop genuine Ram 1500 parts at the highly competitive prices online. Enjoy a manufacturer's warranty, a hassle-free return policy, and rapid delivery. No more guesswork with off brands. Get genuine parts with exact fit and true factory performance. Shop with confidence today at JeepPartsDeal.com.
Dodge Ram 1500 Fuse Box Parts and Q&A
- Q: How to Service and Repair a Fuse Box on Dodge Ram 1500?A:Before servicing or repairing the Integrated Power Module, first take out the negative and positive Battery Cables. Release the cover and undo the nut at the B+ terminal of the integrated power module, then remove the cable from that terminal. Remove the gray connector from the integrated power module. Erase the screw and bolt from the bolts on the sprayer. Secure the module with your hands, lift it from the wall mounting bracket and place it upside down so you can see the plugs below. Push the locking tab down and turn the connector arm toward the outside until it comes free. Put the integrated power module on a bench and take out the four screws that hold the front control module in place before pulling the front control module straight off. Attach the front control module onto the integrated power module receptacle by pushing it on straight and secure it with the four retaining screws tightened to 30 in. lbs. plus or minus 5. All electrical connectors are colored to help you quickly differentiate them. Push straight on the electrical connectors and rotate the connector arm until it snaps into place. Take the integrated power module with your hands and set it on the Battery Tray, putting in the retaining bolt and screw at the end. Add the gray connector to the integrated power module housing, place the B+ terminal cable and nut onto the B+ terminal, snap the cover back on and reattach both battery cables.

Related Dodge Ram 1500 Parts
 Dodge Ram 1500 Starter Relay
 Dodge Ram 1500 Radiator Fan Relay
 Dodge Ram 1500 Cooling Fan Relay
 Dodge Ram 1500 Daytime Running Light Relay
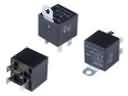 Dodge Ram 1500 Fuel Pump Relay
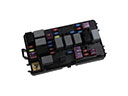 Dodge Ram 1500 Fuse
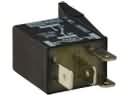 Dodge Ram 1500 Headlight Relay
 Dodge Ram 1500 Horn Relay
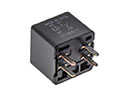 Dodge Ram 1500 HVAC Relay
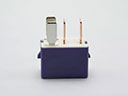 Dodge Ram 1500 Ignition Relay
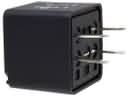 Dodge Ram 1500 Relay
 Dodge Ram 1500 Relay Block