JeepParts
My Garage
My Account
Cart
OEM Dodge Ram 1500 Van Car Speakers
Audio Speakers- Select Vehicle by Model
- Select Vehicle by VIN
Select Vehicle by Model
orMake
Model
Year
Select Vehicle by VIN
For the most accurate results, select vehicle by your VIN (Vehicle Identification Number).
6 Car Speakers found

Dodge Ram 1500 Van Speaker Part Number: 56043119AA

Dodge Ram 1500 Van Speaker Part Number: 56043100AA

Dodge Ram 1500 Van Speaker Part Number: 56043016
Dodge Ram 1500 Van Speaker Part Number: 56043015AB
Dodge Ram 1500 Van Speaker Part Number: 56043013AB
Dodge Ram 1500 Van Speaker Part Number: 56043017AC
Dodge Ram 1500 Van Car Speakers
Choose OEM Car Speakers that meet Dodge factory standards. Dodge designs and tests every component for precision and durability. Each Car Speakers follows strict manufacturing steps to lock in quality and fit. If your Dodge Ram 1500 Van matters to you, OEM parts make the smart choice. You'll get the exact look, feel, and performance you expect. Shop genuine Ram 1500 Van parts at the highly competitive prices online. Enjoy a manufacturer's warranty, a hassle-free return policy, and rapid delivery. No more guesswork with off brands. Get genuine parts with exact fit and true factory performance. Shop with confidence today at JeepPartsDeal.com.
Dodge Ram 1500 Van Car Speakers Parts and Q&A
- Q: How to replace the rear panel Car Speakers on Dodge Ram 1500 Van?A:Before you start, you should first loosen and pull the negative battery cable away from the chassis. If your speaker doesn't have a cargo trim for cabinets, remove the two screws holding the bracket in place and gently pull the bracket off to reveal the body wire harness connector and disconnect it. After that, unscrew the four nuts fixing the grille to the back of the bracket and take it away. Take out the four screws connecting the speaker to the front of the bracket and remove the speaker. If your model has a cargo trim, begin by unattaching the negative battery cable, next remove the trim piece from the rear panel and remove the body harness connector from the speaker connector receptacle. Disconnect four nuts holding the speaker grille to the rear of the trim panel and then take away the grille. Take off the four screws keeping the speaker in place on the back panel trim and lift out the speaker. If installing without using the cargo compartment trim, set the speaker on the lower rear part of the bracket, position the grille and secure everything with 2.2 Nm (20 in. lbs.) nuts. Attach the body wire harness connector back, position the bracket on the rear panel reinforcements, attach with the two screws at 2.2 Nm (20 in. lbs.) and only after that, reconnect the battery negative cable. To do installation with the cargo compartment trim on, attach the speaker to the rear part of the trim panel, use four screws to secure it at 2.2 Nm (20 in. lbs.), place the grille over the speaker and secure it with four nuts again at 2.2 Nm (20 in. lbs.). Attach the body wire harness connector again, set the trim panel into place at the back and join the negative battery cable once more.
- Q: How to replace the front door speaker in Car Speakers on Dodge Ram 1500 Van?A:The first step to replacing the front door speaker is to cut loose and isolate the battery's negative cable. Uninstall the trim panel on the front door, then unscrew the four screws holding the speaker to the front door panel inside. Unplug the speaker wire harness connector from the door's connector after pulling out the speaker far enough to do so. Take out the inner panel at the front door and pull the speaker from it. At installation, connect the new speaker to the front door inner panel and join the speaker wire harness connector to the same point on the front door wire harness connector. Set the speaker in the mounting hole and tighten each of the four screws to 4 Nm (35 in. lbs.). Once all the checks are done, reattach the trim to the front door and link the battery negative cable again.


Related Dodge Ram 1500 Van Parts
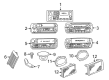
 Dodge Ram 1500 Van Dash Panel
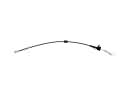 Dodge Ram 1500 Van Door Latch Cable
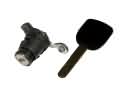 Dodge Ram 1500 Van Door Lock Cylinder
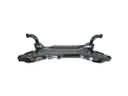 Dodge Ram 1500 Van Front Cross-Member
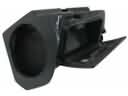 Dodge Ram 1500 Van Glove Box
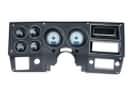
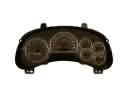 Dodge Ram 1500 Van Instrument Cluster
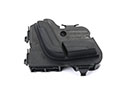 Dodge Ram 1500 Van Seat Switch
 Dodge Ram 1500 Van Speedometer
 Dodge Ram 1500 Van Trunk Lock Cylinder
 Dodge Ram 1500 Van Window Regulator
 Dodge Ram 1500 Van Windshield Washer Nozzle
 Dodge Ram 1500 Van Wiper Pivot