JeepParts
My Garage
My Account
Cart
OEM Dodge Ram 2500 Hydraulic Hose
Brake Hydraulic Line- Select Vehicle by Model
- Select Vehicle by VIN
Select Vehicle by Model
orMake
Model
Year
Select Vehicle by VIN
For the most accurate results, select vehicle by your VIN (Vehicle Identification Number).
12 Hydraulic Hoses found


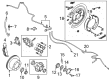
Dodge Ram 2500 Flex Hose, Rear Driver Side Part Number: 52121635AF
$47.33 MSRP: $71.65You Save: $24.32 (34%)

Dodge Ram 2500 Flex Hose, Rear Passenger Side Part Number: 52121634AG
$52.98 MSRP: $80.15You Save: $27.17 (34%)


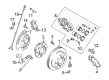
Dodge Ram 2500 Flex Hose, Front Passenger Side Part Number: 52010312AE
$69.74 MSRP: $103.00You Save: $33.26 (33%)


Dodge Ram 2500 Flex Hose, Front Driver Side Part Number: 52010313AG
$78.97 MSRP: $117.00You Save: $38.03 (33%)
Dodge Ram 2500 Flex Hose, Rear Center Part Number: 52121118AD
$601.12 MSRP: $911.00You Save: $309.88 (35%)Ships in 1-2 Business Days
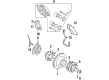
Dodge Ram 2500 Brake Hose Part Number: 52009945AD
$447.57 MSRP: $633.00You Save: $185.43 (30%)Ships in 1-2 Business Days
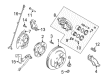
Dodge Ram 2500 Flex Hose, Front Driver Side Part Number: 52010311AF
$90.51 MSRP: $120.00You Save: $29.49 (25%)Ships in 1-2 Business Days
Dodge Ram 2500 Flex Hose Part Number: 52009575AE
$218.28 MSRP: $277.00You Save: $58.72 (22%)Ships in 1-2 Business Days

Dodge Ram 2500 Brake Hose, Rear Center Part Number: 52121636AC

Dodge Ram 2500 Flex Hose Part Number: 4636392AB
Dodge Ram 2500 Flex Hose, Front Passenger Side Part Number: 52010310AD
Dodge Ram 2500 Flex Hose Part Number: 52008870AC
Dodge Ram 2500 Hydraulic Hose
Choose OEM Hydraulic Hose that meet Dodge factory standards. Dodge designs and tests every component for precision and durability. Each Hydraulic Hose follows strict manufacturing steps to lock in quality and fit. If your Dodge Ram 2500 matters to you, OEM parts make the smart choice. You'll get the exact look, feel, and performance you expect. Shop genuine Ram 2500 parts at the highly competitive prices online. Enjoy a manufacturer's warranty, a hassle-free return policy, and rapid delivery. No more guesswork with off brands. Get genuine parts with exact fit and true factory performance. Shop with confidence today at JeepPartsDeal.com.
Dodge Ram 2500 Hydraulic Hose Parts and Q&A
- Q: How to Effectively Service and Repair a Hydraulic Hose on Dodge Ram 2500?A:First, raise and support the vehicle and afterward, take off the heat shield that covers the hydraulic line to work on the hydraulic hose linkage. After that, take out the two nuts securing the slave cylinder to the clutch housing and remove that cylinder. Take the plastic clips off the hydraulic line where it meets both the lower and upper dash panels. For this step, place the vehicle on very low stands and pull the connector of the clutch pedal interlock switch. Take out the rod pin from the Clutch Master Cylinder and don't forget to tighten the cap on the reservoir tank so it doesn't spill. Take out the nuts from the clutch master cylinder bracket and detach the clutch cylinders, reservoir and connecting lines from your car. Place the cylinders and line in the engine space so the clutch hydraulic line sits against the dash panel behind the engine hoses and wires. Add some grease to the inside diameter of the push rod eye, set the clutch master cylinder in place on the dashboard and tighten the nuts with 28 Nm (21 ft. lbs.). Insert the push rod pin and click the clutch pedal position interlock switch back into the car. Use the plastic clips on the top of the dash panel to secure the hydraulic line. Again lift the car, place the slave cylinder, have its rod seat in the release lever and twist the included bolts with 23 Nm (17 ft. lbs. of force). Should you install a new clutch linkage, join the hydraulic line of the clutch to its slave cylinder, making sure it is never disconnected once connected. Operation of the linkage should be tested once the heat shield is placed properly over the hydraulic line.
- Q: How to Install a Hydraulic Hose in an Engine Compartment on Dodge Ram 2500?A:Install the pipes on the cylinders, moving them in the engine compartment so the clutch hydraulic tube aligns with the dash panel and stays behind all other engine wiring and hoses. Spread a little grease on the inside edge of the master cylinder push rod eye, then connect the Clutch Master Cylinder (1) to the dash and secure it with a torque of 28 Nm (21 ft. lbs.). After that, install the clutch master cylinder push rod pin (3) and link up the connector for the clutch pedal position interlock switch (2). Attach the plastic clips under the lower dash panel flange and on top at the stud for the hydraulic line, seating it firmly in the dash panel. Raise the vehicle and fit the slave cylinder (2) so the rod is securely in place within the release lever, then prepare the slave cylinder nuts and fix them to 23 Nm (17 ft. lbs.). Once a clutch linkage change is being made, hook up the clutch hydraulic line to the slave cylinder before rotating the flywheel, remembering not to later remove the line. After that, put the heat shield on the hydraulic line and check if the linkage is working properly after running it several times.


Related Dodge Ram 2500 Parts
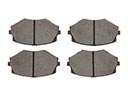 Dodge Ram 2500 Brake Pads
 Dodge Ram 2500 ABS Control Module
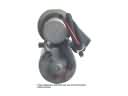 Dodge Ram 2500 ABS Pump And Motor Assembly
 Dodge Ram 2500 Brake Caliper Bolt
 Dodge Ram 2500 Brake Caliper Bracket
 Dodge Ram 2500 Brake Caliper Piston
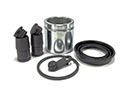 Dodge Ram 2500 Brake Caliper Repair Kit
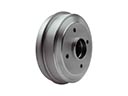 Dodge Ram 2500 Brake Drum
 Dodge Ram 2500 Brake Proportioning Valve
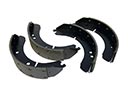 Dodge Ram 2500 Brake Shoe Set
 Dodge Ram 2500 Parking Brake Cable
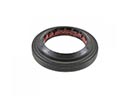 Dodge Ram 2500 Wheel Seal