JeepParts
My Garage
My Account
Cart
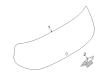
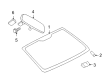
OEM Jeep Compass Windshield
Glass Windshield- Select Vehicle by Model
- Select Vehicle by VIN
Select Vehicle by Model
orMake
Model
Year
Select Vehicle by VIN
For the most accurate results, select vehicle by your VIN (Vehicle Identification Number).
26 Windshields found

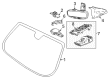
Jeep Compass Lift Gate Glass Part Number: 55112803AB
$194.12 MSRP: $340.00You Save: $145.88 (43%)Ships in 1-3 Business DaysJeep Compass Lift Gate Glass, Rear Part Number: 55112797AB
$230.00 MSRP: $340.00You Save: $110.00 (33%)Ships in 1-3 Business DaysJeep Compass Lift Gate Glass, Rear Part Number: 55112804AC
$427.09 MSRP: $622.00You Save: $194.91 (32%)Ships in 1-3 Business DaysJeep Compass Lift Gate Glass, Rear Part Number: 55112802AC
$427.09 MSRP: $622.00You Save: $194.91 (32%)Ships in 1-3 Business Days
Jeep Compass Windshield, Front Part Number: 55112753AD
$459.15 MSRP: $669.00You Save: $209.85 (32%)Ships in 1-3 Business DaysJeep Compass Windshield, Front Part Number: 55112739AD
$468.31 MSRP: $681.00You Save: $212.69 (32%)Ships in 1-3 Business DaysJeep Compass Windshield, Front Part Number: 55112788AE
$506.09 MSRP: $737.00You Save: $230.91 (32%)Ships in 1-3 Business DaysJeep Compass Windshield, Front Part Number: 68500764AB
$525.56 MSRP: $765.00You Save: $239.44 (32%)Ships in 1-3 Business DaysJeep Compass Windshiel Part Number: 68646563AA
$531.28 MSRP: $774.00You Save: $242.72 (32%)Ships in 1-2 Business DaysJeep Compass Windshield, Front Part Number: 68488320AA
$531.28 MSRP: $774.00You Save: $242.72 (32%)Jeep Compass Windshield, Front Part Number: 55112754AE
$540.44 MSRP: $788.00You Save: $247.56 (32%)Ships in 1-3 Business DaysJeep Compass Windshield, Front Part Number: 55112754AD
$540.44 MSRP: $788.00You Save: $247.56 (32%)Ships in 1-3 Business DaysJeep Compass Windshield, Front Part Number: 55112781AD
$556.47 MSRP: $810.00You Save: $253.53 (32%)Ships in 1-3 Business DaysJeep Compass Windshiel Part Number: 68646565AA
$574.79 MSRP: $838.00You Save: $263.21 (32%)Ships in 1-2 Business DaysJeep Compass Windshield, Front Part Number: 55112782AE
$577.08 MSRP: $840.00You Save: $262.92 (32%)Ships in 1-3 Business DaysJeep Compass Windshield, Front Part Number: 55112786AD
$586.24 MSRP: $852.00You Save: $265.76 (32%)Ships in 1-3 Business DaysJeep Compass Windshield, Front Part Number: 55112786AC
$586.24 MSRP: $852.00You Save: $265.76 (32%)Ships in 1-3 Business Days
Jeep Compass Windshield, Front Part Number: 68214873AA
$603.42 MSRP: $879.00You Save: $275.58 (32%)Ships in 1-3 Business DaysJeep Compass Windshield, Front Part Number: 55112752AD
$603.42 MSRP: $879.00You Save: $275.58 (32%)Ships in 1-3 Business DaysJeep Compass Windshiel Part Number: 68488322AB
$611.43 MSRP: $892.00You Save: $280.57 (32%)Ships in 1-2 Business Days
| Page 1 of 2 |Next >
1-20 of 26 Results
Jeep Compass Windshield
Choose OEM Windshield that meet Jeep factory standards. Jeep designs and tests every component for precision and durability. Each Windshield follows strict manufacturing steps to lock in quality and fit. If your Jeep Compass matters to you, OEM parts make the smart choice. You'll get the exact look, feel, and performance you expect. Shop genuine Compass parts at the highly competitive prices online. Enjoy a manufacturer's warranty, a hassle-free return policy, and rapid delivery. No more guesswork with off brands. Get genuine parts with exact fit and true factory performance. Shop with confidence today at JeepPartsDeal.com.
A Jeep Compass Windshield stands as an essential part of Jeep brand delivery which demonstrates their dedication to trustworthy and superior automobile performance. The Windshield provides both ideal sight and defense from debris and harsh weather conditions which ultimately enhances the safety features of the Compass during navigation. Safety laminated glass constructs the Windshield through two curved sheets that integrate a plastic interlayer that keeps visibility clear while reinforcing the structural framework. All Jeep Compass models need regular maintenance of their Windshield because an impaired glass pane severely compromises visibility but also reduces driving safety. The vehicle's efficient fuel consumption values result from both the Windshield's aerodynamically engineered design which decreases drag resistance during travel. The Jeep Compass Windshield serves as a performance-critical component which works with both first-generation and new second-generation vehicle models. The Jeep Compass Windshield stands out in the automotive market due to its advanced sound insulation technology and UV protection systems which make it the preferable choice for drivers who need safety and comfort in their vehicles. The Jeep Compass Windshield requires replacement expenses between $110 and $140 therefore consumers need to invest in premium products for maintaining the car's well-known road endurance and dependability. The the automaker model part serves to boost both operational performance and safety aspects of this widely applied compact SUV model.
Jeep Compass Windshield Parts and Q&A
- Q: How to Properly Install a Windshield on Jeep Compass?A:The windshield should only be used after waiting at least 24 hours for the urethane to settle. To avoid water leaks from pressing the passenger compartment, roll the front door glass down and open the rear slider glass if it is available. Apply a rigid plastic object along the windshield edge and remove most of the old bonding material, making sure to keep 1-2 mm intact, since this affects the paint and the way things join. Add support spacers where they are missing or damaged in the bottom part of the opening between the windshield and lower cowl. On a windshield that is not new, shave the old bead of adhesive to about one millimeter (0.04 inches) and remove any loose pieces. Install new spacers along the tops of the glass and place the lower spacer assemblies into the empty holes. Line up the windshield (1) so it is centered in the opening, supported by the side and lower spacers (2 & 3) and look at the spacers near the bottom (3) to ensure there is no more than the allowed roof gap between the top of the car and the windshield. Put tape around the windshield (1) for help with fixing and to check whether the gap is straight, cut the tape afterward and finally remove the windshield. Using a rag and solvent, clean and dry the part of glass (2) you are gluing and check the primer; if it is damaged, re-apply primer to the damaged spots. Coat the outside edge of the glass with primer (1) to a width of 15 mm (0.5 in.) (2) and let it dry for up to 10 minutes. For a fresh windshield, set the upper spacers in the upper glass edge (1), let the A-pillar spacers touch the glass (2) and lock the lower spacers (1) into the windshield channels from below. Put the windshield (2) in the middle of the opening, add adhesive tape, check that the gap is parallel and finally cut and remove the windshield after the tape. Clean and dry the area around the windshield, put primer on the surface you will be gluing and let it air dry for about 10 minutes. Slide the vacuum nozzle between the window and the seal to clean the inside of the area, flatten the old glue and rub down the around where you will place the new adhesive. For damaged areas, put on another thin coat of primer and air dry it for at least 10 minutes. Right in the center of the windshield, make sure to put a 9.5 mm wide and 12.7 mm high bead of sealant (7) from the material. Find the adhesive bead at the center and underside of the primed windshield (2), press the ends down and use the tape to guide the windshield in as you lift it into place. Position the windshield gently and let someone add the pressure to hold it in place; make sure only one hand is used for safety. The last step is to put in the cowl panel and the rear view mirror.

Related Jeep Compass Parts
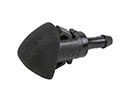 Jeep Compass Windshield Washer Nozzle
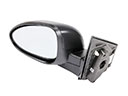 Jeep Compass Car Mirror
 Jeep Compass Hood Release Cable
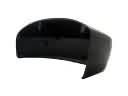 Jeep Compass Mirror Cover
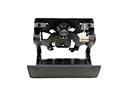 Jeep Compass Tailgate Handle
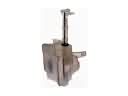 Jeep Compass Windshield Washer Fluid Reservoir
 Jeep Compass Windshield Wiper
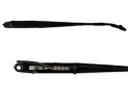 Jeep Compass Wiper Arm
 Jeep Compass Wiper Blade
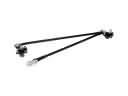 Jeep Compass Wiper Linkage
 Jeep Compass Wiper Motor
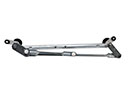 Jeep Compass Wiper Pivot