JeepParts
My Garage
My Account
Cart
OEM Jeep Patriot Windshield
Glass Windshield- Select Vehicle by Model
- Select Vehicle by VIN
Select Vehicle by Model
orMake
Model
Year
Select Vehicle by VIN
For the most accurate results, select vehicle by your VIN (Vehicle Identification Number).
2 Windshields found

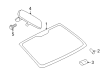
Jeep Patriot Windshield Part Number: 68003722AB
$603.42 MSRP: $879.00You Save: $275.58 (32%)Ships in 1-3 Business Days
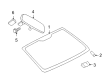
Jeep Patriot Windshield, Front Part Number: 68214873AA
$603.42 MSRP: $879.00You Save: $275.58 (32%)Ships in 1-3 Business Days
Jeep Patriot Windshield
Choose OEM Windshield that meet Jeep factory standards. Jeep designs and tests every component for precision and durability. Each Windshield follows strict manufacturing steps to lock in quality and fit. If your Jeep Patriot matters to you, OEM parts make the smart choice. You'll get the exact look, feel, and performance you expect. Shop genuine Patriot parts at the highly competitive prices online. Enjoy a manufacturer's warranty, a hassle-free return policy, and rapid delivery. No more guesswork with off brands. Get genuine parts with exact fit and true factory performance. Shop with confidence today at JeepPartsDeal.com.
The Jeep Patriot Windshield functions as a key instrument that heightens the reliability as well as performance levels of the Jeep Patriot compact SUV which stands out for its durable features and off-road abilities. Safety during driving depends on the Windshield which protects drivers and passengers while enhancing their sight through its design against environmental factors. Safety glass laminations form the Jeep Patriot Windshield through two curved glass layers bonded together with plastic film providing enhanced strength and observable clarity. The vehicle attains better fuel efficiency through its design which produces minimal air drag. The wide model compatibility for Jeep Patriot Windshields fits all Sport, Latitude and Limited trims through different production years to help vehicle owners protect the integrity of their vehicles. Vehicle maintenance requires focusing on Windshield upkeep since small damages to its structure affect windshield safety during driving. As a functional component of the Jeep Patriot Windshield costs between $110 and $140 which varies according to individual features that are available. The primary attributes of the Jeep Patriot Windshield make it notable among automotive component products because it performs well under extreme conditions while aiding vehicle aerodynamics. The the automaker model part plays a fundamental role in vehicle performance by combining high efficiency and safety benefits for the complete driving community.
Jeep Patriot Windshield Parts and Q&A
- Q: How to Properly Install a Windshield on Jeep Patriot?A:After installing the windshield, do not use the vehicle until you have allowed at least 24 hours for the urethane to set. Move down the left and right front door windows and let the back glass slider open if you can, to avoid a closed-up car which might lead to leaks. Leave about 1-2 mm of the bonding material on the fence, since getting it down too much can change how both the bond and paint turn out. Set the support spacers provided into the openings where they are needed beneath the windshield. After your windshield is already in place, level the previous bead of adhesive (1 mm) and get rid of excessive adhesive. Secure new spacers (1) onto the top of the glass and then slide lower spacer assemblies (4) into the indented holes below; make sure they are locked with the side that's not deep facing the top. Put the windshield (1) in the exactly middle of the car, with the side and lower spacers (2 & 3) underneath and set the lower spacers as required to match the roof gap's specification. Use tape to aid the last installation step, check the windshield gap is straight, cut the tape and remove the windshield. Give the glass (2) to be glued another cleaning with a suitable product, look for any spoiled primer and repair damaged spots with another layer of primer. Smear paint primer around the edge of the glass in a 15 mm (0.5 in.) strip (1) and leave it to dry in the air for 10 minutes (2). When replacing the windshield, hold four upper spacers (1) against the upper rim of the glass (2), apply four more from above onto the A-pillars and insert the lower spacer assemblies (1) into the slots, locking them into position. Put the windshield into position in the center of the car, use adhesive tape around the windshield, make sure the gap is parallel, remove the tape and then extract the windshield. Ensure the area you'll bond is clean and bare, apply primer to its surface and let it dry for about 10 minutes in the air. Brush and vacuum the space in the windshield and reduce the old sealant layer to 1 mm tall, then clean the re-glue area. Fix any part that is damaged and let the air-dry primer dry for about 10 minutes. Run a line of adhesive (1) resembling a rope from the bottom center, directly in the middle of the seal, using a triangular nozzle. Find the bead of adhesive at that spot on the windshield (2), press it flush with the glass, lift the windshield (2), then gently lay it in place as you press on it. To avoid damage to the windshield, only press it into place by yourself. After that, place the cowl panel above the engine and secure the rear view mirror.
- Q: How to Safely Remove a Windshield on Jeep Patriot?A:The first step is to read all warning and cautions about carrying out service. Start with the rear view mirror and move on to the cowl grille. After that, run a wire behind the windshield and slowly pull it away from the adhesive.


Related Jeep Patriot Parts
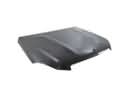 Jeep Patriot Hood
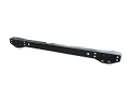 Jeep Patriot Rear Crossmember
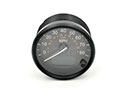 Jeep Patriot Speedometer
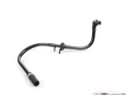 Jeep Patriot Brake Booster Vacuum Hose
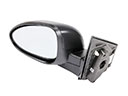 Jeep Patriot Car Mirror
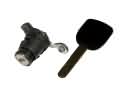 Jeep Patriot Door Lock Cylinder
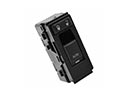 Jeep Patriot Door Lock Switch
 Jeep Patriot Hood Release Cable
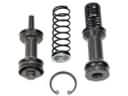 Jeep Patriot Master Cylinder Repair Kit
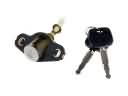 Jeep Patriot Trunk Lock Cylinder
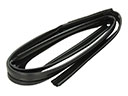 Jeep Patriot Window Run
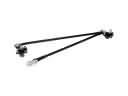 Jeep Patriot Wiper Linkage