JeepParts
My Garage
My Account
Cart
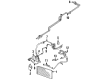
OEM 2000 Dodge Caravan A/C Expansion Valve
Air Conditioning Expansion Valve- Select Vehicle by Model
- Select Vehicle by VIN
Select Vehicle by Model
orMake
Model
Year
Select Vehicle by VIN
For the most accurate results, select vehicle by your VIN (Vehicle Identification Number).
2 A/C Expansion Valves found

2000 Dodge Caravan Expansion Valve Part Number: 4798682
$127.32 MSRP: $166.47You Save: $39.15 (24%)Product Specifications- Other Name: Valve - A/C Expansion; A/C Expansion Valve; Valve Assembly, A/C Expansion, Rear Unit, W/O - Rings; Valve, Auxiliary Unit Expansion, W/O - Rings; Valve A/C Expansion
- Item Weight: 0.90 Pounds
- Condition: New
- Fitment Type: Direct Replacement
- SKU: 4798682
- Warranty: This genuine part is guaranteed by Mopar's factory warranty.

2000 Dodge Caravan Expansion Valve Part Number: 4882342AB
Product Specifications- Other Name: Valve - A/C Expansion; A/C Expansion Valve
- Item Weight: 1.00 Pounds
- Item Dimensions: 4.2 x 3.1 x 1.3 inches
- Condition: New
- Fitment Type: Direct Replacement
- SKU: 4882342AB
- Warranty: This genuine part is guaranteed by Mopar's factory warranty.
2000 Dodge Caravan A/C Expansion Valve Parts and Q&A
- Q: What Preparations Are Essential Before Servicing an A/C Expansion Valve on 2000 Dodge Caravan?A: Make sure the fridge is empty before you near the expansion valve for service and repairs. First, take the battery negative cable off and drain the refrigerant from the air conditioning system. After that, remove the accessory drive belt and the upper generator bracket and pull apart the generator field wire connector. Bring the generator forward and take the ground wire out at the dash panel. After that, remove the nut holding the refrigerant line sealing plate to the expansion valve and take out the stud from the valve. With caution, remove the sealing plate assembly from the expansion valve to the vehicle's front, keeping the pilot tubes away from the sealing surfaces and then cover the openings. After loosening both screws holding the expansion valve to the evaporator sealing plate, remove the valve with the old O-rings inside. During installation, take out the older O-rings and add new ones to the refrigerant lines and to the evaporator sealing plate. Hand-start the stud into the expansion valve and tighten it to 7 - 11 Nm (64 - 96 in. lbs). Attach the expansion valve to the sealing plate and lock it in place using the screws tightened between 8 and 14 Nm (70 to 130 in. lbs.). From there, set the refrigerant lines and the sealing plate on the expansion valve, screwing the fastener to tighten. Thread the ground wire into the dash panel, slide the generator into the old position and attach the field wire connector. Attach the upper generator bracket and then put on the accessory drive belt. Once everything is done, evacuate the system, recharge it and after the expansion valve is installed and leaks are checked, perform the A/C test again.
Related 2000 Dodge Caravan Parts
 2000 Dodge Caravan Heater Core
 2000 Dodge Caravan Blower Motor
 2000 Dodge Caravan Blower Motor Resistor
 2000 Dodge Caravan A/C Accumulator
 2000 Dodge Caravan A/C Clutch
 2000 Dodge Caravan A/C Compressor Cut-Out Switches
 2000 Dodge Caravan A/C Condenser
 2000 Dodge Caravan A/C Hose
 2000 Dodge Caravan A/C Switch
 2000 Dodge Caravan Blower Control Switches
 2000 Dodge Caravan Evaporator
 2000 Dodge Caravan HVAC Pressure Switch