JeepParts
My Garage
My Account
Cart
OEM 2000 Dodge Viper Intake Manifold
Engine Intake Manifold- Select Vehicle by Model
- Select Vehicle by VIN
Select Vehicle by Model
orMake
Model
Year
Select Vehicle by VIN
For the most accurate results, select vehicle by your VIN (Vehicle Identification Number).
1 Intake Manifold found


2000 Dodge Viper Intake Manifold Part Number: 4763758
Product Specifications- Other Name: Manifold - Intake; Manifold Assembly, Intake, Partial; Manifold Intake
- Item Weight: 34.70 Pounds
- Condition: New
- Fitment Type: Direct Replacement
- SKU: 4763758
- Warranty: This genuine part is guaranteed by Mopar's factory warranty.
2000 Dodge Viper Intake Manifold Parts and Q&A
- Q: How to Remove and Install an Intake Manifold on 2000 Dodge Viper?A: To get access to the intake manifold, you should first take out the battery, let go of the fuel system pressure and purge the fuel rail. Get rid of the intake air temperature sensor hookup, separate the throttle body hoses and take out the air cleaner assembly. After that, take out the throttle cable, release the Crankcase Ventilation (CCV) hose and canister purge hose and separate the TPS electrical cable from the intake manifold. Take out the brake booster hose from the air intake plenum and cut the electrical and hose attachments from the Idle Air Control (IAC) motor. Remove the cover for the cowl and take out the electrical lines that come from the ignition coils and the two connectors above the area beneath the left rear plenum. Pull the open-end wrench on the ring of the quick connect fitting and gently disconnect the fuel hose from the fuel rail while a shop towel is carefully wrapped around the fuel hose and held tight. Remove the bolts connecting the intake manifold to the cylinder head, lift the intake manifold at the front and pull it out. Use a covering over the intake manifold when you are servicing it. The CCV hose should be put into the grommet before the intake manifold is installed which follows cleaning the base of the intake manifold after taking off its plastic covering. Position the intake manifold gaskets properly, then set the manifold on the engine and install the bolts to 1 Nm (10 in. lbs.) and then 11 Nm (95 in. lbs.). Put a little engine oil inside the chassis fuel tube end and slide the fuel supply hose onto it. Afterward, pull backward on the quick connect fitting to ensure a secure fit. Link the IAC electrical and hose connectors, the CCV and canister purge hoses to the intake plenum and the brake booster hose to the intake plenum as well. Attach the ignition coils to the two electrical connectors in the rear of the engine and after that, put in the cowl cover. The wiring connector goes to the TPS, the throttle cable is put in place and then the air cleaner and throttle body hose assemblies must be installed, connecting the intake air temperature sensor electrical connector to the air cleaner assembly. Once done, fix the battery and start the DRB III Scan Tool, using it to perform ASD Fuel System Test to pressurize the system and check for leaks. Because the Auto Shutdown (ASD) relay stays active for 7 minutes, you should record that it will only shut off when you take the ignition switch to OFF or Stop All Test is used or when it is turned off after 7 minutes.
Related 2000 Dodge Viper Parts
 2000 Dodge Viper Air Filter
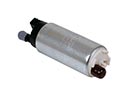 2000 Dodge Viper Fuel Pump
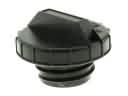 2000 Dodge Viper Gas Cap
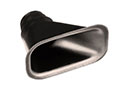 2000 Dodge Viper Air Duct
 2000 Dodge Viper Air Filter Box
 2000 Dodge Viper Fuel Injector O-Ring
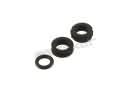 2000 Dodge Viper Fuel Injector Seal
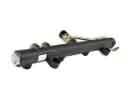 2000 Dodge Viper Fuel Rail
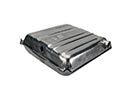 2000 Dodge Viper Fuel Tank
 2000 Dodge Viper Intake Manifold Gasket
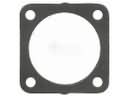 2000 Dodge Viper Throttle Body Gasket
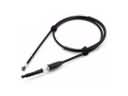 2000 Dodge Viper Throttle Cable