JeepParts
My Garage
My Account
Cart
OEM 2004 Jeep Grand Cherokee Cruise Control Servo
Cruise Control Servo Speed- Select Vehicle by Model
- Select Vehicle by VIN
Select Vehicle by Model
orMake
Model
Year
Select Vehicle by VIN
For the most accurate results, select vehicle by your VIN (Vehicle Identification Number).
1 Cruise Control Servo found


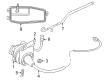
2004 Jeep Grand Cherokee Cruise Servo Part Number: 4669979
Product Specifications- Other Name: Servo - Speed Control; Cruise Control Servo; Actuator; Servo; Servo Speed Control
- Item Weight: 1.20 Pounds
- Item Dimensions: 5.4 x 4.9 x 4.9 inches
- Condition: New
- Fitment Type: Direct Replacement
- SKU: 4669979
- Warranty: This genuine part is guaranteed by Mopar's factory warranty.
2004 Jeep Grand Cherokee Cruise Control Servo Parts and Q&A
- Q: How to Install and Remove a Cruise Control Servo on 2004 Jeep Grand Cherokee?A: On my drone, you will find the speed control servo put on a bracket below the battery tray. The first step is to take out the negative and positive battery cables from the battery. Lift off the cover on top of the throttle body and pull the servo cable out of it. After that, remove the battery from the battery tray and remove the connecting wires from the tray. Loose the PDC in the battery tray and unplug the positive cable from the Power Distribution Center (PDC). Unscrew the four battery tray bolts and remember that one bolt goes to the bracket supporting the battery tray as you disconnect the battery sensor wire. You need to separate the vacuum tube at the servo vacuum hose fitting and the wire harness at the servo as well. If you pull out the servo and mounting bracket as one, undo the two nuts close to the right-front tire, remove the inner fender clips and gently pull the inner fender back for access. If the servo is going to be taken from its bracket, get rid of the two nuts that hold the servo sleeve to the bracket, pull out the speed control sleeve and servo from the bracket and lastly remove the clip keeping the cables in place. The servo motor can be detached from the mounting bracket or even taken off as a total unit. First, attach the servo to the bracket, make sure the hole in the cable connector lines up with the pin's hole and lastly use the clip to secure the cable to the servo. Gently place the studs through the bracket's holes, fit the servo cable mounting nuts and secure them with 8.5 Nm (75 in. lbs.) torque. If you attach the servo and bracket as one component, screw in both mounting nuts to a torque of 28 Nm ± 6 Nm (250 in. lbs. ± 50 in. lbs.). After that, join the vacuum line and the electrical wire to the servo and attach the servo wire to the throttle body. Place the battery tray and temperature sensor in position, connect the wiring to the tray and mount the battery. Last, connect the positive cable of your battery to the Power Distribution Center and the negative cable to the terminal on the battery. Before running the engine, press the accelerator pedal to see if you encounter any binds.
Related 2004 Jeep Grand Cherokee Parts
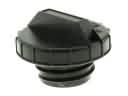 2004 Jeep Grand Cherokee Gas Cap
 2004 Jeep Grand Cherokee Fuel Filter
 2004 Jeep Grand Cherokee Fuel Tank
 2004 Jeep Grand Cherokee Fuel Filler Neck
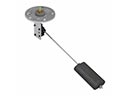 2004 Jeep Grand Cherokee Fuel Sending Unit
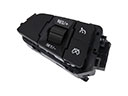 2004 Jeep Grand Cherokee Cruise Control Switch
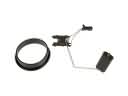 2004 Jeep Grand Cherokee Fuel Level Sensor
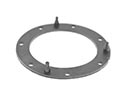 2004 Jeep Grand Cherokee Fuel Pump Gasket
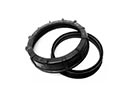 2004 Jeep Grand Cherokee Fuel Pump Seal
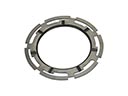 2004 Jeep Grand Cherokee Fuel Tank Lock Ring
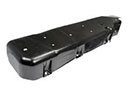 2004 Jeep Grand Cherokee Fuel Tank Skid Plate
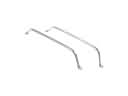 2004 Jeep Grand Cherokee Fuel Tank Strap