JeepParts
My Garage
My Account
Cart
OEM 2006 Chrysler 300 Fuel Level Sensor
Gas Gauge Sensor- Select Vehicle by Model
- Select Vehicle by VIN
Select Vehicle by Model
orMake
Model
Year
Select Vehicle by VIN
For the most accurate results, select vehicle by your VIN (Vehicle Identification Number).
2 Fuel Level Sensors found

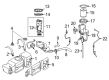
2006 Chrysler 300 Fuel Pump Gasket Part Number: 68304753AA
$33.39 MSRP: $47.75You Save: $14.36 (31%)Product Specifications- Other Name: O Ring - Fuel Pump And Level Unit; Fuel Pump Tank Seal; Fuel Pump Seal; Fuel Pump Assembly Seal; Gasket Fuel Pump
- Replaces: 57009306AA
- Item Weight: 0.50 Pounds
- Item Dimensions: 6.2 x 6.3 x 0.4 inches
- Condition: New
- Fitment Type: Direct Replacement
- SKU: 68304753AA
- Warranty: This genuine part is guaranteed by Mopar's factory warranty.


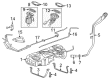
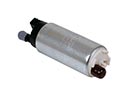
2006 Chrysler 300 Fuel Pump, Passenger Side Part Number: 5136023AF
$313.84 MSRP: $467.00You Save: $153.16 (33%)Product Specifications- Other Name: Module Kit - Pickup/Level Unit; Fuel Pump and Sender Assembly, Right; Fuel Transfer Unit; Fuel Level Sensor; Fuel Gauge Sending Unit; Module Kit includes Pickup, Sending Unit, Level Unit, and O-Ring.
- Position: Passenger Side
- Replaces: 5136023AB, RL136023AD, RL136023AC, 5136023AD, 5136023AE, 5136023AC
- Item Weight: 3.00 Pounds
- Item Dimensions: 14.9 x 11.5 x 8.0 inches
- Condition: New
- Fitment Type: Direct Replacement
- SKU: 5136023AF
- Warranty: This genuine part is guaranteed by Mopar's factory warranty.
2006 Chrysler 300 Fuel Level Sensor Parts and Q&A
- Q: How to Service and Repair a Fuel Level Sensor on 2006 Chrysler 300?A: Before servicing the fuel level sensor, disconnect the vehicle's negative battery cable and let the fuel pressure drop. After filling your tank to only half full, remove the module lock-ring carefully to avoid spills. Insert a 30" nylon tube with a hard nylon tip inside the fuel tank to drain a little fuel. Pull the foamed pad over the modules out of the way once the rear lower cushion is removed. Take out the electrical connector from the left side module and record its direction. With a special tool #9340, remove the lock ring at the left side module to drain fuel from this side of the tank, raising the part to place the hose in the tank. Take out the module, remove the connection from the bottom and pump the left side module. Lift off the top of the module and allow the fuel to flow by turning the bottom half to the side. Pull up the release tab, remove the fuel line and after that, remove the fuel return line (1) as well as the siphon return line (2). Unattach the plastic access panels in the floor pan on the right, then remove the fuel supply line from the module and mark the direction in which it was joined. Close the drain valve under the right side of the tank and remove its module lock ring by cycling tool #9340. Disconnect the fuel level sensor card by unlatching it, cut the tie straps on the fuel level hoses to take out the wiring harness for the card and unconnect the ground wire from the check valve and fuel pressure regulator. Put in the level sensor card first and ensure the locking tabs are fixed, after which route and tie strap the wiring harness to the hoses. Apply the hoses and wiring to the fuel tank, set the module so its marks line up and secure the module lock-ring using special tool #9340. Connect one end of the fuel line and install the plastic access covers over everything. Reconnect the fuel supply lines along with their wires and secure the level sensor card wire to the same fuel supply line. Position the left module top over the bottom, connect both fuel level sensor card connectors, align the module with its marks and use tool #9340 to secure the left module lock ring. Plug the electrical connector into the left side module, fit the plastic access cover into place, fold the foam pad back over and put in the lower seat cushion at the back. After that, top off the fuel tank, attach the negative battery cable, pressurize the fuel system using the scan tool and watch for any leaks.
Related 2006 Chrysler 300 Parts
 2006 Chrysler 300 Fuel Pump
 2006 Chrysler 300 Intake Manifold
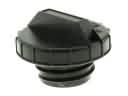 2006 Chrysler 300 Gas Cap
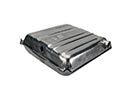 2006 Chrysler 300 Fuel Tank
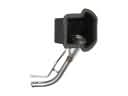 2006 Chrysler 300 Fuel Filler Neck
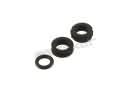 2006 Chrysler 300 Fuel Injector Seal
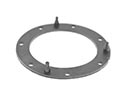 2006 Chrysler 300 Fuel Pump Gasket
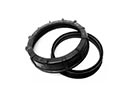 2006 Chrysler 300 Fuel Pump Seal
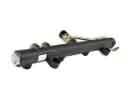 2006 Chrysler 300 Fuel Rail
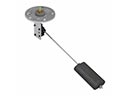 2006 Chrysler 300 Fuel Sending Unit
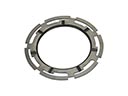 2006 Chrysler 300 Fuel Tank Lock Ring
 2006 Chrysler 300 Fuel Tank Strap