JeepParts
My Garage
My Account
Cart
OEM 2006 Chrysler Pacifica Cigarette Lighter
Car Cigarette Lighter- Select Vehicle by Model
- Select Vehicle by VIN
Select Vehicle by Model
orMake
Model
Year
Select Vehicle by VIN
For the most accurate results, select vehicle by your VIN (Vehicle Identification Number).
3 Cigarette Lighters found


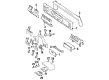
2006 Chrysler Pacifica Power Outlet, Front Part Number: 4685536
$27.72 MSRP: $40.15You Save: $12.43 (31%)Ships in 1-3 Business DaysProduct Specifications- Other Name: Lighter - Cigar Lighter; 12 Volt Accessory Power Outlet, Center; Cigarette Lighter Element, Front.; Lighter Assembly; Knob & Element for Cigar Lighter; Cigarette Lighter.
- Position: Front
- Replaces: 4685536AB, 5ZN46DX9AA, 5ZN46LXHAA
- Item Weight: 0.50 Pounds
- Item Dimensions: 1.4 x 1.3 x 1.1 inches
- Condition: New
- Fitment Type: Direct Replacement
- SKU: 4685536
- Warranty: This genuine part is guaranteed by Mopar's factory warranty.


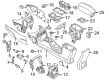
2006 Chrysler Pacifica Power Outlet, Front Part Number: 4685590
$27.24 MSRP: $40.00You Save: $12.76 (32%)Product Specifications- Other Name: Outlet; 12 Volt Accessory Power Outlet Housing, Front; Center; Cigarette Lighter Socket.; Lighter Socket; Power Outlet Base; Cigar Lighter Base; Serviced Without Cap.
- Position: Front
- Replaces: 4685590AB, 5026362AA, 6AL38DX9AA, 6AL38LXHAA
- Item Weight: 0.50 Pounds
- Item Dimensions: 6.1 x 4.1 x 4.2 inches
- Condition: New
- Fitment Type: Direct Replacement
- SKU: 4685590
- Warranty: This genuine part is guaranteed by Mopar's factory warranty.


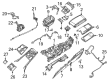
2006 Chrysler Pacifica Power Outlet, Center Part Number: 4793554AC
$24.36 MSRP: $35.00You Save: $10.64 (31%)Product Specifications- Other Name: Lighter; 12 Volt Accessory Power Outlets: Rear Right, Rear Left, Center, Front, Rear; Housing; Cigarette Lighter Socket.; Power Outlet Mount; Armrest Outlet; Power Outlet Cigar; Power Outlet Power
- Position: Center
- Replaces: 4793554AB
- Item Weight: 0.40 Pounds
- Item Dimensions: 6.2 x 4.2 x 4.2 inches
- Condition: New
- Fitment Type: Direct Replacement
- SKU: 4793554AC
- Warranty: This genuine part is guaranteed by Mopar's factory warranty.
2006 Chrysler Pacifica Cigarette Lighter Parts and Q&A
- Q: How to Service the Cigarette Lighter Auxiliary Power Outlet on 2006 Chrysler Pacifica?A: Begin by unplugging and insulating the battery's negative cable to work on the cigarette lighter. Remove the cigarette lighter base to pinpoint where the retaining bosses are found. Go ahead and use external snap ring pliers with 90-degree tips, using them to press down inside the bosses while you squeeze them to set them free from the base. With a gentle motion, use the pliers to remove the base from the ring, cut the base wires and place it away as you pull off the base mounting ring. To install the game, attach the base mount ring at first and join the base wires. Snap the base into place in the instrument panel and then attach the negative cable of the battery.
Related 2006 Chrysler Pacifica Parts
 2006 Chrysler Pacifica Sunroof
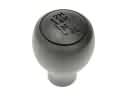 2006 Chrysler Pacifica Shift Knob
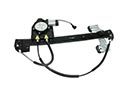 2006 Chrysler Pacifica Window Regulator
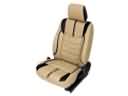 2006 Chrysler Pacifica Seat Cover
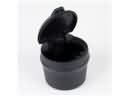 2006 Chrysler Pacifica Ashtray
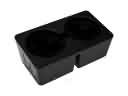 2006 Chrysler Pacifica Cup Holder
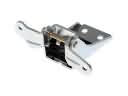 2006 Chrysler Pacifica Door Hinge
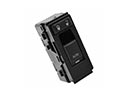 2006 Chrysler Pacifica Door Lock Switch
 2006 Chrysler Pacifica Seat Switch
 2006 Chrysler Pacifica Shift Indicator
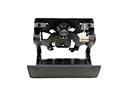 2006 Chrysler Pacifica Tailgate Handle
 2006 Chrysler Pacifica Windshield Washer Nozzle