JeepParts
My Garage
My Account
Cart
OEM 2006 Dodge Magnum EGR Tube
EGR Hose- Select Vehicle by Model
- Select Vehicle by VIN
Select Vehicle by Model
orMake
Model
Year
Select Vehicle by VIN
For the most accurate results, select vehicle by your VIN (Vehicle Identification Number).
4 EGR Tubes found


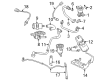
2006 Dodge Magnum Intake Tube Part Number: 4593580AC
$199.89 MSRP: $297.00You Save: $97.11 (33%)Ships in 1-3 Business DaysProduct Specifications- Other Name: Tube - EGR Valve To Intake Plenum; Exhaust Gas Recirculation (EGR) Tube; EGR Tube; Tube; Tube EGR Valve To Intake Plenum
- Replaces: 4593580AB, 4593580AA
- Item Weight: 0.90 Pounds
- Item Dimensions: 12.0 x 4.2 x 4.2 inches
- Condition: New
- Fitment Type: Direct Replacement
- SKU: 4593580AC
- Warranty: This genuine part is guaranteed by Mopar's factory warranty.


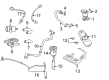
2006 Dodge Magnum EGR Tube Part Number: 4591916AC
Product Specifications- Other Name: Tube - Exhaust Manifold To EGR Valance; Exhaust Gas Recirculation (EGR) Tube; PCV Valve Hose; Tube; Tube Exhaust Manifold To EGR Valve
- Replaces: 4591916AA, 4591916AB
- Item Weight: 0.80 Pounds
- Item Dimensions: 10.5 x 4.3 x 4.1 inches
- Condition: New
- Fitment Type: Direct Replacement
- SKU: 4591916AC
- Warranty: This genuine part is guaranteed by Mopar's factory warranty.

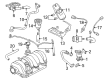
2006 Dodge Magnum EGR Tube Part Number: 4593582AB
Product Specifications- Other Name: Tube - EGR Valve To Intake Plenum; Exhaust Gas Recirculation (EGR) Tube; Tube; Tube EGR Valve To Intake Plenum
- Replaces: 4593582AA
- Item Weight: 0.80 Pounds
- Item Dimensions: 2.1 x 3.1 x 12.3 inches
- Condition: New
- Fitment Type: Direct Replacement
- SKU: 4593582AB
- Warranty: This genuine part is guaranteed by Mopar's factory warranty.

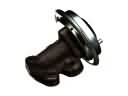
2006 Dodge Magnum EGR Tube Part Number: 4591876AE
Product Specifications- Other Name: Tube - EGR; Exhaust Gas Recirculation (EGR) Tube; Tube; Tube EGR
- Replaces: 4591876AD, 4591876AC
- Item Weight: 0.90 Pounds
- Item Dimensions: 4.6 x 5.8 x 14.3 inches
- Condition: New
- Fitment Type: Direct Replacement
- SKU: 4591876AE
- Warranty: This genuine part is guaranteed by Mopar's factory warranty.
2006 Dodge Magnum EGR Tube Parts and Q&A
- Q: How to Service and Repair an EGR Tube for Upper Tube on 2006 Dodge Magnum?A: The first thing you should do when servicing the EGR upper tube is locate the upper tube, EGR valve and lower tube. First, take out the negative battery wire and release the purge solenoid from its post so you can relocate it. Get rid of all the upper tube bolts holding the EGR valve in place and disconnect the electrical connector from it. Remove the upper tube from the intake manifold without letting the seals drop into the manifold. EGR valve leakage caused by dirt on its gasket can result in a rough engine idle and less vacuum in the manifold, so remember to clean the surfaces. While installing, stay away from scraping metal to clean the EGR valve mounting area since it could damage the seal. Make sure no particles or particles get into the EGR valve during your cleaning. Examine and tidy the gasket surfaces where the EGR tube joins and attach new silicone rubber seals to the EGR tube at the intake manifold end, placing them 17 mm before the flange. Coat the tube hole that holds the EGR in the intake manifold with Mopar®. Throw a bit of Rubber Bushing Installation Lube into the bushing area while assembling, but avoid touching the EGR tube or seal. Insert the EGR tube into the intake manifold and ensure the seals are not crimped or crushed as you verify the placement. Install a new gasket between the EGR valve and tube, after which seal the bolts to 15 Nm. The EGR tube flange can be up to 2 mm above the intake manifold and it will still give a proper seal. Join the electrical connector back to the EGR valve and make sure no wires or cables come into contact with the tube. After that, connect the negative battery cable, unplug the solenoid from the tool, reinstall it in the bracket, put it on its intended hole and tighten the nut to 5 Nm.
Related 2006 Dodge Magnum Parts
 2006 Dodge Magnum EGR Valve
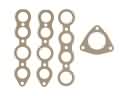 2006 Dodge Magnum Exhaust Manifold
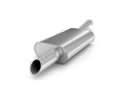 2006 Dodge Magnum Muffler
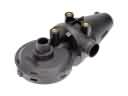 2006 Dodge Magnum PCV Valve
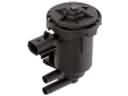 2006 Dodge Magnum Canister Purge Valve
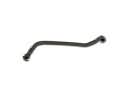 2006 Dodge Magnum Crankcase Breather Hose
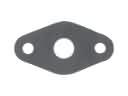 2006 Dodge Magnum EGR Tube Gaskets
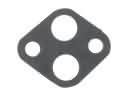 2006 Dodge Magnum EGR Valve Gasket
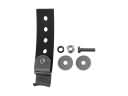 2006 Dodge Magnum Exhaust Hanger
 2006 Dodge Magnum PCV Hose
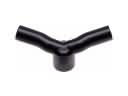 2006 Dodge Magnum PCV Valve Hose
 2006 Dodge Magnum Vapor Canister