JeepParts
My Garage
My Account
Cart
OEM Dodge Magnum EGR Tube
EGR Hose- Select Vehicle by Model
- Select Vehicle by VIN
Select Vehicle by Model
orMake
Model
Year
Select Vehicle by VIN
For the most accurate results, select vehicle by your VIN (Vehicle Identification Number).
4 EGR Tubes found


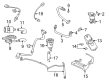
Dodge Magnum Intake Tube Part Number: 4593580AC
$199.89 MSRP: $297.00You Save: $97.11 (33%)Ships in 1-3 Business Days

Dodge Magnum EGR Tube Part Number: 4591916AC

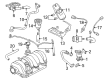
Dodge Magnum EGR Tube Part Number: 4591876AE


Dodge Magnum EGR Tube Part Number: 4593582AB
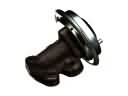
Dodge Magnum EGR Tube
Choose OEM EGR Tube that meet Dodge factory standards. Dodge designs and tests every component for precision and durability. Each EGR Tube follows strict manufacturing steps to lock in quality and fit. If your Dodge Magnum matters to you, OEM parts make the smart choice. You'll get the exact look, feel, and performance you expect. Shop genuine Magnum parts at the highly competitive prices online. Enjoy a manufacturer's warranty, a hassle-free return policy, and rapid delivery. No more guesswork with off brands. Get genuine parts with exact fit and true factory performance. Shop with confidence today at JeepPartsDeal.com.
The EGR Tube is one of the crucial parts that define the strength and stability of Dodge Magnum cars. In order to decrease the NOx emission, EGR tube recycles the exhaust gases back to the engine improving combustion efficiency as well as the general performance of the engine. This feature is particularly important from the aspect of preserving the modern environmental norms compliance of a vehicle as well as its proper functioning as per the expectations of the users. The suitability of the EGR Tube to Magnum models within the mentioned years from 2005 up to 2008 underscores the necessity of the EGR Tube in the different Magnum mode of Dodge automobiles. The readers, especially the drivers can readily understand that there are symptoms which may indicate that the EGR Tube is faulty including rough idle, check engine light among others to ensure the maintenance of the efficiency and safety of the engine. In the automotive market, the EGR Tube has been established in regard to durability of material used as well as durability of their make. Through controlling emission and improving the efficiency of the engine, the EGR Tube also plays part in reducing the pollution and again strengthens the image of the Dodge Magnum as a cultural and performant car. Therefore, it can be concluded that the EGR Tube is one of the key assemblies that can improve this aspect of driving and protect the environment for the whole Dodge Magnum series.
Dodge Magnum EGR Tube Parts and Q&A
- Q: How to Service and Repair an EGR Tube for Lower Tube on Dodge Magnum?A:Before starting any work on the EGR tube, start by removing the negative Battery Cable. There is a small bracket holding the purge solenoid, so you must remove this from the bracket and move the solenoid to another location. After unlocking and disconnecting the EGR Valve's electrical connector, remove the bolts underneath the lower tube on the Exhaust Manifold and the three securing it to the valve. Remove the lower tube from the car, making sure to support the silicone rubber seals so they don't fall into the Intake Manifold. Check the gasket areas on the EGR valve since loose dirt might cause leaks and result in engine shaking at low speeds and decreased manifold vacuum. After the surface is clean, place the bottom tube into the vehicle and attach it with the three bolts to the EGR valve and two bolts to the exhaust manifold. Screw the EGR valve and the exhaust manifold bolt ends into the lower tube until the torque on the bolts is 11 Nm (95 in. lbs.) and 31 Nm (275 in. lbs.). Lock in the electrical connector from step 2, move and secure the purge solenoid, put it on the bracket and reconnect the negative battery cable.

Related Dodge Magnum Parts
 Dodge Magnum EGR Valve
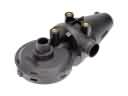 Dodge Magnum PCV Valve
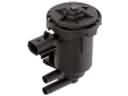 Dodge Magnum Canister Purge Valve
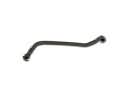 Dodge Magnum Crankcase Breather Hose
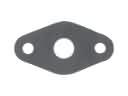 Dodge Magnum EGR Tube Gaskets
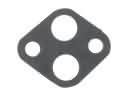 Dodge Magnum EGR Valve Gasket
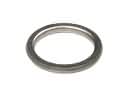 Dodge Magnum Exhaust Flange Gasket
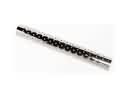 Dodge Magnum Exhaust Heat Shield
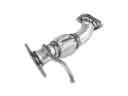 Dodge Magnum Exhaust Pipe
 Dodge Magnum PCV Hose
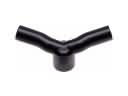 Dodge Magnum PCV Valve Hose
 Dodge Magnum Vapor Canister