JeepParts
My Garage
My Account
Cart
OEM 2009 Dodge Charger Drive Shaft
Axle Shaft- Select Vehicle by Model
- Select Vehicle by VIN
Select Vehicle by Model
orMake
Model
Year
Select Vehicle by VIN
For the most accurate results, select vehicle by your VIN (Vehicle Identification Number).
6 Drive Shafts found


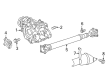
2009 Dodge Charger Drive Shaft, Front Part Number: 4593542AB
$1075.17 MSRP: $1640.00You Save: $564.83 (35%)Ships in 1-2 Business DaysProduct Specifications- Other Name: Shaft - Drive; Drive Shaft, Front; Driveshaft; Drive Shaft Assembly; Shaft Drive Front
- Position: Front
- Item Weight: 9.30 Pounds
- Item Dimensions: 28.3 x 4.9 x 4.4 inches
- Condition: New
- Fitment Type: Direct Replacement
- SKU: 4593542AB
- Warranty: This genuine part is guaranteed by Mopar's factory warranty.

2009 Dodge Charger Drive Shaft Part Number: 4578036AH
$1193.40 MSRP: $1820.00You Save: $626.60 (35%)Product Specifications- Other Name: Shaft - Drive; Driveshaft; Shaft Drive Rear 2-Piece
- Replaces: 4578036AE, 4578036AF, 4578036AC, 4578036AG, 4578036AD, 4578036AB
- Item Weight: 32.00 Pounds
- Item Dimensions: 6.4 x 9.6 x 88.4 inches
- Condition: New
- Fitment Type: Direct Replacement
- SKU: 4578036AH
- Warranty: This genuine part is guaranteed by Mopar's factory warranty.

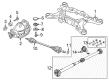
2009 Dodge Charger Drive Shaft, Rear Part Number: 5038864AD
$1021.02 MSRP: $1560.00You Save: $538.98 (35%)Ships in 1-2 Business DaysProduct Specifications- Other Name: Shaft - Drive; Drive Shaft, Rear; Driveshaft; Shaft Drive Rear 2-Piece
- Position: Rear
- Replaces: 5038864AB, 5038864AA
- Item Weight: 34.80 Pounds
- Item Dimensions: 55.4 x 8.0 x 7.1 inches
- Condition: New
- Fitment Type: Direct Replacement
- SKU: 5038864AD
- Warranty: This genuine part is guaranteed by Mopar's factory warranty.


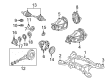
2009 Dodge Charger Drive Shaft Part Number: 4578035AH
Product Specifications- Other Name: Shaft - Drive; Axle Shaft; Driveshaft; Axle Assembly
- Replaces: 4578035AE, 4578035AG, 4578035AC, 4578035AF, 4578035AD, 4578035AB
- Item Weight: 30.90 Pounds
- Item Dimensions: 82.8 x 10.5 x 6.1 inches
- Condition: New
- Fitment Type: Direct Replacement
- SKU: 4578035AH
- Warranty: This genuine part is guaranteed by Mopar's factory warranty.


2009 Dodge Charger Drive Shaft Part Number: 4593681AD
Product Specifications- Other Name: Shaft - Drive; Driveshaft; Shaft Drive Rear 2-Piece
- Replaces: 4593681AC, 4593681AB, 4593681AA
- Item Weight: 32.90 Pounds
- Item Dimensions: 87.7 x 10.3 x 7.4 inches
- Condition: New
- Fitment Type: Direct Replacement
- SKU: 4593681AD
- Warranty: This genuine part is guaranteed by Mopar's factory warranty.

2009 Dodge Charger Drive Shaft Part Number: 4593679AC
Product Specifications- Other Name: Shaft - Drive; Driveshaft
- Replaces: 4593679AA, 4593679AB
- Item Weight: 28.40 Pounds
- Item Dimensions: 87.7 x 25.5 x 14.6 inches
- Condition: New
- Fitment Type: Direct Replacement
- SKU: 4593679AC
- Warranty: This genuine part is guaranteed by Mopar's factory warranty.
2009 Dodge Charger Drive Shaft Parts and Q&A
- Q: How to Install a Drive Shaft on 2009 Dodge Charger?A: Setting up the propeller shaft should always be performed by two people, to prevent problems from over-angulation that might lead to vibrations and breakdowns. For V6 models, if you remove the coupler or damper, install the new set so that the sleeve on top (2) is properly inserted into the counterbores in the propshaft or damper. Attach three bolts to the holes, adding washers and nuts. Torque everything to 58 Nm (43 ft. lbs.). Assisted by a partner, put the propeller shaft onto the axle in the proper way, using the matching marks from when you pulled the couplings and put the bolt/nuts into the rear coupler-to-axle flange just by hand, not with a torque wrench. Then, put the propeller shaft against the flange on the transmission, line up the marks and screw in the front coupling bolts or nuts by hand, not using the required wrench torque. Slide on the center bearing-to-body bolts and tighten them later without torquing for now. Tighten the front coupler-to-transmission flange bolts or nuts to 58 Nm (43 ft. lbs.), the same for the rear coupler-to-axle flange bolts or nuts. Jack up the rear suspension and press it down so it runs level with the car's body. This prevents any excess moving parts and frames in your center bearing that can create noise and cause early wear. Afterward, tighten the center bearing bolts to 27 Nm (20 ft. lbs.), place the heat shield (1), put on the rear exhaust system (2) and bolter on the crossmember (1).
Related 2009 Dodge Charger Parts
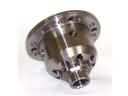 2009 Dodge Charger Differential
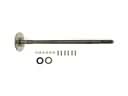 2009 Dodge Charger Axle Shaft
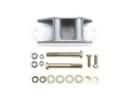 2009 Dodge Charger Carrier Bearing Spacer
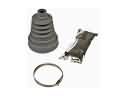 2009 Dodge Charger CV Boot
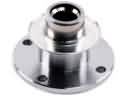 2009 Dodge Charger CV Joint Companion Flange
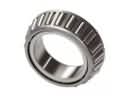 2009 Dodge Charger Differential Bearing
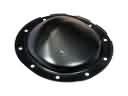 2009 Dodge Charger Differential Cover
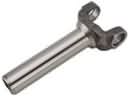 2009 Dodge Charger Driveshaft Yokes
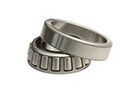 2009 Dodge Charger Pinion Bearing
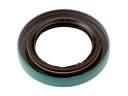 2009 Dodge Charger Transfer Case Seal