JeepParts
My Garage
My Account
Cart
OEM 2009 Dodge Dakota Windshield
Glass Windshield- Select Vehicle by Model
- Select Vehicle by VIN
Select Vehicle by Model
orMake
Model
Year
Select Vehicle by VIN
For the most accurate results, select vehicle by your VIN (Vehicle Identification Number).
1 Windshield found

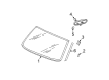
2009 Dodge Dakota Windshield, Front Part Number: 5139096AB
Product Specifications- Other Name: Windshield Glass, Front
- Position: Front
- Replaces: 5139096AA
- Item Weight: 45.30 Pounds
- Item Dimensions: 70.7 x 50.0 x 8.0 inches
- Condition: New
- Fitment Type: Direct Replacement
- SKU: 5139096AB
- Warranty: This genuine part is guaranteed by Mopar's factory warranty.
2009 Dodge Dakota Windshield Parts and Q&A
- Q: How to Properly Install a Windshield on 2009 Dodge Dakota?A: The windshield should not be driven with for 24 hours after the urethane has cured. Reduce pressure inside the passenger compartment by rolling down the left and right front door glass and opening the rear glass slider, if you have it. Make sure the windshield post is no more than 1-2 mm tall after removing most residual urethane so you can save the thicker urethane for painting later and to strengthen bonding. Change any missing or broken support spacers around the windshield gap with new ones. On a previously set windshield, smooth out the old adhesive so it is about 1 mm thick and remove all the bits that aren't stuck down. Add four new spacers to the a-pillars so that they are all spread out at the top and bottom and fit and secure the lower spacer assemblies in the holes. Rest the windshield on the side and lower spacers, setting it against the opening's center, then make any adjustments. Put adhesive tape along the border to prevent the windshield from touching the glass at an uneven distance. Separate the tape and cut it with a knife before sliding the windshield to remove it. This includes wiping the area of the glass to be re-glued with the right solvent, then inspecting the glass primer's condition. If it is dangerous, eliminate the impact on it and encourage another round. When installing a new windshield, also apply four new spacers, fit the lower spacer assemblies, place the windshield in position and look for any damage. Tidy up around where the glass will be placed and applied primer to the space near the edges. Give the primer a bit of time to dry in the air. Use a cotton swab to clean dust out of the windshield opening, straighten the old adhesive bead and clean the area you'll be putting the new adhesive on. Use a bead of adhesive on the windshield seal, so that it is positioned within 5 minutes. Each bead should be about 9.5 - 12.0 mm wide and 12.7 - 14.0 mm tall. Slide the windshield from the bottom into position on the tape, then press it down gently using only one person to avoid breaking it. It's important to install the headliner, a-pillar trim, cowl grille, rearview mirror and windshield molding retainer with screws.
Related 2009 Dodge Dakota Parts
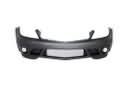 2009 Dodge Dakota Bumper
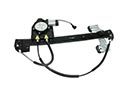 2009 Dodge Dakota Window Regulator
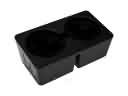 2009 Dodge Dakota Cup Holder
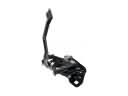 2009 Dodge Dakota Hood Latch
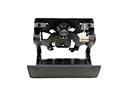 2009 Dodge Dakota Tailgate Handle
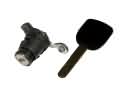 2009 Dodge Dakota Door Lock Cylinder
 2009 Dodge Dakota Air Deflector
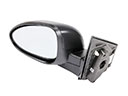 2009 Dodge Dakota Car Mirror
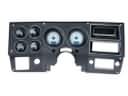 2009 Dodge Dakota Dash Panels
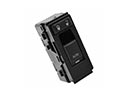 2009 Dodge Dakota Door Lock Switch
 2009 Dodge Dakota Exhaust Nut
 2009 Dodge Dakota Trunk Lid Latch