JeepParts
My Garage
My Account
Cart
OEM 2009 Jeep Wrangler Instrument Cluster
Speedometer Instrument Cluster- Select Vehicle by Model
- Select Vehicle by VIN
Select Vehicle by Model
orMake
Model
Year
Select Vehicle by VIN
For the most accurate results, select vehicle by your VIN (Vehicle Identification Number).
5 Instrument Clusters found

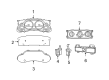
2009 Jeep Wrangler Instrument Cluster Part Number: 5172636AD
Product Specifications- Other Name: Cluster - Instrument Panel; Cluster Assembly
- Replaces: 5172636AB, 5172636AA, 5172636AC
- Item Weight: 7.50 Pounds
- Item Dimensions: 22.4 x 8.9 x 8.8 inches
- Condition: New
- Fitment Type: Direct Replacement
- SKU: 5172636AD
- Warranty: This genuine part is guaranteed by Mopar's factory warranty.
2009 Jeep Wrangler Instrument Cluster Part Number: 5172634AD
Product Specifications- Other Name: Cluster - Instrument Panel; Cluster Assembly
- Replaces: 5172634AB, 5172634AC, 5172634AA
- Item Weight: 7.10 Pounds
- Item Dimensions: 21.9 x 8.8 x 8.8 inches
- Condition: New
- Fitment Type: Direct Replacement
- SKU: 5172634AD
- Warranty: This genuine part is guaranteed by Mopar's factory warranty.
2009 Jeep Wrangler Instrument Cluster Part Number: 5172631AD
$515.25 MSRP: $754.00You Save: $238.75 (32%)Product Specifications- Other Name: Cluster - Instrument Panel; Cluster Assembly
- Replaces: 5172631AC, 5172631AB, 5172631AA
- Item Weight: 4.40 Pounds
- Item Dimensions: 22.1 x 9.0 x 8.9 inches
- Condition: New
- Fitment Type: Direct Replacement
- SKU: 5172631AD
- Warranty: This genuine part is guaranteed by Mopar's factory warranty.
2009 Jeep Wrangler Cluster Assembly Part Number: 5172632AD
$444.26 MSRP: $653.00You Save: $208.74 (32%)Product Specifications- Other Name: Cluster - Instrument Panel; Instrument Cluster
- Replaces: 5172632AB, 5172632AC, 5172632AA
- Item Weight: 3.40 Pounds
- Item Dimensions: 20.6 x 8.5 x 8.2 inches
- Condition: New
- Fitment Type: Direct Replacement
- SKU: 5172632AD
- Warranty: This genuine part is guaranteed by Mopar's factory warranty.

2009 Jeep Wrangler Instrument Cluster Part Number: 5172630AD
$606.85 MSRP: $889.00You Save: $282.15 (32%)Product Specifications- Other Name: Cluster - Instrument Panel; Cluster Instrument Panel
- Replaces: 5172630AC, 5172630AB
- Item Weight: 7.10 Pounds
- Item Dimensions: 21.7 x 9.0 x 8.9 inches
- Condition: New
- Fitment Type: Direct Replacement
- SKU: 5172630AD
- Warranty: This genuine part is guaranteed by Mopar's factory warranty.
2009 Jeep Wrangler Instrument Cluster Parts and Q&A
- Q: How to Install an Instrument Cluster on the Instrument Panel on 2009 Jeep Wrangler?A: Place the instrument panel into the vehicle, secure the back end and confirm the wire harness gets through the cowl panel and lands in its grommet. Screw the nuts onto the back of the studs on the fenceline, then take care to insert the heater core, the A/C lines and the brake booster support studs through the cowl and put the I/P over them. Attach the side support bolts roughly at this point, then set the center support brackets on the studs and use bolts and nuts to secure them. Set the side support bolts at 11 Nm, the fenceline nuts at 12 Nm and both bolts and nuts to 8 Nm. After adjusting the main wire harness, reattach all support clips and use a 18 Nm torque to tighten the brake booster bracket nuts. Take off all the tapes or plugs from the ends of the refrigerant lines, grease the new O-rings with clean refrigerant oil and set them onto the ends of the refrigerant lines. Associate the A/C liquid line with the A/C expansion valve and the A/C suction line and seal them with a nut tightened to 23 Nm. Hold the heater hoses against the heater core tubes, then clamp them together with cable-type spring clamp pliers. After that, put in the EGR tube, fill the coolant, empty the A/C system and install the battery tray. Newly set up the power steering reservoir, attach the grounds on the right-side and link the positive battery cable. Put in the glove box, join the antenna and electrical cables and bolt down all the ground connections with nuts. Fasten the nut to the HVAC bracket below; add the brake rod and clip, then if you have one, add the clutch rod and clip as well. Put in the center I/P trim and screw each panel into place and after that, set in the radio and connect the HVAC control cables and their connectors. Install the center bezel over the I/P, drive in the lower screws, connect the electrical connector and lower the upper center cover as well. Front of the cover against the center support, secure the trim around the steering wheel, rotate it back to fit the shifter tubes and set the transfer case and automatic transmission shifters if desired. Place the end caps in position and seat them onto the I/P, fit the steering column and amplifier and secure all with bolts tightened to 11 Nm. Fit the opening cover onto the lower tabs, put the lower trim in place and hold back the center harness with support clips. Connect the center harness electrical connectors and install the center console, then attach the battery cables and hook the front door check straps over the footmans loop with the electrical connector attached.
Related 2009 Jeep Wrangler Parts
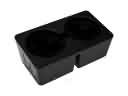 2009 Jeep Wrangler Cup Holder
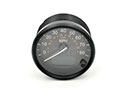 2009 Jeep Wrangler Speedometer
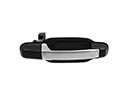 2009 Jeep Wrangler Door Handle
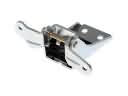 2009 Jeep Wrangler Door Hinge
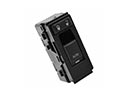 2009 Jeep Wrangler Door Lock Switch
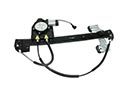 2009 Jeep Wrangler Window Regulator
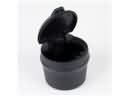 2009 Jeep Wrangler Ashtray
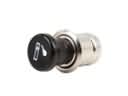 2009 Jeep Wrangler Cigarette Lighter
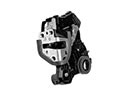 2009 Jeep Wrangler Door Lock
 2009 Jeep Wrangler Windshield Wiper
 2009 Jeep Wrangler Exhaust Nut
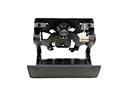 2009 Jeep Wrangler Tailgate Handle