JeepParts
My Garage
My Account
Cart
OEM 2010 Dodge Grand Caravan Brake Pad
Disc Brake Pad Set- Select Vehicle by Model
- Select Vehicle by VIN
Select Vehicle by Model
orMake
Model
Year
Select Vehicle by VIN
For the most accurate results, select vehicle by your VIN (Vehicle Identification Number).
3 Brake Pads found

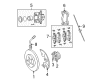
2010 Dodge Grand Caravan Pad Kit - Front Disc Brake Part Number: 68029263AB
$97.05 MSRP: $243.00You Save: $145.95 (61%)Ships in 1-2 Business DaysProduct Specifications- Other Name: FRONT DISC BRAKE
- Position: Front
- Item Weight: 4.60 Pounds
- Item Dimensions: 6.9 x 4.8 x 3.0 inches
- Condition: New
- Fitment Type: Direct Replacement
- SKU: 68029263AB
- Warranty: This genuine part is guaranteed by Mopar's factory warranty.
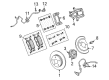
2010 Dodge Grand Caravan Brake Pads, Front Part Number: 68093323AC
$61.33 MSRP: $91.70You Save: $30.37 (34%)Ships in 1-2 Business DaysProduct Specifications- Other Name: Pad Kit - Front Disc Brake; Disc Brake Pad Set, Front; Front Pads
- Position: Front
- Replaces: 68093323AA, 68093323AB, 68053152AB, 68068762AA, 68029264AB, 68053152AA
- Item Weight: 4.60 Pounds
- Item Dimensions: 7.1 x 4.9 x 3.1 inches
- Condition: New
- Fitment Type: Direct Replacement
- SKU: 68093323AC
- Warranty: This genuine part is guaranteed by Mopar's factory warranty.

2010 Dodge Grand Caravan Brake Pads, Rear Part Number: 68029887AB
$181.28 MSRP: $267.00You Save: $85.72 (33%)Product Specifications- Other Name: Pad - Rear Disc Brake; Disc Brake Pad Set, Rear; Disc Brake Hardware Kit; Rear Pads; Pad Kit Rear Disc Brake; Disc Brake Pad Set
- Position: Rear
- Replaces: 68029887AA
- Item Weight: 2.90 Pounds
- Item Dimensions: 6.6 x 4.8 x 3.1 inches
- Condition: New
- Fitment Type: Direct Replacement
- SKU: 68029887AB
- Warranty: This genuine part is guaranteed by Mopar's factory warranty.
2010 Dodge Grand Caravan Brake Pad Parts and Q&A
- Q: How to Remove and Replace Rear Brake Pads on 2010 Dodge Grand Caravan?A: Replace the brake pads for the rear on either side by doing the following steps. Using Retractor, Special Tool 8807, carefully insert the piston from inside the caliper until the parking brake self-adjuster is located on top. Connect a 3/8 in. drive ratchet handle and an extension and run the extension through Special Tool 8807-1. Attach the extension to the caliper's hardened scale and place Special Tool 8807-2 at the very end, making sure its lugs are in the caliper piston's notches. Drop in the screw drive through 8807-1 and turn it until it strikes the top of 8807-2 against the caliper piston, remembering not to over-tighten. Spin the ratchet clockwise and keep going until the piston becomes fully inserted. In order to avoid any movement, abutment shims should be installed on both upper and lower caliper adapter side abutments. If your brake pads still have paper on the back, get rid of it before setup. Slide the brake pads into the shims that are attached to the disc brake caliper adapter bracket. Instead of pushing it onto the adapter bracket, mount the disc brake caliper over the brake pads, avoiding any boot damage. When removing or installing a caliper guide pin bolt, put a wrench on the hex shape of the guide pin and turn the bolt. Join the caliper guide pin bolt holes with the sides of the adapter bracket and thread in the guide pin bolts from both sides, tightening them to 35 Nm. Place the wheel and tire back onto the vehicle and tighten the wheel mounting nuts to 135 Nm. Reduce the vehicle, squeeze the brake multiple times to check it's working well, top up the brake fluid as required and test drive the car to remove any loose matter and settle the brake pads.
Related 2010 Dodge Grand Caravan Parts
 2010 Dodge Grand Caravan Brake Booster
 2010 Dodge Grand Caravan Brake Caliper
 2010 Dodge Grand Caravan Parking Brake Cable
 2010 Dodge Grand Caravan ABS Control Module
 2010 Dodge Grand Caravan Brake Caliper Bracket
 2010 Dodge Grand Caravan Brake Caliper Piston
 2010 Dodge Grand Caravan Brake Disc
 2010 Dodge Grand Caravan Brake Dust Shield
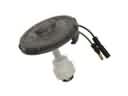 2010 Dodge Grand Caravan Brake Fluid Level Sensor
 2010 Dodge Grand Caravan Brake Line
 2010 Dodge Grand Caravan Hydraulic Hose
 2010 Dodge Grand Caravan Wheel Stud