JeepParts
My Garage
My Account
Cart
OEM Chrysler 300 Belt Tensioner
- Select Vehicle by Model
- Select Vehicle by VIN
Select Vehicle by Model
orMake
Model
Year
Select Vehicle by VIN
For the most accurate results, select vehicle by your VIN (Vehicle Identification Number).
3 Belt Tensioners found


Chrysler 300 Belt Tensioner Part Number: 5184617AD
$317.14 MSRP: $484.00You Save: $166.86 (35%)Ships in 1-2 Business Days


Chrysler 300 Belt Tensioner Part Number: 4861660AA
$124.65 MSRP: $188.00You Save: $63.35 (34%)Ships in 1-2 Business Days


Chrysler 300 Belt Tensioner Part Number: 4892109AA
$145.99 MSRP: $219.00You Save: $73.01 (34%)Ships in 1-2 Business Days
Chrysler 300 Belt Tensioner
Choose OEM Belt Tensioner that meet Chrysler factory standards. Chrysler designs and tests every component for precision and durability. Each Belt Tensioner follows strict manufacturing steps to lock in quality and fit. If your Chrysler 300 matters to you, OEM parts make the smart choice. You'll get the exact look, feel, and performance you expect. Shop genuine 300 parts at the highly competitive prices online. Enjoy a manufacturer's warranty, a hassle-free return policy, and rapid delivery. No more guesswork with off brands. Get genuine parts with exact fit and true factory performance. Shop with confidence today at JeepPartsDeal.com.
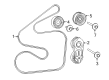
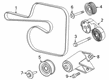
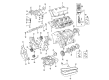
Chrysler 300 belt tensioner is one of the best parts that can greatly improve the quality and performance of the Chrysler 300 series. This device is being used for keeping the tension of the drive belt in appropriate level which is linking the engine to other necessary part of the car like alternator and water pump. Thus, the Belt Tensioner, which keeps the optimal tension, is the component that contributes to the improvement of the automobile's performance and its protection. Different versions of Chrysler 300 have used distinct types of Belt Tensioners such as state of the art Self-Adjusted tensioners that use springs of coils to provide tension on the belt regularly. This characteristic also makes it possible to find the right blend for different Chrysler 300 models, and therefore it is ideal for use by most of the car's users. The Belt Tensioner comprises of the following parts; a pulley, tensioner shaft, and a spring assembly; to avoid belt problems like the rough edges and the loud sounds that are a sign of belt wore out. The Belt Tensioner is vital, and a faulty one may cause substantial performance problems; therefore, frequent check-ups are recommended. Thus, the enhanced construction and reliability of the Belt Tensioner distinguish this product in the automotive market and enhance the durability of the car. In light of the factors depicted above, the Belt Tensioner pulls out as another exceptional aspect that adds to the reliability of the Chrysler 300 as a luxury car.
Chrysler 300 Belt Tensioner Parts and Q&A
- Q: How to Install a Belt Tensioner on a 2.7L Engine on Chrysler 300?A:First, attach the tensioner bolt to the tensioner and tighten it to 34 Nm (40 ft. lbs.). Once you have chosen the right belt, install it, ensuring the tensioner includes two things: an indexing tang at the back and an indexing stop on its housing. If you're installing a new belt, place the tang within approximately 6 - 8mm (0.24 - 0.32 in.) of one of the indexing stops, so both designated indexing stops are on opposite ends of the tang. A belt is new if it has been used for no more than 15 minutes. Be sure to examine the belt indexing notches.
- Q: How to Service and Repair a Belt Tensioner on Chrysler 300?A:It is essential to confirm the indexing tang on the back of the tensioner and the indexing stop located on the tensioner body before starting service. The proper position for the tang during installation is within about 6 - 8 millimeters (0.24 - 0.32 inches) of the indexing stop, where a new belt refers to one used for 15 minutes or fewer. If the requirement is not met, check your belt for the proper length or width, worn bearings on accessories such as the A/C compressor, Power Steering Pump, Water Pump, idler pulley or generator, belts not installed properly, loose pulleys or incorrect belt routes. If it's time to replace your belt, the tensioner indexing arrow should have reached the minimum signal, because the tensioner will not travel any further. Remove the accessory Drive Belt, making sure you don't dismantle anything due to the strong spring pressure of the automatic tensioner, because it's all serviced as a unit except for the pulley on the tensioner. After that, get rid of the bolt holding the assembly to the mounting bracket, along with the tensioner assembly. Unlock and rotate the tensioner before putting the bolt into the accessory pulley, hand-tightening it to 34 Nm (40 ft. lbs.). Then place the drive belt and verify the positions of the belt's indexing points.


Related Chrysler 300 Parts
 Chrysler 300 Thermostat
 Chrysler 300 Thermostat Housing
 Chrysler 300 Radiator Drain Plug
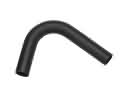 Chrysler 300 Radiator Hose
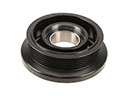 Chrysler 300 A/C Idler Pulley
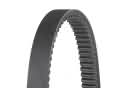 Chrysler 300 Drive Belt
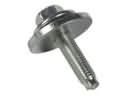 Chrysler 300 Idler Pulley Bolt
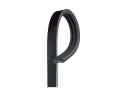 Chrysler 300 Serpentine Belt
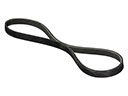 Chrysler 300 V-Belt
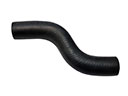 Chrysler 300 Water Hose
 Chrysler 300 Water Pump Gasket
 Chrysler 300 Water Pump Pulley