JeepParts
My Garage
My Account
Cart
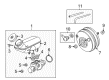
OEM Chrysler Pacifica Brake Master Cylinder Reservoir
Brake Fluid Storage Tank- Select Vehicle by Model
- Select Vehicle by VIN
Select Vehicle by Model
orMake
Model
Year
Select Vehicle by VIN
For the most accurate results, select vehicle by your VIN (Vehicle Identification Number).
3 Brake Master Cylinder Reservoirs found


Chrysler Pacifica Reservoir - Brake Master Cylinder Part Number: 68372581AB
$43.82 MSRP: $65.15You Save: $21.33 (33%)Ships in 1-2 Business Days
Chrysler Pacifica Reservoir Tank Part Number: 68002154AB
$77.80 MSRP: $103.00You Save: $25.20 (25%)Ships in 1-2 Business Days

Chrysler Pacifica Reservoir Tank Part Number: 5072386AA
Chrysler Pacifica Brake Master Cylinder Reservoir
Choose OEM Brake Master Cylinder Reservoir that meet Chrysler factory standards. Chrysler designs and tests every component for precision and durability. Each Brake Master Cylinder Reservoir follows strict manufacturing steps to lock in quality and fit. If your Chrysler Pacifica matters to you, OEM parts make the smart choice. You'll get the exact look, feel, and performance you expect. Shop genuine Pacifica parts at the highly competitive prices online. Enjoy a manufacturer's warranty, a hassle-free return policy, and rapid delivery. No more guesswork with off brands. Get genuine parts with exact fit and true factory performance. Shop with confidence today at JeepPartsDeal.com.
The Chrysler Pacifica Brake Master Cylinder Reservoir functions as a vital component that adds to the reliability and performance capabilities of the Chrysler Pacifica vehicles. The reservoir functions as a storage compartment for brake fluid whereas its designed purpose includes providing clean fluid at the optimal level to achieve peak braking performance. The manufacturing material of nylon or plastic combined with O-ring seals and threaded caps provides increased performance along with extended lifespan to this component. When engaged brake pedal activation causes the Brake Master Cylinder Reservoir and master cylinder to collaborate in pressurizing brake fluid for dependable braking operations. The Brake Master Cylinder Reservoir operates effectively in all Chrysler Pacifica models with gasoline or plug-in hybrid versions giving drivers consistent braking performance. The safety of Brake Master Cylinder Reservoir rely on regular maintenance because maintenance failures can cause both leaks and corrosion which endanger drivers. The master cylinder in Chrysler vehicles since 1967 has dual circuits for backup safety since hydraulic failure becomes unnecessary. The Chrysler Pacifica Brake Master Cylinder Reservoir positions itself optimally in automotive markets because it merges reliability with efficiency and security features that ensure the Pacifica earns its industry acclaim.
Chrysler Pacifica Brake Master Cylinder Reservoir Parts and Q&A
- Q: How to Maintain and Repair a Brake Master Cylinder Reservoir on Chrysler Pacifica?A:Start by cleaning the master cylinder housing and the Brake Master Cylinder reservoir with solvent such as Mopar Brake Parts Cleaner. After removing the reservoir cap, squirt all the brake fluid you can from the reservoir with the syringe. Ensure you do not remove the brake master cylinder reservoir from the master cylinder because this can cause problems. After that, unhook the master cylinder assembly from the power brake vacuum booster and hold the master cylinder in a vise using the flange for the mounting. Insert the right size punch pin into the two holes to remove the pins that hold the reservoir and master cylinder together. Tilt the brake master cylinder reservoir gently sideways as you pull it up to remove it from the seal grommets in the master cylinder housing and after that, take out the two seal grommets. Before putting the master cylinder in your car, install the new sealing grommets and oil the reservoir area. Set the reservoir on top of the grommets and apply pressure as you rock it to help it sit well. Check that the brake master cylinder reservoir is not too high or low, so that it contacts each sealing grommet. After inserting the two retaining pins for the brake master cylinder reservoir into the master cylinder, assemble the master cylinder assembly to the Brake Booster. Make sure to put the fluid in the reservoir up to the level shown on its side.

Related Chrysler Pacifica Parts
 Chrysler Pacifica Sunroof
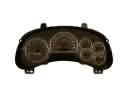 Chrysler Pacifica Instrument Cluster
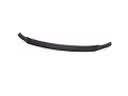 Chrysler Pacifica Spoiler
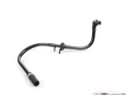 Chrysler Pacifica Brake Booster Vacuum Hose
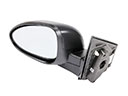 Chrysler Pacifica Car Mirror
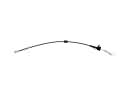 Chrysler Pacifica Door Latch Cable
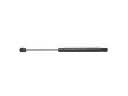 Chrysler Pacifica Lift Support
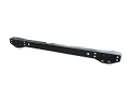 Chrysler Pacifica Rear Crossmember
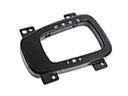 Chrysler Pacifica Shift Indicator
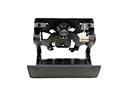 Chrysler Pacifica Tailgate Handle
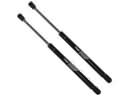 Chrysler Pacifica Trunk Lid Lift Support
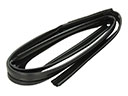 Chrysler Pacifica Window Run