JeepParts
My Garage
My Account
Cart
OEM Chrysler Prowler Clock Spring
Spiral Cable Clock Spring- Select Vehicle by Model
- Select Vehicle by VIN
Select Vehicle by Model
orMake
Model
Year
Select Vehicle by VIN
For the most accurate results, select vehicle by your VIN (Vehicle Identification Number).
1 Clock Spring found

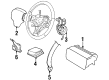
Chrysler Prowler Clockspring Part Number: 4865243AC
Chrysler Prowler Clock Spring
Choose OEM Clock Spring that meet Chrysler factory standards. Chrysler designs and tests every component for precision and durability. Each Clock Spring follows strict manufacturing steps to lock in quality and fit. If your Chrysler Prowler matters to you, OEM parts make the smart choice. You'll get the exact look, feel, and performance you expect. Shop genuine Prowler parts at the highly competitive prices online. Enjoy a manufacturer's warranty, a hassle-free return policy, and rapid delivery. No more guesswork with off brands. Get genuine parts with exact fit and true factory performance. Shop with confidence today at JeepPartsDeal.com.
The Chrysler Prowler Clock Spring functions as an essential part which reinforces both reliability and performance capability of the Chrysler Prowler vehicles. As part of Supplemental Restraint System components the Clock Spring manages essential electrical power between airbag modules and vehicle wiring to make quick airbag deployment possible during crashes for passenger protection. A unique spiral design in the Chrysler Prowler Clock Spring enables steering wheel rotation and ensures electrical connection thus making it a mandatory safety component for both driver and passenger safety. This product supports different Prowler vehicle models and stands crucial for both efficiency and safety of the entire vehicle. The auto market stands out from other products due to this component's spring-loaded cleaning brushes which guarantee dependable operations. The Chrysler Prowler achieves excellent driving satisfaction because its dependable Clock Spring system enables the V6 engine and eye-catching design. There is no substitute for the car's 7.2-second 0-60 sprint capability since its Clock Spring operation remains dependable in order to maintain safety feature usefulness. This Clock Spring proves itself to be more than an ordinary component because Chrysler manufactures it with a dedication to safety standards and performance excellence. Thus the model achieves superior design status.
Chrysler Prowler Clock Spring Parts and Q&A
- Q: How to Service and Repair a Clock Spring Assembly on Chrysler Prowler?A:The first step for service or repair of the Clock Spring Assembly or Spiral Cable is to turn the Steering Wheel so the front wheels point straight ahead. Unplug the negative cable from the battery and if the air bag has not been activated, give it two minutes for the system capacitor to empty itself. After removing the Driver air bag, disconnect the speed control and remote radio switch wire connectors. After spraying the mount, insert a steering wheel puller inside the air bag area to remove the wheel. After that, take out the tachometer and both steering column shrouds to reach the clock spring wire harness connectors underneath. Remove the wire harness wire coming from the clock spring that attaches to the other side of the instrument panel wire harness at the bottom of the steering column. If working on the clock spring, first lift off the locating fingers as needed and remember that a defective clock spring or a deployed Driver air bag means it must be replaced and cannot be fixed. To install, put the clock spring on the steering column and make sure it is seated correctly. Join the clock spring wire harness to the instrument panel wire harness and then attach the steering column shrouds, watching that the wire is positioned inside. Secure the tachometer and then line up the front wheels straight ahead before installing the steering wheel so the flats on the hub go into the right place on the clock spring. Thread both wire harnesses into their holes above and below the steering wheel hub and tighten the steering wheel nut by hand to 3.5 Nm (30 ft. lbs.). Connect the control unit, speed sensor, promise break, radio lead and key wire to the remote area, then connect the horn and air bag wire to the air bag. After that, put on the air bag and install it with 9 to 11 Nm (80 to 100 in. lbs) of torque on the bolts. Do not link the battery's negative wire until the air bag system has been checked and tested by a professional.
Related Chrysler Prowler Parts
 Chrysler Prowler Air Bag Control Module
 Chrysler Prowler Air Bag Sensor
 Chrysler Prowler Airbag
 Chrysler Prowler Antenna Cable
 Chrysler Prowler Brake Light Switch
 Chrysler Prowler Horn
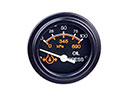 Chrysler Prowler Oil Pressure Gauge
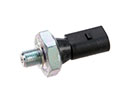 Chrysler Prowler Oil Pressure Switch
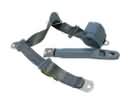 Chrysler Prowler Seat Belt
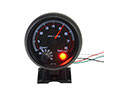 Chrysler Prowler Tachometer
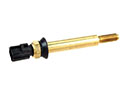 Chrysler Prowler Temperature Sender
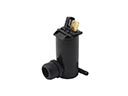 Chrysler Prowler Windshield Washer Pump