JeepParts
My Garage
My Account
Cart
OEM Dodge Charger Axle Shaft
Car Axle Shaft- Select Vehicle by Model
- Select Vehicle by VIN
Select Vehicle by Model
orMake
Model
Year
Select Vehicle by VIN
For the most accurate results, select vehicle by your VIN (Vehicle Identification Number).
39 Axle Shafts found


Dodge Charger Axle Assembly, Rear Part Number: 68277002AB
$397.71 MSRP: $965.00You Save: $567.29 (59%)


Dodge Charger Axle Assembly, Rear Part Number: 52123966AD
$563.50 MSRP: $849.00You Save: $285.50 (34%)Ships in 1-2 Business Days


Dodge Charger Drive Axle, Front Driver Side Part Number: 4578601AA
$450.79 MSRP: $685.00You Save: $234.21 (35%)Ships in 1-2 Business Days

Dodge Charger Axle Assembly, Rear Part Number: 52123958AE
$518.19 MSRP: $780.00You Save: $261.81 (34%)


Dodge Charger Axle Assembly, Rear Part Number: 52123952AD
$285.04 MSRP: $429.00You Save: $143.96 (34%)Ships in 1-2 Business Days


Dodge Charger Axle Assembly, Rear Part Number: 52123962AD
$562.86 MSRP: $964.00You Save: $401.14 (42%)


Dodge Charger Axle Assembly, Rear Driver Side Part Number: 5180495AC
$685.05 MSRP: $1035.00You Save: $349.95 (34%)
Dodge Charger Axle Assembly, Rear Part Number: 68258859AB
$713.24 MSRP: $1040.00You Save: $326.76 (32%)

Dodge Charger Axle Assembly Part Number: R4578601AA
$252.99 MSRP: $305.00You Save: $52.01 (18%)


Dodge Charger Axle Assembly, Rear Part Number: 53010748AA
$741.40 MSRP: $1120.00You Save: $378.60 (34%)


Dodge Charger Axle Assembly Part Number: R4578600AA
$259.37 MSRP: $305.00You Save: $45.63 (15%)


Dodge Charger Axle Assembly, Rear Driver Side Part Number: 53010749AA
$668.59 MSRP: $972.00You Save: $303.41 (32%)


Dodge Charger Axle Assembly, Rear Passenger Side Part Number: 5180492AC
$668.59 MSRP: $971.00You Save: $302.41 (32%)


Dodge Charger Axle Assembly, Rear Driver Side Part Number: 4578733AE
$777.36 MSRP: $1130.00You Save: $352.64 (32%)


Dodge Charger Axle Assembly, Rear Passenger Side Part Number: 4578732AE
$902.17 MSRP: $1315.00You Save: $412.83 (32%)
Dodge Charger Axle Assembly, Rear Driver Side Part Number: 5180491AC


Dodge Charger Axle Assembly, Rear Driver Side Part Number: 5180493AC


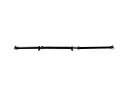
Dodge Charger Drive Shaft Part Number: 4578035AH


Dodge Charger Axle Assembly, Rear Driver Side Part Number: 5175229AC
| Page 1 of 2 |Next >
1-20 of 39 Results
Dodge Charger Axle Shaft
Choose OEM Axle Shaft that meet Dodge factory standards. Dodge designs and tests every component for precision and durability. Each Axle Shaft follows strict manufacturing steps to lock in quality and fit. If your Dodge Charger matters to you, OEM parts make the smart choice. You'll get the exact look, feel, and performance you expect. Shop genuine Charger parts at the highly competitive prices online. Enjoy a manufacturer's warranty, a hassle-free return policy, and rapid delivery. No more guesswork with off brands. Get genuine parts with exact fit and true factory performance. Shop with confidence today at JeepPartsDeal.com.
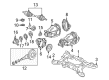
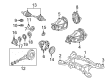
The Axle Shaft of Dodge Charger consumes power from the differential and transmits it to drive wheels that rotates independently in order to increase the traction. These steel shafts can be of numerous types, like the solid axles of the current day trucks and the ancient RWD cars, and the half-shafts of vehicles having an independent suspension system. Housing of the differential and axle shafts are of solid axles while the half shaft transmit power from the transaxle to the wheels. Axle shafts may be damaged due to constant impact with the obstacles that make them to develop some problems like noise and vibrations; on the other hand, halfshafts may prove to be faulty due to worn CV Joints and torn boots. On balance, the Axle Shaft has the primary function as bearing the weight of the car, transmitting the necessary amount of torque, and ensuring the correct positioning of the wheels in Dodge Charger automobile models.
Dodge Charger Axle Shaft Parts and Q&A
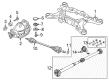
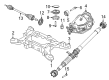
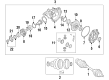
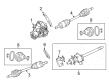
- Q: How to Maintain an Axle Shaft on Dodge Charger?A:Start by taking apart the left halfshaft assembly (2) when servicing the axle shaft assembly. After that, remove the four intermediate shaft-to-oil pan bolts (1) and detach the assembly (3) from the engine. Only the whole intermediate shaft gets serviced; it is not dismotivated for servicing.
- Q: How to Maintain and Repair an Axle Shaft on Dodge Charger?A:Use a drive-on hoist or rear jack stands to compress the rear suspension so that the screws can be removed from the rear halfshaft-then you can repair and service the axle shaft assembly. If the boots inside the halfshaft need service, the entire shaft has to be taken out and replaced. It is very important to assign the unequal halfshafts so that the left halfshaft is labeled as the shorter one. Do not touch the halfshaft assembly by its boots to stop any possible damage. With the drain plug (1) close to the wheel, put the vehicle in neutral, raise it and then remove it with a 14mm wrench to empty the rear axle fluid. Put back the drain plug (1) and tighten it up to 60 Nm if you have the 198 axle or 50 Nm if your vehicle has the 210 axle. Remove the rear exhaust system and the wheel/tire assembly from the end that is spin off for V8 models (2 and 1). First, take out and throw away the wheel hub nut (1) and afterwards apply index marks (3) to both the propeller shaft rubber coupler (1) and the axle flange (2). Unbolt the three propeller shaft coupler-to-axle flange bolt/nuts and unscrew the front and rear shaft clamp screw to disengage each halfshaft (2) from the axle. If you aren't using a transmission jack, use a pry to compress the rear suspension, then remove the bolt/nut (2) and two bolts (1) securing the rear axle forward isolator to the isolator mount. As you remove the rear axle, hold up the propeller shaft with some helpful rope or wire (1). Take off the halfshafts one by one, keeping the axle assembly so that you can compress one halfshaft while removing the other (1). If the rubber isolation washer (1) looks worn, make sure to remove it and use a good screwdriver to remove the axle seals (2). To perform installation, work around the differential cover and implement Tool 9223 (2) to mount the new axle seal(s) (1) and a bidirectional halfshaft isolation washer (1). Screw the halfshaft (2) into the wheel hub/knuckle assembly and tighten a new hub nut (1) manually. Pour Mopar Gear and Axle Lubricant (75W-140) inside the halfshaft inner joint bearing journal and then install the halfshaft on the rear axle, holding it securely with new circlip(s) to not touch the rear axle seals. Raise the rear axle up, match the propeller shaft index marks (3) and begin to thread the bolt/nuts that hold the propeller shaft coupler to the axle by hand. Bolt the two axle-to-crossmember bolts (1) with a torque of 220 Nm (162 ft. lbs.), then tighten the bolt/nut on the rear axle front mount isolator (1) to 65 Nm (48 ft. lbs.). Press the inner joints of the halfshafts into the axle assembly, remove the transmission jack (1) and if needed, take out the screw-type under-hoist jack stands (2). Apply a force of 58 Nm (43 ft. lbs.) to the propeller shaft coupler-to-axle flange bolt and nut, then take out the rear axle fill plug (1) with a 14mm hex. Fill the axle with Mopar 75W-140 Synthetic Gear & Axle Lubricant, using 1.4L (1.5 qts.) for the 198 and 1.6L (1.7 qts.) for the 210 axle. Place and tighten the fill plug (1) to 60 Nm for the 198 axle and to 50 Nm for the 210 axle. On V8 models, place the exhaust system and tighten the band clamps (1) to 61 Nm (45 ft. lbs.). Now, drive the halfshaft into the gear, tighten its hub nut (1) to 213 Nm (157 ft. lbs.), mount the center cap and then tighten the lug nuts of the wheel/tire assembly (1) to 150 Nm (110 ft. lbs.).


Related Dodge Charger Parts
 Dodge Charger Drive Shaft
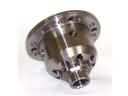 Dodge Charger Differential
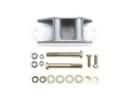 Dodge Charger Carrier Bearing Spacer
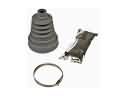 Dodge Charger CV Boot
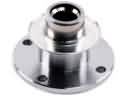 Dodge Charger CV Joint Companion Flange
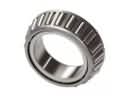 Dodge Charger Differential Bearing
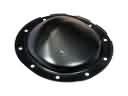 Dodge Charger Differential Cover
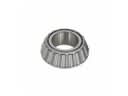 Dodge Charger Differential Pinion Bearing
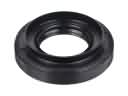 Dodge Charger Differential Seal
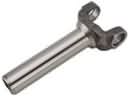 Dodge Charger Driveshaft Yokes
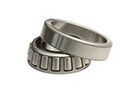 Dodge Charger Pinion Bearing
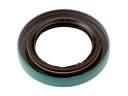 Dodge Charger Transfer Case Seal
Browse Dodge Charger Axle Shaft by Years
2023
2022
2021
2020
2019
2018
2017
2016
2015
2014
2013
2012
2011
2010
2009
2008
2007
2006