JeepParts
My Garage
My Account
Cart
OEM Dodge Intrepid Brake Line
Brake Hose- Select Vehicle by Model
- Select Vehicle by VIN
Select Vehicle by Model
orMake
Model
Year
Select Vehicle by VIN
For the most accurate results, select vehicle by your VIN (Vehicle Identification Number).
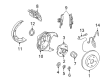
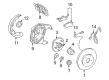
17 Brake Lines found


Dodge Intrepid Flex Hose, Front Driver Side Part Number: 4779121AA
$23.92 MSRP: $36.85You Save: $12.93 (36%)Ships in 1-2 Business Days

Dodge Intrepid Flex Hose, Rear Passenger Side Part Number: 4779012AC
$52.20 MSRP: $75.00You Save: $22.80 (31%)Ships in 1-2 Business Days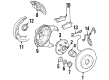
Dodge Intrepid Flex Hose, Rear Driver Side Part Number: 4779013AD
$274.49 MSRP: $343.00You Save: $68.51 (20%)Ships in 1-2 Business Days
Dodge Intrepid Flex Hose Part Number: 4582277
$13.60 MSRP: $17.24You Save: $3.64 (22%)Ships in 1-2 Business DaysDodge Intrepid Flex Hose, Front Part Number: 4582276
$13.60 MSRP: $17.24You Save: $3.64 (22%)Ships in 1-2 Business Days


Dodge Intrepid Flex Hose Part Number: 4779120AA


Dodge Intrepid Flex Hose, Rear Driver Side Part Number: 4779013AC


Dodge Intrepid Tube Assembly Part Number: 4779065AB
Dodge Intrepid Flex Hose, Rear Driver Side Part Number: 4779221AA
Dodge Intrepid Flex Hose, Rear Passenger Side Part Number: 4779220AA
Dodge Intrepid Flex Hose, Rear Driver Side Part Number: 4779013AE

Dodge Intrepid Flex Hose Part Number: 4695309

Dodge Intrepid Flex Hose Part Number: 4695308
Dodge Intrepid Flex Hose Part Number: 4582442
Dodge Intrepid Flex Hose Part Number: 4582273
Dodge Intrepid Brake Hose, Front Driver Side Part Number: 4779120AB
Dodge Intrepid Flex Hose, Rear Passenger Side Part Number: 4779012AD
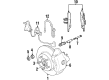
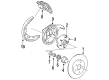
Dodge Intrepid Brake Line
Choose OEM Brake Line that meet Dodge factory standards. Dodge designs and tests every component for precision and durability. Each Brake Line follows strict manufacturing steps to lock in quality and fit. If your Dodge Intrepid matters to you, OEM parts make the smart choice. You'll get the exact look, feel, and performance you expect. Shop genuine Intrepid parts at the highly competitive prices online. Enjoy a manufacturer's warranty, a hassle-free return policy, and rapid delivery. No more guesswork with off brands. Get genuine parts with exact fit and true factory performance. Shop with confidence today at JeepPartsDeal.com.
Dodge Intrepid Brake Line Parts and Q&A
- Q: How to Replace the Brake Line on Dodge Intrepid?A:All bolt-on brake tubes on this car are connected using Iso Style Tubing Flares at all points except for the one between the rear proportioning valve and flex hose which is attached by a double inverted flare. When changing the chassis brake tubes, only double wall 4.75mm (3/16 inch) steel with the Prokote 2000 coating should be used. It is necessary to bend and flare brake tubing correctly and avoid guiding it against rough or heated areas, to avoid kinks during replacement. All tubes should be fastened with the proper clips and bolts and you should make sure the flexible hose between the master cylinder, junction block or antilock control unit remains protected. Take off the damaged section of the brake line tube with a Tubing Cutter, Special Tool C-3478-a or similar and make sure to ream out the inside so the flared tube ends seat well. Before flaring, be sure to put the tube nut over the tubing. For all service procedures, you must use 4.75 mm metric size tubing together with metric Iso tube flaring equipment. Iso style metric tubing flares can be made using Snap-On Flaring Tool Tfm-428 or an alternative. Make sure the end of the tubing is square and that it doesn't have any burrs before flaring it. Align the two jaws of the Flaring Tool with the tubing, but do not lock them before you run the tool. Lay the tubing so that it is in line with the top surface of the flaring tool bar assembly. Attach the suitable sized adaptor over the yoke assembly feed screw, so that it sits right over the opening of the brake line. Before tightening the adapter, coat the place where the adapter meets the brake tubing with rubber lubricant. Once all adjustments are made, tighten the screw enough so that the adaptor seats squarely on the bar assembly to finish a metric Iso tubing flare.
- Q: What Type of Brake Line Flares Are Used at Chassis Connections on Dodge Intrepid?A:All the brakes on this vehicle rely on Iso Style Tubing Flares at every chassis brake tube location except the rear proportioning valve which connects to the flex hose with a Sae double inverted flare. When changing your chassis brake tubes, only 4.75 mm (3/16 inch) double wall steel tubing should be used. A zinc and aluminum alloy (Prokote 2000) coats the brake pipes in the chassis, so the replacement must also use a coated tube. Only use the right type of flaring tool and process when attaching brake tubes to ensure your car's hydraulic brakes are safe. Before you flare and cut the end of the brake line tubing, first use your Tubing Cutter, Special Tool C-3478-A or similar, to remove the old seat on the tubing. Work out any burrs on the inside of the tubing for a clean square end that fits well with the flared part of the flared nut. Remember to attach a tube nut to the tubing before you begin to flare. While conducting service work, be sure to fit metric Iso tube flaring equipment to 4.75 mm tubing. To create an (Iso tube) flare, use the Snap-On Flaring Tool Tfm-428 or a similar product. At the tubing's end, ensure it is squared and has no burrs to improve the final surface. Use the Flaring Tool's jaws to surround the tubing, close them together, but do not lock the tubing. Ensure that the interior of the tubing is right against the top of the flaring tool bar assembly. Put the proper size adaptor on the yoke's feed screw, so that it fits in the middle of the brake tubing. Work lubricant onto the portion of the adapter that touches the brake tubing and push the adapter all the way inside the brake tubing. Adjust the screw on the yoke assembly so that the adaptor is sitting level on the bar assembly, ending in the creation of an Iso tubing flare.


Related Dodge Intrepid Parts
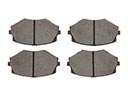 Dodge Intrepid Brake Pads
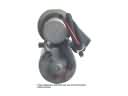 Dodge Intrepid ABS Pump And Motor Assembly
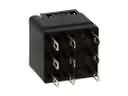 Dodge Intrepid ABS Relay
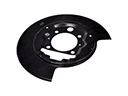 Dodge Intrepid Backing Plate
 Dodge Intrepid Brake Caliper
 Dodge Intrepid Brake Caliper Bracket
 Dodge Intrepid Brake Controller
 Dodge Intrepid Brake Dust Shields
 Dodge Intrepid Brake Master Cylinder
 Dodge Intrepid Brake Rotor
 Dodge Intrepid Speed Sensor
 Dodge Intrepid Wheel Cylinder