JeepParts
My Garage
My Account
Cart
OEM Dodge Intrepid Drive Belt
Serpentine Belt- Select Vehicle by Model
- Select Vehicle by VIN
Select Vehicle by Model
orMake
Model
Year
Select Vehicle by VIN
For the most accurate results, select vehicle by your VIN (Vehicle Identification Number).
9 Drive Belts found


Dodge Intrepid Serpentine Belt Part Number: 4892479AB
$48.28 MSRP: $70.90You Save: $22.62 (32%)Ships in 1-2 Business Days
Dodge Intrepid Serpentine Belt Part Number: 4892173AA
$27.50 MSRP: $52.20You Save: $24.70 (48%)Ships in 1-2 Business Days
Dodge Intrepid Serpentine Belt Part Number: 4792071AC
$17.69 MSRP: $28.95You Save: $11.26 (39%)Ships in 1-2 Business Days
Dodge Intrepid Serpentine Belt Part Number: 4573013AD
$29.42 MSRP: $43.25You Save: $13.83 (32%)Ships in 1-2 Business Days
Dodge Intrepid A/C Belt Part Number: B0015545
$14.57 MSRP: $18.75You Save: $4.18 (23%)Dodge Intrepid Serpentine Belt Part Number: 4792070AD
$5.50 MSRP: $6.97You Save: $1.47 (22%)Ships in 1-2 Business Days
Dodge Intrepid Serpentine Belt Part Number: 4573234AB
$16.85 MSRP: $32.25You Save: $15.40 (48%)Ships in 1-2 Business DaysDodge Intrepid Serpentine Belt Part Number: 5086571AA
$9.48 MSRP: $15.55You Save: $6.07 (40%)Ships in 1-2 Business Days

Dodge Intrepid Serpentine Belt Part Number: 4663950AF
Dodge Intrepid Drive Belt
Choose OEM Drive Belt that meet Dodge factory standards. Dodge designs and tests every component for precision and durability. Each Drive Belt follows strict manufacturing steps to lock in quality and fit. If your Dodge Intrepid matters to you, OEM parts make the smart choice. You'll get the exact look, feel, and performance you expect. Shop genuine Intrepid parts at the highly competitive prices online. Enjoy a manufacturer's warranty, a hassle-free return policy, and rapid delivery. No more guesswork with off brands. Get genuine parts with exact fit and true factory performance. Shop with confidence today at JeepPartsDeal.com.
A vital functionality of the Dodge Intrepid Drive Belt exists to connect the engine to critical components including the alternator and A/C compressor thus supporting both performance and reliability. Drive Belts possess a typical operational life span of 100,000 miles but drivers should consider replacing it before 100,000 miles in case any signs of material degradation appear. The Dodge Intrepid uses either V-belts or multi-groove belts as drive belts which provide improved flexibility and stronger traction functions. The Intrepid stands out due to its versatile design which results in dependable driving experiences and safe operations thus creating a dependable choice for drivers. The Drive Belt demonstrates its critical importance for vehicle performance because it provides compatibility among different Intrepid models such as those using 3.3 L and 3.5 L V6 engines. The Dodge Intrepid Drive Belt raises engine efficiency and safeguards vehicles from engine failures along with part malfunctions. A serpentine design addition of this product enables optimal power delivery through its direct connection to the crankshaft pulley. Reliability and performance distinguish the Dodge Intrepid Drive Belt as a vital component which separates it from other automotive products within this market segment. The Drive Belt maintains essential operational integrity for the Dodge model full-sized sedan because it allows drivers to enjoy combined comfort and power and safety benefits.
Dodge Intrepid Drive Belt Parts and Q&A
- Q: How to Service a Drive Belt on Dodge Intrepid?A:Before handling the A/C compressor belt, take off the generator/power steering belt. With the tension on, loosen the restriction bolt and the pivot bolt while they are still in place. Put a 1/2" drive breaker bar in the square hole on the belt tensioner and turn it counterclockwise to take the belt off the pulleys. Slowly rotate the tensioner in a clockwise direction to take strain off of the springs. Remove all dirt and fluids from the belt pulley routes first and then install the new drive belt. If the belt shows too much wear or damaged threads or is severely glazed, change it; minimal ribbed-side cracks are acceptable, but parallel ones are not. Just before removing the locking bolt for the A/C belt, grab the tensioner with a 1/2" drive breaker bar to avoid getting hurt. Put the torsion spring into position on the new belt before you install the pulleys. If it doesn't, take the required steps to correct it. Put the breaker bar into the tensioner, press against it anticlockwise and remove the locking bolt. Release the spring, then get rid of the pivot bolt, tensioner and spring from the timing cover in front. Set the spring arm where it should go, add the new belt, install the torsion spring, tensioner and pivot bolt and only make sure the pivot bolt is finger tight at this stage. With the breaker bar, apply pressure going the opposite way of a clock while the locking bolt is being installed. Counterclockwise rotation of the tensioner allows you to slide the belt on the pulleys. When the tensioner is released and the breaker bar removed, the belt falls into place, ready for use. Replace the generator/power steering belt after both black tensioner locking bolts and pivot bolts are threaded to a pressure setting of 28 Nm (250 in. lbs.). If your used belt has traveled more than 500 miles, start by changing the spring, then put on the belt with proper routing and the same tension as the factory belt.
- Q: How to Ensure Proper Maintenance and Installation of a Drive Belt on a Poly-V Belt System on Dodge Intrepid?A:Allow the belt pulleys to be oil-, grease- and coolant-free before setting on the drive belt by cleaning and removing all items from the belt pulley grooves. The belt must be replaced if it is much too worn, has damaged cords or shows too much glazing. Although Poly-V Belts can get a few minor cracks across the ribbed belt after bending the wrong way, this is considered normal. Cracks that run parallel are not acceptable. You should never apply any belt dressing or restorer to Poly-V Belts.


Related Dodge Intrepid Parts
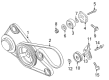
 Dodge Intrepid Thermostat Housing
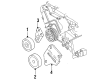
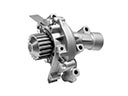 Dodge Intrepid Water Pump
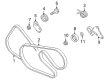
 Dodge Intrepid A/C Idler Pulley
 Dodge Intrepid Belt Tensioner
 Dodge Intrepid Cooling Fan Assembly
 Dodge Intrepid Fan Blade
 Dodge Intrepid Idler Pulley Bolt
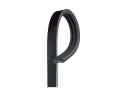 Dodge Intrepid Serpentine Belt
 Dodge Intrepid Thermostat Gasket
 Dodge Intrepid Transmission Oil Cooler Hose
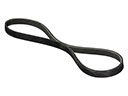 Dodge Intrepid V-Belt
 Dodge Intrepid Water Hose
Browse Dodge Intrepid Drive Belt by Years
2004
2003
2002
2001
2000
1999
1998
1997
1996
1995
1994
1993