JeepParts
My Garage
My Account
Cart
OEM Dodge Intrepid Radiator Cap
Cooling Radiator Cap- Select Vehicle by Model
- Select Vehicle by VIN
Select Vehicle by Model
orMake
Model
Year
Select Vehicle by VIN
For the most accurate results, select vehicle by your VIN (Vehicle Identification Number).
1 Radiator Cap found


Dodge Intrepid Radiator Cap Part Number: 4596198
$26.22 MSRP: $38.35You Save: $12.13 (32%)
Dodge Intrepid Radiator Cap
Choose OEM Radiator Cap that meet Dodge factory standards. Dodge designs and tests every component for precision and durability. Each Radiator Cap follows strict manufacturing steps to lock in quality and fit. If your Dodge Intrepid matters to you, OEM parts make the smart choice. You'll get the exact look, feel, and performance you expect. Shop genuine Intrepid parts at the highly competitive prices online. Enjoy a manufacturer's warranty, a hassle-free return policy, and rapid delivery. No more guesswork with off brands. Get genuine parts with exact fit and true factory performance. Shop with confidence today at JeepPartsDeal.com.
Dodge Intrepid Radiator Cap Parts and Q&A
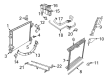
- Q: Is Your Radiator Cap Functioning Properly? How to Inspect It on Dodge Intrepid?A:For the inspection, take out the radiator cap and set up the Radiator Pressure Tool, pump air into the cap and wait for the pressure cap upper gasket to relieve at 124 kPa (18 psi); the minimum pressure the cap can keep is 110 kPa (16 psi). After you remove the pressure tester, place the cap facing up; the vent valve at the bottom will stay shut. Should the gasket be swollen and get in the way of the valve, put on a new cap. Once the cap is clean, upend it; if any light shines through the space between the vent valve and the rubber seal, put on a new cap. Be sure to check the warning that comes with every coolant bottle pressure cap, since it advises opening the cap carefully when the system is cold due to rising pressure in the system, to avoid burns. You should never remove the pressure cap unless you are: checking the freeze point, adding antifreeze, servicing the system, changing the coolant or checking for vacuum leaks. Wait 15 minutes after running the vehicle if you are going to remove the cap. Wrap the cap with a shop towel then rotate the cap in a counterclockwise direction until it stops without pushing down so fluid can run off through the overflow tube. After the system is no longer pumping coolant and steam and pressure goes down, fully remove the cap. You should make sure to squeeze the radiator inlet hose with a shop towel both before and after you turn to your first stop.

Related Dodge Intrepid Parts
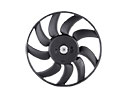 Dodge Intrepid Radiator fan
 Dodge Intrepid Thermostat
 Dodge Intrepid Thermostat Housing
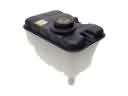 Dodge Intrepid Coolant Reservoir
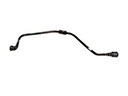 Dodge Intrepid Coolant Reservoir Hose
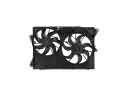 Dodge Intrepid Cooling Fan Assembly
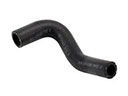 Dodge Intrepid Cooling Hose
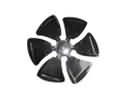 Dodge Intrepid Fan Blade
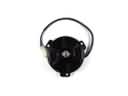 Dodge Intrepid Fan Motor
 Dodge Intrepid Fan Shroud
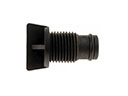 Dodge Intrepid Radiator Drain Plug
 Dodge Intrepid Water Pump Gasket