JeepParts
My Garage
My Account
Cart
OEM Dodge Magnum Radiator
Cooling Radiator- Select Vehicle by Model
- Select Vehicle by VIN
Select Vehicle by Model
orMake
Model
Year
Select Vehicle by VIN
For the most accurate results, select vehicle by your VIN (Vehicle Identification Number).
5 Radiators found


Dodge Magnum Radiator Part Number: 5137691AA
$244.21 MSRP: $369.00You Save: $124.79 (34%)


Dodge Magnum Radiator Part Number: 5170742AA
$281.78 MSRP: $425.00You Save: $143.22 (34%)


Dodge Magnum Radiator Part Number: 68050131AA
$437.58 MSRP: $660.00You Save: $222.42 (34%)Ships in 1-2 Business DaysDodge Magnum Radiator Part Number: 5137692AA
$244.21 MSRP: $369.00You Save: $124.79 (34%)Ships in 1-2 Business DaysDodge Magnum Radiator Part Number: 5175367AA
Dodge Magnum Radiator
Choose OEM Radiator that meet Dodge factory standards. Dodge designs and tests every component for precision and durability. Each Radiator follows strict manufacturing steps to lock in quality and fit. If your Dodge Magnum matters to you, OEM parts make the smart choice. You'll get the exact look, feel, and performance you expect. Shop genuine Magnum parts at the highly competitive prices online. Enjoy a manufacturer's warranty, a hassle-free return policy, and rapid delivery. No more guesswork with off brands. Get genuine parts with exact fit and true factory performance. Shop with confidence today at JeepPartsDeal.com.
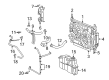
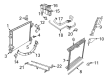
The radiator in Dodge Magnum cars performs the function of cooling system, its role is to heat exchange with the engine coolant. It works as a radiator where heat is transfer from the coolant passing through the engine block to the air blowing through the radiators. Aluminum is most often used for the core of the Dodge Magnum radiators with plastic and aluminium tanks, however, there are copper/brass types. Years later, there are improved performance radiators, built from lightweight aluminum with welded tanks to increase the toughness and heat exchanging abilities of the unit. These performance radiators usually have larger tubes and more fins per inch in comparison with standard ones which increases the coolant flow and heat rejection rates respectively. Dodge Magnum vehicles can come with the direct fit as well as the universal radiators and can be used for a number of applications including the custom and racing ones.
Dodge Magnum Radiator Parts and Q&A
- Q: How to Safely Detach a Radiator on Dodge Magnum?A:Before removing the radiator, unhook the Battery Cable and drain the amount of fluid in the cooling system. After that, take off the upper radiator hose and remove both upper radiator closure panels. After that, remove the radiator fan assembly. Pull up the vehicle, remove the lower splash shield and after that, take out the lower radiator hose. Open the lower condenser mount bolts and then lower the car. Once that is done, open up the upper radiator hose, using hand tools for the upper radiator mounting bolts, as there is a tread locker in place. After that, loosen the upper radiator brackets and take them off along with the upper condenser mounting bolts. Once finished, remove the assembly from the condenser, tilt the radiator slightly to one side and detach it from the car.
- Q: How to Properly Remove and Install a Radiator on Dodge Magnum?A:Before getting rid of the radiator, make sure the negative Battery Cable is disconnected and all the coolant is drained. From there, disconnect the upper radiator hose, remove the reflector panels surrounding the radiator and detach the radiator fan assembly. Lift the car, take off the lower splash shield and then unbolt the lower radiator hose and lower condenser group. Before pulling up the vehicle, lower it down, take off the upper radiator hose, remove all mounting bolts for the upper radiator and brackets and then the upper condenser mounting bolts. Take the condenser away from the radiator, position the radiator over the engine and remove the whole piece. Cover the backside of the engine with a towel and spray water and compressed air across the fins for a safe radiator cleaning. See if there are any cracks in the radiator tanks, if any fittings are broken or missing and inspect the connection point of the tanks and the core for any seepage or weakening seals. Edges of the radiator core may be corroded, bent or missing and the tube sections inside the core might be damaged. For installation, fix the radiator under the hood, matching the lower rubber isolators to the holes in the radiator support underneath. Place the radiator bracket and all the bolts in position, tightening them until they reach 12 Nm. Mount the condenser on the radiator and attach the top bolts, making sure they are installed to 6 Nm. Lift the vehicle once more so you can put in the lower condenser bolts, whose tightness should be 10 Nm. Replace the lower radiator hose and clamp, drop the vehicle and install the fan next. Attach the upper radiator hose, not allowing it to conflict with the accessory drive belt or engine and put the hose clamp into position. Secure the negative cable, make sure the coolant tank is full and let the engine warm up until it's operating as it should, checking that the fluids in the cooling system and automatic transmission are set properly.


Related Dodge Magnum Parts
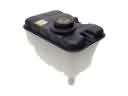 Dodge Magnum Coolant Reservoir
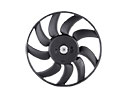 Dodge Magnum Radiator fan
 Dodge Magnum Thermostat
 Dodge Magnum Thermostat Housing
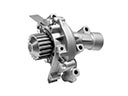 Dodge Magnum Water Pump
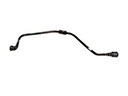 Dodge Magnum Coolant Reservoir Hose
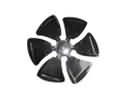 Dodge Magnum Fan Blade
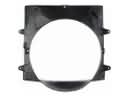 Dodge Magnum Fan Shroud
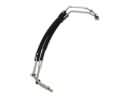 Dodge Magnum Oil Cooler Hose
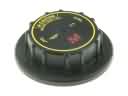 Dodge Magnum Radiator Cap
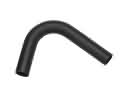 Dodge Magnum Radiator Hose
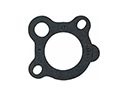 Dodge Magnum Thermostat Gasket