JeepParts
My Garage
My Account
Cart
OEM Dodge Ram 1500 Van Antenna Cable
Radio Antenna Cable- Select Vehicle by Model
- Select Vehicle by VIN
Select Vehicle by Model
orMake
Model
Year
Select Vehicle by VIN
For the most accurate results, select vehicle by your VIN (Vehicle Identification Number).
1 Antenna Cable found

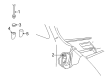
Dodge Ram 1500 Van Antenna Cable Part Number: 56043008AC
Dodge Ram 1500 Van Antenna Cable
Choose OEM Antenna Cable that meet Dodge factory standards. Dodge designs and tests every component for precision and durability. Each Antenna Cable follows strict manufacturing steps to lock in quality and fit. If your Dodge Ram 1500 Van matters to you, OEM parts make the smart choice. You'll get the exact look, feel, and performance you expect. Shop genuine Ram 1500 Van parts at the highly competitive prices online. Enjoy a manufacturer's warranty, a hassle-free return policy, and rapid delivery. No more guesswork with off brands. Get genuine parts with exact fit and true factory performance. Shop with confidence today at JeepPartsDeal.com.
Dodge Ram 1500 Van Antenna Cable Parts and Q&A
- Q: How to service and repair the antenna cable on Dodge Ram 1500 Van?A:Before working on or repairing the antenna cable, disconnect and separate the battery's negative cable. Pull off the end cap at the passenger end of the instrument panel and lower the glove box. Twist apart the connector halves and do not pull at the coaxial cable when separating the connector. Slide the plug of the antenna half of the coaxial cable out of the bracket on the right side of the instrument panel, then pull on the cable from the opening in the glove box. Pass the antenna coaxial cable grommet out through the hole near the dash panel and take off the cover/grille panel of the cowl plenum at the base of the windshield from the cowl plenum top. Loosen and take out the antenna mast from the antenna, unscrew the antenna cap nut with an antenna nut wrench (Special Tool C-4816) and finally remove the antenna adapter from the fender. Feed the antenna body and cable assembly down through the hole in the fender top, stretching them out through the right opening in the cowl plenum. Start by putting the antenna body and its cable into the cowl plenum, then push the antenna coaxial cable through the cutout in the dash and seat the coaxial cable grommet. Drop the antenna into the mount on top of the fender, cover it with the adapter and secure them together with the antenna nut and wrench to 7.3 Nm torque. Put the mast into the antenna body and tighten it to 3.3 Nm (30 in. lbs.), next put the cowl plenum cover or grille panel back in place. Shove the cable halfway up through the glove box and guide it between the end of the right instrument panel and the dash panel. Snap the antenna segment of the cable onto the right instrument panel end bracket and then connect the other half together. After doing everything else, apply the glove box to the instrument panel, position the end cap at the passenger end and attach the battery negative cable again.

Related Dodge Ram 1500 Van Parts
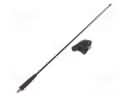 Dodge Ram 1500 Van Antenna
 Dodge Ram 1500 Van Antenna Mast
 Dodge Ram 1500 Van Brake Light Switch
 Dodge Ram 1500 Van Clock Spring
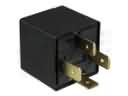 Dodge Ram 1500 Van Daytime Running Light Relay
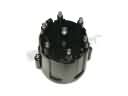 Dodge Ram 1500 Van Distributor Cap
 Dodge Ram 1500 Van Headlight Switch
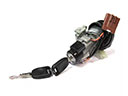 Dodge Ram 1500 Van Igniter
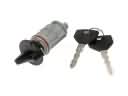 Dodge Ram 1500 Van Ignition Lock Assembly
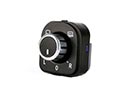 Dodge Ram 1500 Van Mirror Switch
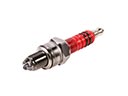 Dodge Ram 1500 Van Spark Plug
 Dodge Ram 1500 Van Wiper Pulse Module