JeepParts
My Garage
My Account
Cart
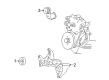
OEM Dodge Ram 2500 Van Drive Belt
Serpentine Belt- Select Vehicle by Model
- Select Vehicle by VIN
Select Vehicle by Model
orMake
Model
Year
Select Vehicle by VIN
For the most accurate results, select vehicle by your VIN (Vehicle Identification Number).
2 Drive Belts found

Dodge Ram 2500 Van Serpentine Belt Part Number: 53010305AC
$44.79 MSRP: $96.40You Save: $51.61 (54%)Ships in 1-2 Business DaysDodge Ram 2500 Van Serpentine Belt Part Number: 53010306AC
Dodge Ram 2500 Van Drive Belt
Choose OEM Drive Belt that meet Dodge factory standards. Dodge designs and tests every component for precision and durability. Each Drive Belt follows strict manufacturing steps to lock in quality and fit. If your Dodge Ram 2500 Van matters to you, OEM parts make the smart choice. You'll get the exact look, feel, and performance you expect. Shop genuine Ram 2500 Van parts at the highly competitive prices online. Enjoy a manufacturer's warranty, a hassle-free return policy, and rapid delivery. No more guesswork with off brands. Get genuine parts with exact fit and true factory performance. Shop with confidence today at JeepPartsDeal.com.
Dodge Ram 2500 Van Drive Belt Parts and Q&A
- Q: How are the accessory drive components operated and what is the process for removing and installing the serpentine drive belt on Dodge Ram 2500 Van?A:The single accessory drive belt is controlled by the crankshaft and the belt tension is kept correct automatically by an adjusting mechanism. Place a socket/wrench onto the automatic tensioner's bolt, turn the tensioner counterclockwise and when the pressure on the belt is gone, remove it from the pulley. Remove the belt from the idler pulley and then remove the whole assembly from your car. Let the serpentine accessory drive belt be correctly placed for smooth water pump movement and to stop the engine from overheating. Use the instructions from the routing diagrams and if the Belt Routing Label in the engine compartment conflicts with them, go by the label. Make sure the drive belt is across all pulleys, excluding the one between the generator and A/C compressor, the idler pulley. Attach the socket/wrench to the pulley bolt of the tensioner, rotate clockwise, set the belt above the idler pulley and release as the tensioner rotates back in, making the belt sit properly on every pulley. Note where the indexing arrow and indexing mark are found on the belt and the tensioner. A new belt should be fitted with the arrow placed within approximately 3 mm (1/8 inch) of the indexing mark. After 15 minutes or less of use, a belt is still considered a new belt. If you don't meet this requirement, inspect for a wrong belt on your engine, worn-out bearings on your engine accessories, loose pulleys, engine accessories not lined up properly or incorrect belt routing. A worn belt should be exchanged if the belt tensioner's indexing arrow is past position A.
- Q: How to service and repair the drive belt on Dodge Ram 2500 Van?A:First, be aware that the schematics for drive belt routing are based on the most current information; if they do not match the label in the engine compartment, also use the label. A spring-loaded automatic belt tensioner is built into many cars, so never check its tension by using a tension gauge. First, fit a socket/wrench onto the bolt on the pulley of the automatic tensioner and rotate the tensioner assembly clockwise to let the belt go loose. Taking the belt from the idler pulley first, remove it from the vehicle. While placing the accessory drive belt on your car, be sure to position it properly or the wrong rotation of the water pump could cause your engine to overheat; see the correct figures to understand the proper placement. Cover all pulleys but the idler pulley with the drive belt; the idler pulley is in the middle between the A/C compressor and generator. Once more, join a socket/wrench to the automatic tensioner bolt and turn the pulley clockwise, guiding the belt onto the idler pulley. After the tensioner moves back into position, take out the wrench to check that the belt sits correctly on all pulleys. Always look for the big and small indexing marks on the belt.
Related Dodge Ram 2500 Van Parts
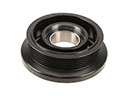 Dodge Ram 2500 Van A/C Idler Pulley
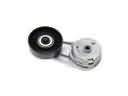 Dodge Ram 2500 Van Belt Tensioner
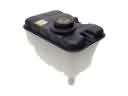 Dodge Ram 2500 Van Coolant Reservoir
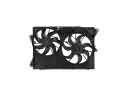 Dodge Ram 2500 Van Cooling Fan Assembly
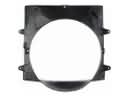 Dodge Ram 2500 Van Fan Shroud
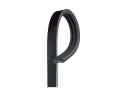 Dodge Ram 2500 Van Serpentine Belt
 Dodge Ram 2500 Van Thermostat
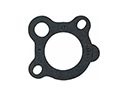 Dodge Ram 2500 Van Thermostat Gasket
 Dodge Ram 2500 Van Thermostat Housing
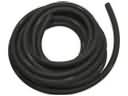 Dodge Ram 2500 Van Transmission Oil Cooler Hose
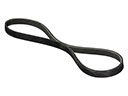 Dodge Ram 2500 Van V-Belt
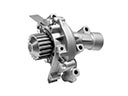 Dodge Ram 2500 Van Water Pump