JeepParts
My Garage
My Account
Cart
OEM Dodge Ram 3500 Van Intake Valve
Engine Intake Valve- Select Vehicle by Model
- Select Vehicle by VIN
Select Vehicle by Model
orMake
Model
Year
Select Vehicle by VIN
For the most accurate results, select vehicle by your VIN (Vehicle Identification Number).
1 Intake Valve found

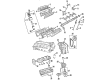
Dodge Ram 3500 Van Intake Valve Part Number: 53006723
$24.16 MSRP: $30.62You Save: $6.46 (22%)Ships in 1-2 Business Days
Dodge Ram 3500 Van Intake Valve
Choose OEM Intake Valve that meet Dodge factory standards. Dodge designs and tests every component for precision and durability. Each Intake Valve follows strict manufacturing steps to lock in quality and fit. If your Dodge Ram 3500 Van matters to you, OEM parts make the smart choice. You'll get the exact look, feel, and performance you expect. Shop genuine Ram 3500 Van parts at the highly competitive prices online. Enjoy a manufacturer's warranty, a hassle-free return policy, and rapid delivery. No more guesswork with off brands. Get genuine parts with exact fit and true factory performance. Shop with confidence today at JeepPartsDeal.com.
Dodge Ram 3500 Van Intake Valve Parts and Q&A
- Q: How to service and repair the Exhaust Valve and Intake Valve on Dodge Ram 3500 Van?A:The first step to fixing or repairing a valve is to take off the cylinder head. After using the Valve Spring Compressor Tool MD-998772A and adapter 6716A, take the locks out, remove the threads from the retainers, take out the valve stem seals and remove each valve spring. First, remove any metal scraps from the valve lock grooves so the valve guides don't get damaged and place the valves in order to avoid confusion when putting them back. Scrub every valve and get rid of those that show signs of burning, warping or cracking. Get rid of carbon and varnish in the valve guides by applying a specialist cleaner. If the ware on the valve stem measures more than 0.051 mm (0.002 in.), replace the valve. Rub each valve stem with oil and then put them carefully into the cylinder head. After valve or seat regrounding, check the valve stem and change the cylinder head if it measures too tall. Start by fitting new seals to the valve guides. While making sure the valve springs and valve retainers are securely in place. Compress the valve springs using MD-998772A and adapter 6716A, bolt on the locks and disengage the tool. When valves or seats have ground, find the spring installed height by measuring from the spring seat in the cylinder head to the bottom of the spring retainer or from the top of the spacer if you have installed one. When the spring height is greater than 42.86 mm (1-11/16 in.), add a 1.587 mm (1/16 in.) spacer inside the counterbore in the head to take the spring height back to 41.27 to 42.86 mm (1-5/8 to 1-11/16 in.). After that, place and secure the cylinder head.

Related Dodge Ram 3500 Van Parts
 Dodge Ram 3500 Van Camshaft
 Dodge Ram 3500 Van Crankshaft
 Dodge Ram 3500 Van Crankshaft Pulley
 Dodge Ram 3500 Van Cylinder Head
 Dodge Ram 3500 Van Engine Mount
 Dodge Ram 3500 Van Exhaust Valve
 Dodge Ram 3500 Van Harmonic Balancer
 Dodge Ram 3500 Van Lash Adjuster
 Dodge Ram 3500 Van Motor And Transmission Mount
 Dodge Ram 3500 Van Pushrod
 Dodge Ram 3500 Van Rocker Arm
 Dodge Ram 3500 Van Valve Cover Gasket