JeepParts
My Garage
My Account
Cart
OEM Dodge Ram 3500 Van Radiator Cap
Cooling Radiator Cap- Select Vehicle by Model
- Select Vehicle by VIN
Select Vehicle by Model
orMake
Model
Year
Select Vehicle by VIN
For the most accurate results, select vehicle by your VIN (Vehicle Identification Number).
3 Radiator Caps found


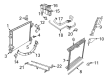
Dodge Ram 3500 Van Radiator Cap Part Number: 4596198
$26.22 MSRP: $38.35You Save: $12.13 (32%)


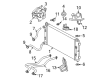
Dodge Ram 3500 Van Radiator Cap Part Number: 52079880AA
$15.96 MSRP: $23.35You Save: $7.39 (32%)Ships in 1-2 Business Days


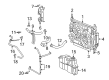
Dodge Ram 3500 Van Radiator Cap Part Number: 55116901AA
$15.96 MSRP: $23.35You Save: $7.39 (32%)
Dodge Ram 3500 Van Radiator Cap
Choose OEM Radiator Cap that meet Dodge factory standards. Dodge designs and tests every component for precision and durability. Each Radiator Cap follows strict manufacturing steps to lock in quality and fit. If your Dodge Ram 3500 Van matters to you, OEM parts make the smart choice. You'll get the exact look, feel, and performance you expect. Shop genuine Ram 3500 Van parts at the highly competitive prices online. Enjoy a manufacturer's warranty, a hassle-free return policy, and rapid delivery. No more guesswork with off brands. Get genuine parts with exact fit and true factory performance. Shop with confidence today at JeepPartsDeal.com.
Dodge Ram 3500 Van Radiator Cap Parts and Q&A
- Q: How should you clean and inspect a radiator cap on Dodge Ram 3500 Van?A:It is important to wash the radiator cap with just soap and water, since using any solvent may harm the seal. Beware that small leaks you find when testing the cap with a pressure gauge may not mean there is a problem with the cooling system. Just because there is a slow leak during testing doesn't mean you should replace a pressure cap that does not show leakage in its past. To try, pour water into the tool, turn it over and make sure the cap is still secure. Put a small amount of water on the gasket and tighten the cap on either a model 7700 pressure tester or an equivalent, before turning on the pump until the gauge shows 104 kPa (15 psi). Pressure caps that don't hold 97 kPa (14 psi) or more should be replaced. If the cap does not retain pressure or vacuum once it's installed on the radiator, look at the radiator filler neck and check if the top gasket of the cap is damaged, dirty or distorted. Put the cap upright, with the logo toward you and check if the valve at the base opens up and if it's blocked by a swollen rubber gasket, then you should replace the cap. Besides, tip the lid over and if light shines through the gap between the vent valve and the rubber gasket, replace it. A new cap without a spring to keep the vent closed and created for a coolant reserve/overflow should be used, together with a completely sealed diaphragm spring and a rubber gasket that blocks off the radiator filler top.
- Q: How to service and repair a radiator cap on Dodge Ram 3500 Van?A:Repair the radiator cap by cleaning it with mild soap and water, but never use anything as strong as degreaser to keep the seal intact. Check the cap out by holding it upright at eye level; if the bottom vent valve won't open and its rubber gasket swelled up, you need to change the cap. Then, while the cap is upside down at eye level, peek inside and watch for light between the vent valve and the gasket; if it's visible, exchange the cap right away. Select a cap that does not have a spring to close the vent and look for a cap designed for an overflow system with a sealed diaphragm spring and a hair-line-thick rubber gasket that seals directly to the radiator top.


Related Dodge Ram 3500 Van Parts
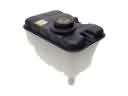 Dodge Ram 3500 Van Coolant Reservoir
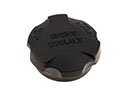 Dodge Ram 3500 Van Coolant Reservoir Cap
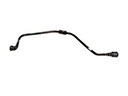 Dodge Ram 3500 Van Coolant Reservoir Hose
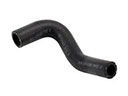 Dodge Ram 3500 Van Cooling Hose
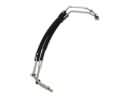 Dodge Ram 3500 Van Oil Cooler Hose
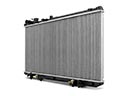 Dodge Ram 3500 Van Radiator
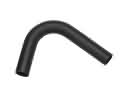 Dodge Ram 3500 Van Radiator Hose
 Dodge Ram 3500 Van Thermostat
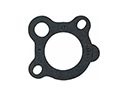 Dodge Ram 3500 Van Thermostat Gasket
 Dodge Ram 3500 Van Thermostat Housing
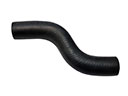 Dodge Ram 3500 Van Water Hose
 Dodge Ram 3500 Van Water Pump